Streusel Top Blueberry Custard Pie

Streusel Top Blueberry Custard Pie

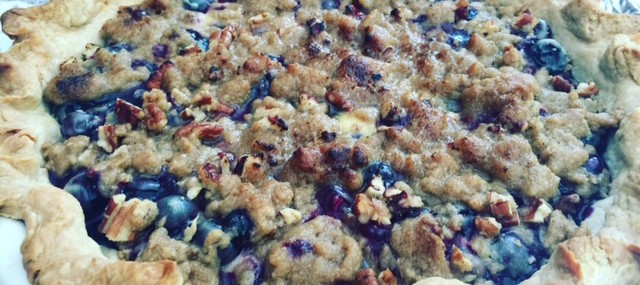
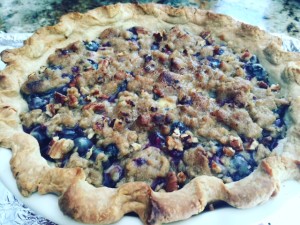
Blueberry Streudel PieEvery summer, I host at least a couple lobster parties and what could scream “Maine” more than a blueberry pie?! I live in New Jersey where blueberries abound and are sweet and delicious, so double whammy.
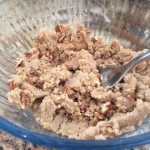
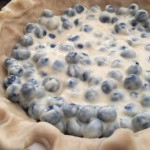
I typically make my Crumb Top Blueberry Pie, but this weekend, I decided to change the crumble top to a nutty streusel top and it was a nice change with the extra crunchiness from the pecans. I also did a custard-like bottom which was well-received by my guests.

As always, don’t fret if you’re not into making your own pie dough, just use a store-bought one. I make my own Fail Proof Pie Crust using my VERY simple food processor technique.  

Filling Ingredients

  • 8 ounces sour cream (I used reduced-fat but don’t recommend non-fat)
  • 1 large egg
  • ¾ cup granulated sugar
  • 2 Tbsp. all-purpose flour
  • ¼ tsp. salt
  • 2 tsp. pure vanilla extract
  • 3 cups fresh blueberries
  • 1 9-inch pie crust, unbaked

Streusel Topping:

  • ⅓ cup flour
  • ½ cup brown sugar
  • ¼ cup butter, softened
  • ½ cup chopped pecans

Filling Instructions

  1. Preheat oven to 400 degrees.
  2. In a large bowl, combine the sour cream, egg, ¾ cup sugar, 2 tablespoons flour, salt and vanilla extract until smooth. Using a rubber spatula, gently add the blueberries to the sour cream mixture then pour into the unbaked pie crust. Bake for 25 minutes.

Streusel Instructions:

  1. Combine the flour and brown sugar in a medium bowl. Using your fingertips, incorporate the butter into the dry ingredients until the mixture is the texture of course sand. Add the pecans. Sprinkle the streusel topping over the surface of the pie after it has baked 25 minutes. Bake an additional 20 minutes, until the topping has browned – after 10 minutes of baking, if the crust or the streusel gets too dark, cover loosely with foil.
  2. Serve the pie warm with vanilla ice cream.

The addition of pecans and the custard bottom were inspired by this recipe.

Baby Back Ribs with Balsamic BBQ Sauce

Baby Back Ribs with Balsamic BBQ Sauce

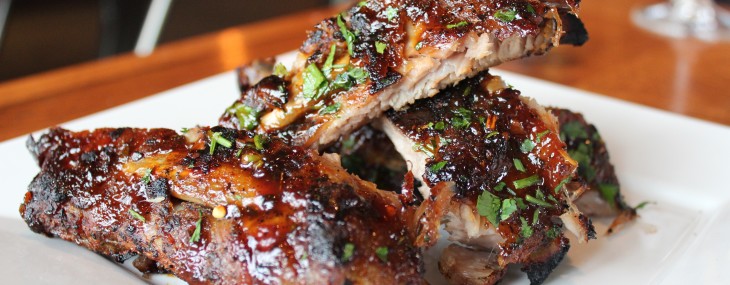
Pork RibsWhile I have my go-to ribs recipe, I’m always looking for new ideas and variations from the old standard. This recipe, provided by Executive Chef Josh Bernstein of Spuntino Wine Bar & Italian Tapas, puts a bit of an Italian spin on the backyard BBQ favorite.

Ingredients:

Rib Spice Rub:

  • 1/4 cup dried basil
  • 1/4 cup dried oregano
  • 1/2 cup paprika
  • 1/2 cup garlic powder
  • 1/2 cup onion powder
  • 1/2 cup ground fennel seed
  • 3/4 cup dark brown sugar           
  • 1 cup kosher salt
  • 2 Tbsp. red pepper flakes
  • 2 Tbsp. ground black pepper

Balsamic BBQ Sauce:

  • 2 cups balsamic vinegar
  • 1-1/2 cups ketchup
  • 3/4 cup dark brown sugar
  • 1 Tbsp. fresh chopped garlic
  • 2 Tbsp. Worcestershire sauce
  • 2 Tbsp. Dijon mustard
  • 1 tsp. Kosher salt             
  • 1/2 tsp. ground black pepper

Ribs:

  • 4 racks of baby back ribs
  • 1 cup rib spice rub
  • 2 Tbsp. chopped Italian parsley
  • 1 cup balsamic BBQ sauce

Method:

For the Rib Spice Rub:
Place all of the ingredients into a bowl.  Mix well.  Keep in an air tight container for up to 3 weeks.  This recipe will make more than needed for the ribs.  It is a good marinade for other meats as well.

For the Balsamic BBQ Sauce:
Combine all of the ingredients in a sauce pot.  Bring to a boil.  Reduce the flame and simmer for 45 minutes.  Stir every 10 minutes.  Strain and cool.

For the Ribs:
Spread the spice rub evenly over the ribs.  Wrap each in aluminum foil.  Allow to marinate overnight in the refrigerator for at least 12 hours.  Place the ribs, still wrapped in aluminum foil, into a 350 degree oven for 2 hours.  At this point you can cool them down and refrigerate up to 7 days or freeze for up to 2 months.  If not, brush the ribs with the BBQ sauce and place onto a hot grill.  Cook until the sauce is hot on the ribs.  Cut into 1-2 rib portions and garnish with parsley.

Serves 4.

Black Skillet Frittata by Piattino

Black Skillet Frittata by Piattino

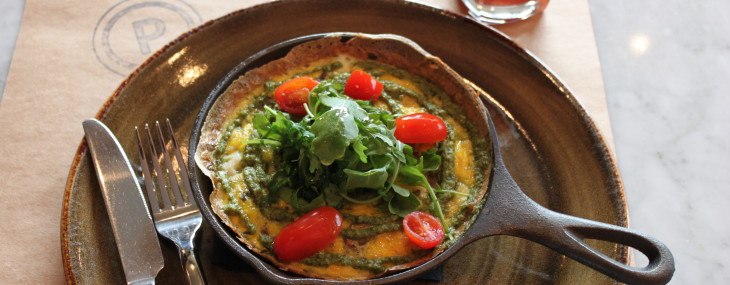
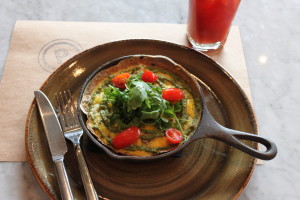
Black Skillet FrittataI love brunch and am always looking for creative dishes to serve at home when I host. I received this easy recipe for a meatless frittata from Piattino: A Neighborhood Bistro and wanted to share as it sounds delish.
Piattino, serving up modern twists to traditional Italian fare, is now serving an a la carte brunch menu on Saturday and Sundays from 11:00AM to 3:00PM, so locals could also go to the restaurant to try this dish!

Ingredients:

  • 2 ounces wild mushroom mix cooked
  • 2 ounces asparagus cut ½ inch long, blanched
  • 1 ounce blended oil
  • 1 tsp. chopped rosemary
  • 4 eggs cracked and beaten
  • 1 ounce prepared pesto
  • 2 ounces baby arugula
  • 1 tsp. olive oil
  • Pinch each of salt and pepper

Directions:

  1. Heat a black cast iron skillet over medium high heat on a burner. Once hot add blended oil and cooked vegetables. Stir vegetables with a wooden spoon until heated through. Add rosemary and eggs and stir again to combine the vegetables. Place the skillet in a 350 degree oven for 5-7 minutes or until eggs are semi firm to the touch.
  2. Remove skillet from oven and drizzle pesto on top of the egg. Toss arugula with olive oil, salt and pepper and place in center of the cast iron skillet, you want to create height from the arugula.

Makes one frittata.

About Piattino:

Nestled in Historic Mendham, Piattino brings its authentic, new age Italian dining experience directly to New Jersey.  Sourcing artisan ingredients from around the world and our own backyard, Piattino’s scratch-made, chef-driven menu includes a variety of mouthwatering antipasti’s, insalates, pastas and entrees. Piattino is also known locally for its delicious, hand-stretched Neapolitan style pizzas and sandizza’s (our version of a Panini) baked at 800 degrees in its imported Italian stone-fired oven using premium ingredients, ranging from truffled wild mushrooms to 24-month-aged prosciutto di Parma. The menu also features a regional food and drink specialties section celebrating the various styles served across the boot – including current items from the Aosta Valley Region – such as Charred Octopus, White Bean and Sausage soup, Mezzaluna Carbonnade artisan pizza, and much more.

88 East Main Street, Mendham, NJ – 973-543-0025.

Cheers,

Veronique

Pig & Prince Restaurant Duck Fat Grilled Cheese

Pig & Prince Restaurant Duck Fat Grilled Cheese

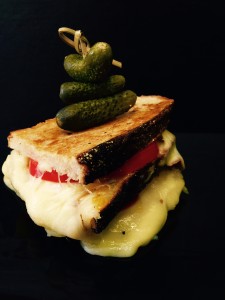
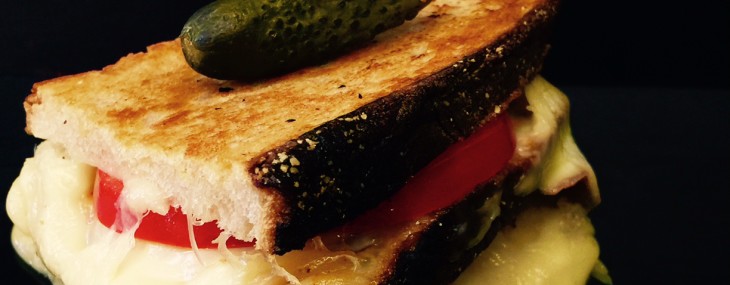
Today is National Grilled Cheese Day, a day dedicated to celebrating a national favorite: the grilled cheese sandwich. Chef Mike Carrino, of popular restaurant Pig & Prince Restaurant in Montclair, NJ, has masterfully created an elegant and delicious twist on a classic sandwich – the Duck Fat Grilled Cheese.

Duck Fat Grilled Cheese _ pig and princeThis elevated take on the ‘old reliable’ of sandwiches is sure to please die-hard grilled cheese lovers.
Duck Fat Grilled Cheese

  • 8 – ½ inch slices of artisanal rosemary sourdough
  • (or your favorite type of rustic bread)
  • 12 slices of muenster cheese
  • 12 slices of cypress grove, midnight moon cheese
  • 8 large slices of tomato
  • House made boursin cheese (see recipe below)
  • 16 slices of duck bacon (regular pork bacon can also be used)
  • 4 tbls melted butter
  • 4 tbls rendered duck fat (duck confit fat would be best)

Housemade Boursin:

  • 16oz cream cheese softened
  • ½ cup soft butter
  • 3 cloves garlic (microplane)
  • 1 tbsp chopped herbs
  • ¼ tsp chopped dried oregano
  • ¼ tsp chopped dill
  • ¼ tsp chopped basil
  • Salt and lemon to taste

In a medium bowl, mix all the boursin ingredients together until fully incorporated.

To assemble the grilled cheese:

  1. Spread some melted duck fat on the inside of the bread with a pastry brush.
  2. Smear your homemade boursin on the inside of each slice of bread.
  3. Layer 3 slices of Muenster on one side of the sandwich bread and 3 slices of Midnight Moon on the other side of the sandwich.
  4. Lay the tomato on the Midnight Moon side and then the duck bacon (or bacon) on top of the tomato.
  5. Place Muenster side on top in a large skillet, on medium heat, pour in melted butter and the remaining duck fat.
  6. Cook on each side for about 3 minutes each, moving often to keep the heat equally distributed.
  7. Remove from pan and allow to sit one to two minutes before cutting.

Happy National Grilled Cheese Day!

Veronique

Easy Egg Cups

Easy Egg Cups

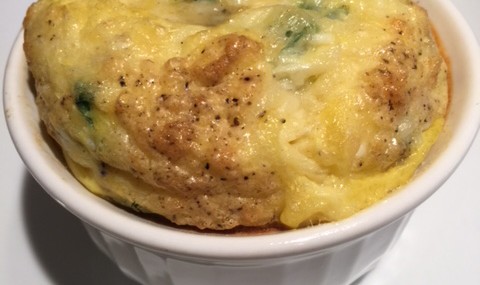
Breakfast, often said to be the most important meal of the day, is my favorite meal is the day. On the weekends, with more time on my hands, I have no issues making delicious, hearty breakfast, but on hectic weekday mornings…not as easy.

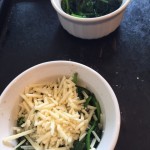
I’ve been making these cute and delicious egg cups on Sundays that I can have anytime during the week. They’re great for a quick breakfast with a piece of toast and even perfect for lunch with a side salad.

Ingredients:

  • 1 Tbsp. vegetable oil
  • 5 ounces baby spinach
  • 4 large eggs
  • ¼ cup water
  • ½ tsp. each salt and pepper
  • ½ cup shredded sharp cheddar cheese

Directions:

  1. Preheat the oven to 350 degrees.
  2. Generously coat two 4-ounce ramekins (or other small dishes) with cooking spray.
  3. Warm the oil in a large skillet over medium-high heat, add the spinach and sauté until fully wilted, 3-4 minutes. Set aside to cool for a few minutes.
  4. In a large mixing bowl, whisk the eggs with the water, salt and pepper until fully blended, about 1 minute. Don’t whisk less than a minute if you want fluffy, light eggs.
  5. Divide the cooked spinach in the ramekins. Divide the cheese over the spinach then pour the gg mixture over the cheese and spinach. Use a small fork to gently move the spinach and cheese around so the egg mixture gets evenly distributed to the bottom of the ramekins.
  6. Place the ramekins on a sheet tray to catch any drips and bake for about 25 minutes, or until the egg is set and not jittery.
  7. Let the egg cups cool completely then cover in plastic wrap and refrigerate until ready to use.
  8. To reheat, cover a ramekin with a paper towel and microwave for 60-90 seconds.

Makes 2 servings.

Wild Mushroom Soup

Wild Mushroom Soup

Wild Mushroom SoupWhat could be more comforting than a hearty, warm soup on a cold winter day? Nothing, that’s what!

This soup could easily be vegetarian by replacing the chicken broth with vegetable broth.

  • 3 cups chicken broth
  • 1 ounce Porcini mushrooms
  • 1/2 stick butter
  • 2 celery stalks, minced
  • 1/2 cup onion, minced
  • 2 garlic cloves, minced
  • 8 ounces Shitake mushrooms, sliced
  • 2 Tbs. flour
  • 1/2 tsp. oregano
  • 1/8 tsp. red pepper
  • 1 cup half and half
  • 1 Tbs. Madeira wine
  • Salt and pepper to taste
  1. Bring stock to a simmer.  Add porcini.  Remove from heat.  Cover and let stand for 30 minutes.  Stain, reserve soaking liquid and chop the Porcini. 
  2. Melt butter in a heavy saucepan over medium heat. Add celery, onion and garlic and sauté 8 minutes. 
  3. Add mushrooms and sauté and additional 3 minutes.  Add flour, oregano, and pepper and sauté 3 minutes. 
  4. Whisk in Porcini stock, half and half and Madeira wine.  Bring to a slow simmer, then educe heat and simmer 10 minutes. Season with salt and pepper to taste.

4 Servings

Nut Goodie Bars

Nut Goodie Bars

Nut GoodieNut Goodie is a candy bar that has been manufactured by Saint Paul, Minnesota’s Pearson’s Candy Company for over 100 years. The popular Midwest candy bar is a blend of chocolate, maple and peanuts and is decadent and purely delicious.

I’d never heard of this candy bar until my friend and colleague, Pam, brought bags of them to a conference our company exhibited at a couple years ago. Our midwest-based clients went nuts (pun intended) over the treats and we heard many stories of how they loved the bars as kids.

I was able to get the recipe for the tasty, chewy bites from Pam and sharing it with you.

Ingredients:

  • 12 ounces chocolate chips
  • 12 ounces butterscotch chips
  • 2 cups peanut butter (smooth or chunky)
  • 1 cup butter, softened
  • ½ cup evaporated milk
  • ¼ cup powdered vanilla pudding (not instant)
  • 2 pounds confectioners’ sugar
  • 1 tsp. maple extract
  • 16-ounce jar of dry-roasted peanuts

Directions:

  1. Butter or coat in cooking spray a 12×16 pan.
  2. In a metal bowl over a pan of simmering water (don’t let the bowl touch the water), melt the chocolate and butterscotch chips and peanut butter, mix well to combine. Pour half the mixture into the buttered pan and refrigerate.
  3. In a large saucepan over medium-high heat, combine the butter, evaporated milk and vanilla pudding mix. Bring to a boil, cook for a minute and remove the pan from the heat.
  4. Add the confectioners’ sugar to the bowl of an electric mixer. Add the hot butter mixture to the confectioners’ sugar and mix until well-combined. Add the maple extract and mix for another 30 seconds, until mixture is smooth.
  5. Pour/spread the butter/confectioners’ sugar mixture over the refrigerated chocolate base in the pan. Put the pan back in the refrigerator for 30 minutes.
  6. Add the peanuts to remaining melted chocolate mixture and spread over the chilled butter/confectioners’ sugar filling in the pan. Refrigerate for an hour then cut into squares.

Yields 24-32 squares.

Slow Cooker Vegetarian Stuffed Cabbage

Slow Cooker Vegetarian Stuffed Cabbage

This is a great recipe for those chilly winter days or for any day where you simply don’t feel like slaving over a hot stove. These stuffed cabbage are hearty and you won’t even miss the meat as the cremini mushrooms are earthy and meatlike. I use a Savoy cabbage for this recipe as I like the look of the frilly leaves and the fact that I can make smaller rolls for weekday lunches. A standard cabbage would be absolutely okay too.

Cabbage leaves cooking method: To get perfectly-cooked cabbage leaves, get salted (1 tsp.) water boiling in a large and tall stockpot. Add the head of cabbage to the boiling water and cook for 2 minutes. Remove the cabbage head from the water with tongs and peel off about 10 leaves. Add the leaves to the boiling water and cook for another 2 minutes. Remove the leaves and place on paper towels to drain. Stuffing Ingredients:

  • 2 Tbsp. vegetable oil
  • 1 medium Spanish onion, chopped
  • 2 garlic cloves, minced
  • 2 cups diced butternut squash
  • 2 cups chopped cremini mushrooms
  • 1 tsp. garlic powder
  • 1 tsp. salt
  • ½.tsp. each black pepper and dried thyme
  • 1 cup cooked long grain rice

Stuffing Directions:

  1. In a large skillet over medium-high heat, warm the oil then add the onion. Cook for 2-3 minutes until softened, stirring occasionally. Add the garlic and cook for an additional minute.
  2. Lower the heat to medium and add the butternut squash to the onion. Cook, stirring frequently for 5 minutes, until the squash has softened.
  3. Raise the heat to medium-high and add the mushrooms to the onion/squash mixture, cook for 3-4 minutes until the mushrooms have softened.
  4. Add the garlic powder, salt, pepper and thyme and stir to combine.
  5. Add the rice to the mixture and stir to combine. Take off the heat and allow to cool for 5 minutes.

Assembly Ingredients: 3 cups tomato sauce, homemade or store-bought Assembly Directions:

  1. Place a cooked leaf on a plate or cutting board and remove the hard core with scissors.
  2. Add ¼ cup of the filling to the base of the leaf and roll up like a burrito – start at the base, roll once, tuck the ends in the roll all the way to the edge of the leaf.
  3. Add 1 cup of tomato sauce to the bottom of the slow cooker them top with the cabbage rolls. Pack them as tightly as possible then top with the remaining 2 cups of tomato sauce.
  4. Cook for 6-8 hours on low.
  5. Serve the rolls with tomato sauce.

Serves 5 guests for a light dinner.

Getting Freekeh on Meatless Monday

As I did in 2015, I’ll be continuing with my mission to go meatless on Mondays. It’s been rather easy to make the change as I love roasting a whole bunch of veggies on Sundays that I then use on Mondays in salads with couscous, quinoa or freekeh.

For those not familiar with freekeh, it’s an ancient grain that has long been recognized as a main ingredient in Middle Eastern and Mediterranean cooking.

Freekehlicious is the leading importer of Greenwheat Freekeh, a product of Australia. A couple months ago, the company sent me samples of its cracked and wholegrain freekeh for me to try and I’ve been addicted ever since.

The cooking process for freekeh is very simple:

  • In small saucepan, place ½ cup of Freekehlicious and 1½ cups of water or broth and bring to a boil.
  • Stir, reduce heat to simmer.
  • Cover and cook – cracked freekeh: 20 minutes and wholegrain freekeh: 40 minutes. .
  • Remove from heat and let stand for 5 minutes.
  • Yields 1½ cups.

The cooked grain can be used hot or cold and lasts in the fridge for up to 8 days. I love serving the cooked Freekeh like I would Irish steel-cut oatmeal with a bit of maple syrup or in salads, as I did today.

My favorite salad to make goes like this:

Freekeh is 100% natural, with no additives, chemicals, coloring, pesticides/herbicides, GMOs or chemicals.

Cheers,

Veronique

Pumpkin Bread

Pumpkin Bread

Day 12 of my “12 Days of Baked Goods” series!

Pumpkin Bread on Bottom Right

Pumpkin Bread on Bottom Right

Right before Thanksgiving, my friend, Alli Meyer, posted a photo (included here) of all the desserts she made for her parents’ Thanksgiving dinner. She was willing to share the recipe she uses for her pumpkin bread that I thought you’d enjoy.

Ingredients:

  • 1 cup pumpkin pie filling (not pure pumpkin pie, the filling)
  • ½ cup canola oil, plus more for the pan
  • ¾ cup granulated sugar
  • ½ cup molasses
  • 1 tsp. pure vanilla extract
  • 2 cups all-purpose flour
  • 1 ½ tsp. baking powder
  • ½ tsp. baking soda
  • ¾ tsp. kosher salt
  • 1 tsp. ground cinnamon
  • ¼ tsp. ground nutmeg
  • ¼ tsp. ground cloves
  • ½ tsp. ground ginger

Directions:

  1. Preheat oven to 350 degrees F.
  2. Oil a 9 x 5 inch loaf pan.
  3. In a large bowl, combine pumpkin pie filling, oil, sugar, molasses, and vanilla.
  4. In a separate bowl, combine the flour, baking powder, baking soda, salt, cinnamon, nutmeg, cloves, and ginger.
  5. Slowly stir the flour mixture into the pumpkin mixture.
  6. Pour into the prepared loaf pan.
  7. Bake for 60 – 65 minutes.
  8. Transfer pan to a wire rack for 10 minutes to cool.
  9. Using a knife, loosen the bread from the pan.
  10. Inver the bread onto a cutting board or serving plate and serve warm.

Inspired by a recipe by Real Simple Alli found about eight years ago.

Cheers,

Veronique