Duck Fat Fries

Duck Fat Fries

Duck Fat Fries

Duck Fat Fries

Last weekend, I hosted my First Annual FryFest. All foods served were…fried! Since I love fries cooked in duck fat, I decided to make those one of the various sides I served.

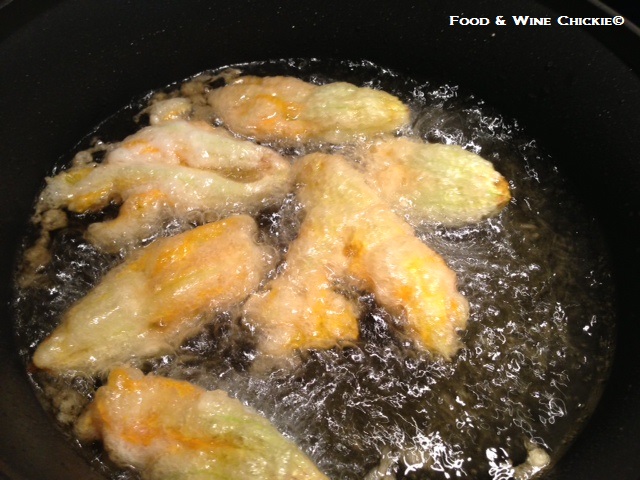
This is a classic double-fry process where the potatoes are first blanched in oil at a lower temperature to soften them then fried to a golden color and crisp exterior in hotter oil.
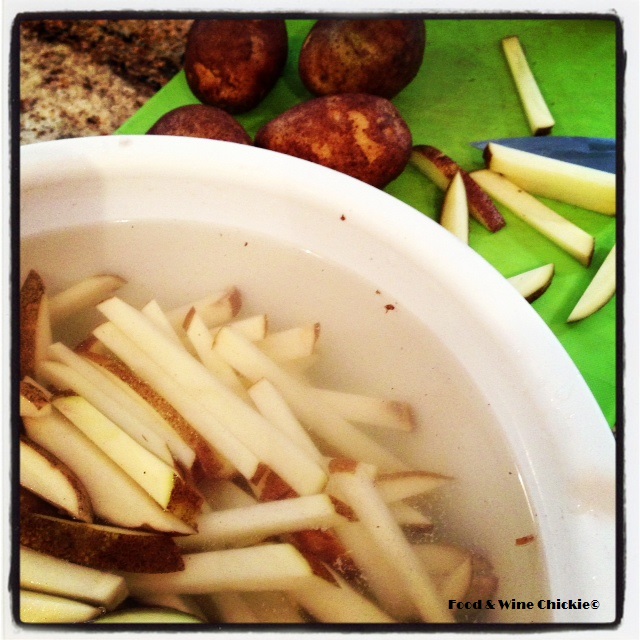
Fries Soaking

Fries Soaking

I made enough fries for an army at my party, but I scaled down the quantities to serve four people. Do yourself a favor and use Russet potatoes and don’t fool around with others that won’t give you the right taste and crispness. They’re easy to find and inexpensive.

Ingredients:

  • 4 large Russet potatoes, unpeeled but scrubbed
  • One 11.28-ounce container of duck fat (I used Rougie)
  • 5 cups peanut or canola oil
  • Sea salt
  • Freshly-grated Parmesan cheese (optional)

Directions:

  1. Cut the potatoes into 1/2” sticks.
  2. Rinse the potato sticks with cold water, add them to a large bowl filled with cold water and soak them for a few hours or overnight in the refrigerator. This will help rid the spuds of some of their starch and create ultra-crispy fries.
  3. Drain the potatoes very well and try to dry as much of the moisture as possible using a kitchen towel.
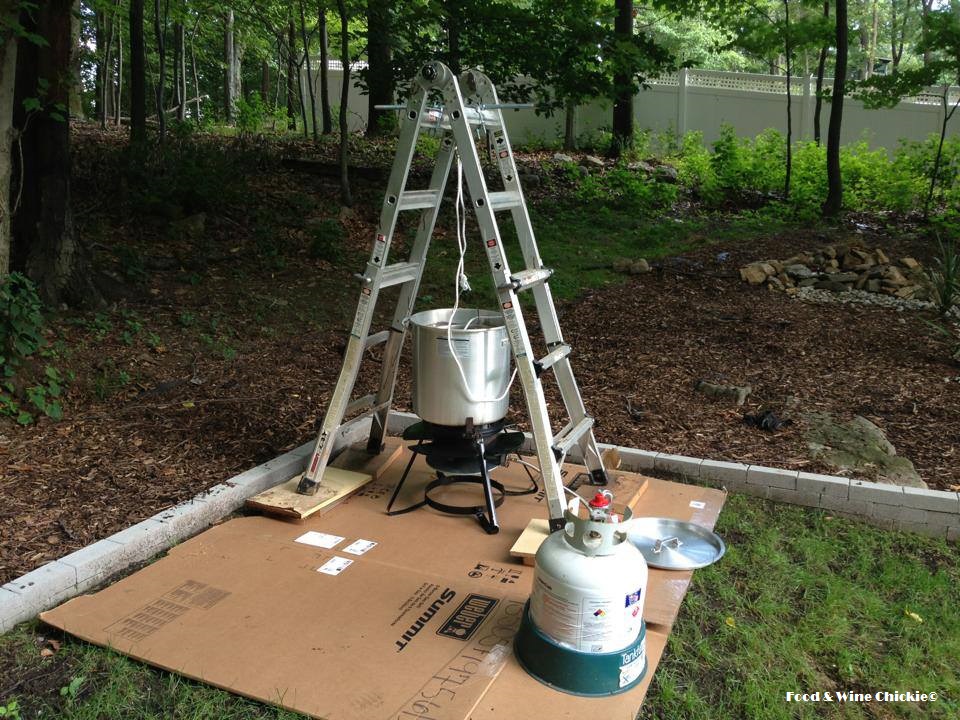
  4. Add the duck fat and the oil to a heavy pot (5-6 quarts). The fat/oil should only come up a third to a half of the way up the sides of the pot. If the oil goes higher than that, you risk the hot fat overflowing when you put the potatoes in so get another bigger pot.
  5. Heat the fat/oil to 325 degrees on a candy/deep fry thermometer. Add the potatoes and increase the heat to allow the fat/oil to stay at the 325 degree temperature. Fry for 5 minutes – fries should remain nearly white. Drain on several layers of paper towels and allow to cool.
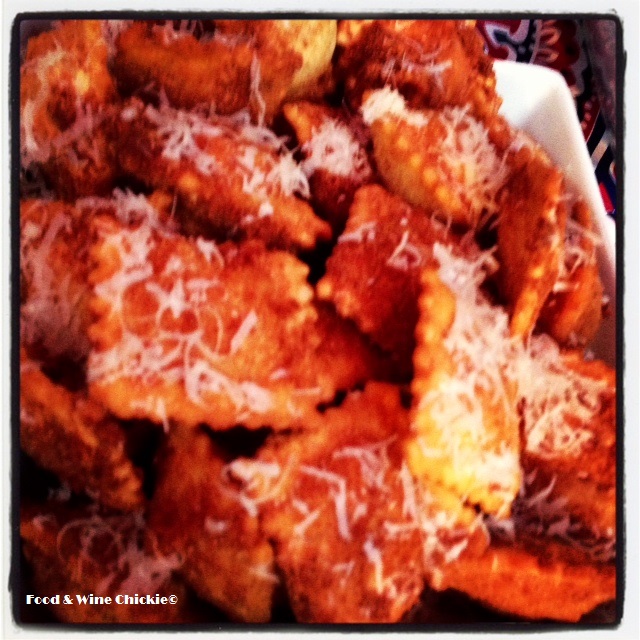
  6. Bring the fat/oil to 375 degrees. Add the blanched fries and increase the heat to allow the fat/oil to stay at the 375 degree temperature. Fry for 7-8 minutes, until golden brown. Drain on several layers of paper towels, sprinkle with sea salt and Parmesan (if using) and serve at once.
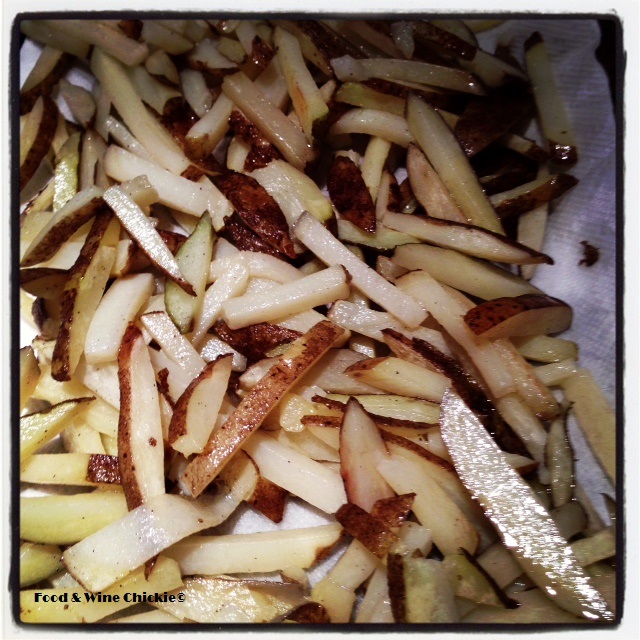
Blanched Fries

Blanched Fries

Serves 4.

Notes: You can get through step 5 then wrap the blanched fries in aluminum foil and refrigerate until the next day. Once the fries are fully cooked, if you’re working in batches, you can keep them hot in a 200 degree oven for a few minutes – don’t leave them in for more than 15 minutes or the fries will get soggy.

First Annual FryFest

First Annual FryFest

Egg Roll Making

Egg Roll Making

Last night, I co-hosted the First Annual FryFest with my friend and fellow foodie, Danny of Eat with Dan. While not the picture of healthy eating, it was way fun evening filled with only foods that were fried.

Fried Raviolis

Fried Raviolis

The guests were treated to an egg roll wrapping demo by Dan and his beautiful bride, Melissa. The pair hand-rolled 50 egg rolls then fried them to perfection. They were by far the best egg rolls I’ve ever had and that was the consensus with the rest of the guests. What a treat!

The piece de resistance of the evening was a deep-fried turkey. The 14-pound bird was brined, coated with my Tangy Dry Spice Rub.  My guy built a pulley contraption to help lower and raise the turkey into the pot of hot oil safely. While I was concerned about things going badly with the whole turkey deep-frying, all went well because of good, smart planning.

Fried Turkey

Fried Turkey

Other items that graced our menu were onion rings in maple-flavored batter, fried Mozzarella, fried raviolis, corn dogs and duck fat fries. Dessert was fried ice cream and Zeppole – Italian fried dough.

Turkey Fryer Contraption

Turkey Fryer Contraption

I’ll share the recipes in upcoming posts so you can recreate them at your home.

The weather was fabulous, the guests were fun, the wine was rosé and the food was decadent and tasty. A fine combination for a great summer evening.

Have you liked Eat with Dan on Facebook? Have you followed him on Twitter? Do it now for drop-dead gorgeous food photos.

Cheers,

Veronique

Grilled Salmon Caprese Salad

Grilled Salmon Caprese Salad

Salmon Caprese SaladThis week, I posted a picture of a light lunch I’d made for myself and I received so many requests for the recipe that I thought I’d do a quick recap.

Seared Salmon

Seared Salmon

First of all, this isn’t really a “recipe”, it’s more of a tasty idea for a quick and easy summer salad. I like to grill a few salmon filets and used them in salads to help me have something of sustenance while on my silly low-carb diet. It’s also a great way to use up all those tomatoes in your gardens come late summer.

Ingredients:

  • 6-ounce salmon filet, skin on one side
  • 1 Tbsp vegetable oil
  • Big pinch of salt and pepper for the salmon
  • ¼ cup olive oil
  • 4 Tbsp. red wine vinegar
  • ½ Tbsp. Dijon mustard
  • ½ tsp. each salt, pepper and Oregano
  • 20 pear or cherry tomatoes, halved or 2 medium-sized tomatoes, cut into bite-size chuncks
  • 10 Bonconcini fresh Mozzarella balls halved or a couple slices of fresh Mozzarella, cubed


Grape Tomatoes

Grape Tomatoes

Directions:

  1. Coat the salmon with oil then rub the salt and pepper over it.
  2. Heat a medium skillet over medium-high heat and place the salmon, flesh-side down, in it. Cook without disturbing for 3 minutes. Carefully flip the fish with a thin spatula and cook skin-side down for 4 minutes. Set aside to cool for 15 minutes and refrigerate wrapped in foil for up to a day if not using right away.
  3. In a glass jar with a tight-fitted lid, add the ¼ cup of oil, the vinegar, the mustard and the remaining salt, pepper and the Oregano. Close the lid and shake vigorously. Alternatively, whisk all the ingredients in a small bowl. Refrigerate for up to 3 days if not using right away.
  4. In a serving bowl, add the tomatoes, cheese and the vinaigrette. Combine gently. Using your fingers, break off bite-size pieces of salmon into the bowl. Toss the salmon with the other ingredients gently. Serve at once.

Makes one serving.

5 National Cheesecake Day Recipes

5 National Cheesecake Day Recipes

Dulce de Leche Mini Cheesecake

Dulce de Leche Mini Cheesecake

Today’s National Cheesecake Day. I don’t care who decided today was dedicated to all things cheesecake – I love cheesecake!

Here are 5 cheesecake recipes to help you celebrate National Cheesecake Day!

What are some of your favorite cheesecakes?

Cheers,

Veronique

Chewy Crunchy Peanut Butter Chocolate Chip Cookies

Chewy Crunchy Peanut Butter Chocolate Chip Cookies

Chewy Crunchy Chocolate Chip CookiesI truly love when readers contact me to say they’ve successfully tried some of my recipes and have even ventured to make yummy variations to them.

One of my readers, Kayla from New Jersey, wrote me recently to say she used the Extreme Peanut Butter Cookies recipe and replaced the peanut butter chips with chocolate chips. She loved the results and sent in the gorgeous images posted here. Here’s the recipe for your perusal and enjoyment!

Ingredients:

  • 1 cup butter, softened
  • 1 cup peanut butter
  • 1 cup granulated sugar
  • 1 cup packed brown sugar or ½ cup honey
  • 1 tsp. baking soda
  • 1 tsp. baking powder
  • 2 eggs
  • 1 tsp. vanilla
  • 2 ½ cups all-purpose flour
  • 1 8-ounce bag of semi-sweet chocolate chips

Chewy Crunchy Chocolate Chip Cookies PanDirections:

  1. Preheat oven to 375 degrees F.
  2. In a large mixing bowl, beat butter and peanut butter with an electric mixer on medium-high speed for 30 seconds.
  3. Add the granulated sugar, brown sugar, baking soda and baking powder and 1 cup of the flour. Beat until combined, scraping sides of bowl occasionally. Beat in the eggs and vanilla until combined. Beat in remaining flour. Stir in the chocolate chips.
  4. Shape dough into 1½ inch balls. Place balls 2 inches apart on an ungreased cookie sheet. Bake for 7 to 9 minutes or until bottoms are light brown. Transfer to a wire rack and let cool.

Makes about 36 cookies.

Let me know what you think if you bake a batch!

Chocolate Cupcakes with Ganache Centers

Chocolate Cupcakes with Ganache Centers

Chocolate Cupcakes with Ganache Centers

With Chocolate Marshmallow Frosting

Ganache centers, need I say more?? These dark chocolate cupcakes get an extra boost of chocolateness with the addition of bittersweet chocolate ganache filling in the center of the cupcakes.

As you bake these cupcakes, the fudgy centers will cave in – no worries! That’s the perfect little nook to put extra frosting in.

Ganache Centers Ingredients:

  • ¼ cup heavy cream
  • 2 ounces bittersweet chocolate, finely chopped
  • 1 Tbsp. confectioner sugar

Chocolate Cupcakes Ingredients:

  • 3 ounces bittersweet chocolate, finely chopped
  • 1/3 cup Dutch-processed cocoa powder
  • ¾ cup piping hot, brewed coffee
  • ¾ cup bread flour
  • ¾ cup granulated sugar
  • ½ tsp. salt
  • ½ tsp. baking soda
  • 6 Tbsp. vegetable oil
  • 2 large eggs
  • 2 tsp. white vinegar
  • 1 tsp. pure vanilla extract
Cupcakes after baking

Cupcakes after baking

Ganache Centers Directions:

  1. Place chocolate, cream, and confectioner sugar in a medium bowl and microwave for 30 seconds. Stir the mixture and if not completely melted, return to the microwave for 10 seconds. Stir until smooth then place in the refrigerator to cool, 15-20 minutes.

Chocolate Cupcakes Directions:

  1. Preheat oven to 350 degrees and either butter and flour a 12-muffin pan or add cupcake liners.
  2. In a medium bowl, add the chocolate and cocoa powder. Pour the hot coffee over the chocolate and cocoa powder. Whisk until smooth, about 1 minute, and chill in the refrigerator for 15-20 minutes.
  3. Blend together the flour, sugar, salt and baking soda in a medium bowl.
  4. In another medium bowl, beat the oil, eggs, vanilla and vinegar. Whisk the egg mixture into the reserved bittersweet chocolate / cocoa powder mixture until smooth.
  5. Using a rubber spatula, add the flour mixture to the chocolate batter until just incorporated. Don’t overmix.
  6. Divide the batter among the cups of the muffin pan. Each cup shouldn’t be more than ¾ full.
  7. Add a teaspoon of ganache on top of each cupcake – don’t mix the ganache in the cake batter.
  8. Bake 17 – 19 minutes, until the cupcake tops are firm. Cool in the pan for 10 minutes, then unmold and transfer to a wire rack to cool completely.
  9. Frost with Chocolate Marshmallow Frosting.

Yields a dozen cupcakes.

Chocolate Marshmallow Frosting

Chocolate Marshmallow Frosting

Marshmallow FrostingOne of the best frostings I’ve ever tasted was at a kids’ birthday party when I was around 8 years old. My friend’s mom made a light and fluffy marshmallow frosting over confetti cake so delicious I remember it vividly to this day.

Since I’m a serious chocolate fanatic, I decided to try a chocolate version of marshmallow frosting. The results were hugely popular with my co-workers who tasted the frosting over Chocolate Cupcakes with Ganache Centers.

Ingredients:

  • 2 sticks butter, softened
  • 1 tsp. pure vanilla extract
  • 4 Tbsp. milk
  • 3 cups confectioner sugar
  • ¼ cup Dutch-processed cocoa powder
  • 7-ounce jar marshmallow crème

Directions:

  1. In the bowl of an electric mixer on medium speed, cream the butter, vanilla and milk until smooth, about 2 minutes.
  2. With the mixer on low, add the confectioner sugar and the cocoa powder and beat until just combined, then beat on medium speed for about 2 minutes.
  3. With a rubber spatula, gently fold the marshmallow crème into the frosting mixture until most of the white streaks are gone.
  4. Use right away or refrigerate for up to 2 days. Bring to room temperature if previously refrigerated.

Makes enough frosting for a dozen cupcakes or a 8” double layer cake.

Fiori Di Zucchine – Fried Zucchini Blossoms

Fiori Di Zucchine – Fried Zucchini Blossoms

Zucchini blossoms

Fresh Blossoms

Saturday night, I had the pleasure of dining at The Orange Squirrel in Bloomfield, NJ again. It had been several months since I had eaten Chef Francesco Palmieri’s inventive and flavorful creations and once again, it was a great meal.

zucchini blossoms

Blossom Dredging

I absolutely adore zucchini blossoms and was thrilled to also see them served up as an amuse-bouche paired with a roasted plum topped with a hazelnut and Gorgonzola Dolce. It was a simply-presented dish yet it was complex in texture and flavor. When Chef Palmieri came out of the kitchen to present the amuse, I am certain he could see my enthusiasm for the blossoms and gave me a box of fresh blooms to take home when I left. What an amazing treat! The blossoms, much like most of the produce at The Orange Squirrel, are sourced from the Palmieri garden just a few blocks away from the restaurant.

zucchini blossoms

Blossom Frying

I left with my box of blooms like a kid leaving a candy store and I knew I would need to create something special with such a precious present. I opted for Fried Zucchini Blossoms – perhaps the most amazing fried food item ever.

Ingredients:

  • Any neutral-flavor vegetable oil (I use canola)
  • 1 cup all-purpose flour
  • 1 tsp. kosher salt
  • 12 ounces club soda, chilled
  • 12-24 zucchini blossoms
  • Sea salt
zucchini blossoms

Fried Blossoms

Directions:

  1. In a deep, heavy pot, bring about 2″ of oil to 350 degrees (use a candy/deep fry thermometer).
  2. In a medium bowl, stir together the flour and the salt. Add the club soda to the flour mixture, whisking until just incorporated with a few lumps. Over-whisking is not your friend here.
  3. Remove the stamens from the blossoms then dip each one in the batter, making sure to allow any excess batter to drip off. The goal is a thin coating.
  4. Place a few blossoms in the hot oil, ensuring the pot is not over-crowded causing the temperature to drop. Cool oil = greasy fried foods. Cook the blossoms for 3 minutes, turning them once, then remove them to a paper towel-lined place. Immediately sprinkle sea salt on the blossoms as they come out of the oil.

Batter is enough for up to 24 blossoms.

Cabot Creamery Seriously Sharp Cheddar Mac N Cheese

Cabot Creamery Seriously Sharp Cheddar Mac N Cheese

Mac n CheeseI make macaroni and cheese using various cheeses and featuring other decadent ingredients (see Porcini and Lobster Macaroni and Cheese) but for cook outs and casual get-togethers, I love the flavor of Cabot Creamery’s Seriously Sharp Cheddar. Crusted with a Panko topping, this mac n cheese gets rave reviews every time.

Ingredients:

  • ½ stick (4 Tbsp.) butter
  • 4 Tbsp. all-purpose flour
  • ½ tsp. each, ground nutmeg, salt and pepper
  • 4 cups whole milk or light cream
  • 1 cup heavy cream
  • 4 cups freshly grated Cabot Seriously Sharp Cheddar
  • 1 ½ pounds tubular pasta (I use Barilla Cellentani) cooked 2 minutes less than recommended on package directions, drained

Topping Ingredients:

  • 1 stick butter
  • 1 cup Panko bread crumbs
  • ½ tsp. cayenne pepper

Mac n Cheese MakingPasta Directions:

  1. Preheat oven to 400 degrees.
  2. Place butter in a large saucepan and melt over medium heat. Add flour and cook for 2 minutes, whisking constantly. Season with nutmeg, salt and pepper.
  3. Stir the milk (or light cream) and the heavy cream into the butter/flour mixture and bring to a simmer. Reduce heat to medium-low and cook for 5 minutes, whisking often.
  4. Slowly add the cheeses, a handful at a time, and stir until fully incorporated.
  5. Add the drained pasta to the cheese sauce and mix well.
  6. Add cheesy pasta to a 13×9 baking dish.

Topping Directions:

  1. Microwave butter in a small dish for 45 seconds. Add Panko and cayenne pepper and stir to incorporate the butter and create a crumbly mixture.
  2. Sprinkle Panko mixture over pasta in an even layer.
  3. Bake pasta for 15 minutes until Panko topping has lightly browned. Serve at once.

Makes 8 servings.

Rosemary and Lemon Compound Butter

Rosemary and Lemon Compound Butter

Compound Butter DisksI just love having compound butter on hand for summer grill outs. Compound butter is made by whipping softened butter with herbs or other condiments to boost flavor in food. I’ve played around with add-ons like minced garlic, chopped anchovies (great on grilled romaine lettuce) and various herbs.

This version of compound butter uses lemon zest and chopped rosemary as the flavor enhancers and it’s delicious over grilled steaks.

Ingredients:

  • 2 sticks of butter, softened
  • Zest of one lemon
  • 1 Tbsp. dried rosemary, chopped
  • ½ tsp. each salt and pepper

Compound ButterDirections:

  1. In a small bowl, whip the butter using a fork. Add the zest and the spices and whip some more to fully incorporate the aromatics into the butter.
  2. Lay two 12-inch sheets of wax paper or plastic wrap on a work surface. Divide the butter mixture between the two sheets and start to wrap the butter to form logs (think sushi roll or jelly roll).
  3. Place the two rolls in the refrigerator for at least four hours (if using within a couple days) or the freezer (if using at a later time).
  4. To use, unwrap the wax paper or plastic wrap and slice the butter in ½” slabs.

Makes about 30 butter slices.