Greek Goddess Dip – By Jordan Winery

Greek Goddess Dip – By Jordan Winery

Chef Todd Knoll

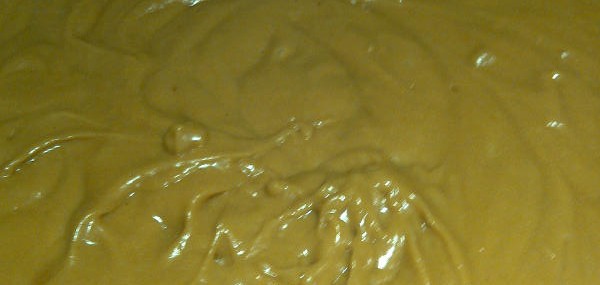
I don’t typically publish other cooks’ recipes on this blog, but find myself enjoying the creative yet simple dishes of Chef Todd Knoll of Jordan Winery in Healdsburg, CA.  Thought I’d share his Greek Goddess Dip that can be served as a salad dressing or as a dip with crudités.

Ingredients:

  • 3/4 c. plain Greek yogurt
  • 1/4 c. sour cream
  • 1/4 c. chopped parsley leaves
  • 1 tbsp. shredded (chiffonade) mint
  • 1 tbsp. chopped dill
  • 1/2 tsp. crumbled dried leaf oregano
  • 1 tbsp. fresh lemon juice
  • 1 tbsp. drained chopped capers
  • Salt and pepper to taste
  • Drizzle of olive oil (as a garnish, just before serving)

Directions:
Whisk together yogurt, sour cream, all herbs, lemon juice and capers in a bowl. Season, cover and refrigerate until ready to serve.

To view a video from Jordan Winery that offers serving suggestions for the dip, click here.

4-Course Fish and Seafood Tasting Menu Dinner

4-Course Fish and Seafood Tasting Menu Dinner

Those of you who follow my blog have read about the tasting menu dinners I sometimes host at my home.  This weekend, I decided to do a four-course fish and seafood tasting menu dinner for two featuring some fresh produce and herbs from my garden.

Here are the dishes I served:

Lump Crab & Yellow Tomato Coulis Shooter

Course #1:  Yellow Tomato Coulis and Lump Crab Shooter

I have beautiful yellow tomatoes ripening in my yard that I absolutely love.  They are sweet and fresh and simply delicious.  For this easy starter, I pureed a couple medium yellow tomatoes with excellent olive oil, a few basil leaves, sea salt and freshly cracked pepper in a food processor.  I served about ¼ cup of this golden elixir in a shot glass topped with a tablespoon of lump crab meat and a tiny basil leaf.

Scallop Crudo

Course #2:  Scallop Crudo

I love crudo (“raw” in Italian) dishes in the summer.  In essence, crudo dishes feature raw fish or seafood ‘cured’ in citrus juice, olive oil, salt and sometimes vinegar.  For those who are not fans of raw fish or seafood, this preparation allows the seafood or fish to cook in the acidic liquid, so give it a try!

I sliced large scallops thinly then cured the slices in a combination of orange and lime juices, a splash of red wine vinegar, sea salt, top quality olive oil, thinly sliced Thai chilies and fresh cilantro leaves.  Absolutely fabulous!

Lobster Tail Risotto

Course #3:  Lobster Tail Risotto

Risotto is uber popular at my home, so knew I had to prepare it for this special meal.  I grilled a 10-ounce lobster tails for 5 minutes, then removed from the shell and sliced carefully.  I made risotto with tons of butter, olive oil, elephant garlic and yellow onion, and then topped the luscious concoction with the lobster tail slices.  Not a bad dish!

Fish Three Ways

Course #4:  Fish Three Ways

I love the idea of serving three fish dishes on one plate. I opted for cod, salmon and yellow fin tuna – pale white to deep red fish.  The cod was marinated in sesame oil, miso and ponzu then lightly sautéed and served over steam soy beans.  The salmon was Dijon mustard and maple syrup-glazed and grilled on a cedar plank then served over leftover glaze.  The tuna was marinated for a short while in steak sauce then grilled to medium rare and served over Taboule salad.  Great flavor and visual contrasts!

Doing this type of meal for two people or six people isn’t difficult.  One needs to make a list of the dishes and accompaniments to be served, make as many of the dishes in advance (or at least prep the dishes) as possible and know what you’ll plate everything on!

Let me know if you try your own tasting menu dinner – cheers!

Veronique

Opa Burgers

Opa Burgers

Opa Burger

If you follow my blog, you must know by now that I love Greek food, and wines.  I try to incorporate typical Greek flavors in many of the food I make and when it came time to create a special burger to pair for a wine tasting, I opted for a Greek version of the American classic.

Burger Ingredients:

  • 1 pound ground lamb
  • 2 Tbsps. fresh mint, chopped
  • 2 large garlic cloves, minced
  • ½ tsp. each, salt and pepper
  • 2 Tbsps. olive oil, preferably Greek
  • 4 small pita pocket bread, often referred by the name Pitettes, sliced in halves horizontally

Topping ingredients:

  • 8-ounce block of Halloumi cheese, cut into 8 slices then lightly coated in olive oil
  • 8 tsps. Tzatziki sauce, homemade or store-bought
  • 1 heirloom tomato, cut into 4 slices

Directions:

  1. Heat a gas or charcoal grill to medium-high.
  2. In a medium bowl, combine the lamb, mint, garlic, salt and pepper and form into four medium patties. Be sure not to overwork the meat causing it to be tough after grilling.
  3. Lightly coat the four patties with the olive oil, and then grill for 3 minutes on each side.
  4. While lamb patties are grilling, place the eight slices of Halloumi cheese on the grill and sear for one minute on each side.
  5. Lightly toast each of the Pitettes halves on the grill.
  6. To assemble, place a lamb patty on a Pitette half, top the meat with two teaspoons of Tzatziki sauce, 2 slices of Halloumi and a slice of tomato. Top with another Pitette half.  Assemble the remaining three burgers.

Makes 4 burgers.

Notes:  Halloumi cheese is ideal for this burger but it can be replaced with crumbled Feta if unavailable.  There are many good quality Tzatziki sauces in the supermarket deli section, so don’t pass on making this burger because you don’t want to make a homemade batch.

Strawberry and Nutella-Stuffed Crepes

Strawberry and Nutella-Stuffed Crepes

My Niece Maude

I recently spent the weekend in my native Quebec where I got a chance to breakfast with my two young nieces.  Like their mom, my sister Josée, they love the combination of strawberries and Nutella, the chocolate hazelnut spread.

On the first morning of my weekend back home, the girls enjoyed Strawberry Nutella Treats.  On the second morning, I brought the Basic Crepe Batter I’d made the evening before and fixed Strawberry and Nutella-Stuffed Crepes.  The crepe batter is prepared in advance in a jiffy and the stuffed crepes are simple to fix for the whole family, even on busy mornings.  On this occasion, I added a few freshly-picked blueberries to the strawberries.

Ingredients:

  • Basic Crepe Batter
  • 4 Tbsps. butter
  • 8 Tbsps. Nutella
  • 1 pint of ripe strawberries, sliced
  • Whipped cream (optional)

Directions:

  1. In a large skillet (or crepe pan), melt 1 tablespoon of butter over medium-high heat until golden.
  2. Add ¼ of the crepe batter to the skillet and spread it evenly over the entire surface of the pan by tilting the skillet around.  Cook the crepe until the surface is mostly no longer wet, about 45 seconds.  Flip with a spatula and cook the second side for about 30 seconds.
  3. Strawberry Nutella Crepe

    Remove the crepe to a plate.  Spread 2 tablespoons of Nutella over the crepe then top with ¼ of the slices strawberries.  Roll the crepe, jellyroll-style and served with whipped cream, if using.

  4. Repeat steps 1-3 for the three remaining crepes.

Makes 4 crepes.

Notes:  The batter can easily be doubled or tripled if serving more guests.  The crepes can be stuffed with any berries, and another favorite of mine is stuffing them with a combination of raspberries and blueberries.

Top 5 Tips for a Great Grilled Steak

Top 5 Tips for a Great Grilled Steak

The following five steak grilling tips prove that you don’t have to be a grilling or steakhouse professional to serve your guests steaks that taste like you are.


Bone In Ribeye

1)  Buy the Right Cut of Meat

When you think of the best steak you’ve had at a steakhouse, you likely think of how juicy and flavorful the meat was, right?  In an attempt to recreate this savory experience, you must buy the right cut of meat.  This means that you must stay away from the overly lean filet mignon and try one of these top 5 cuts of meat for grilling:

Rib Eye:  The king of steaks, in my opinion.  The marbling of this cut is screaming for a hot grill.  With just a cracking of pepper and a generous coarse salt coating, it will be the best steak you’ve had, especially if still on the bone.

NY Strip:  This is a classic with the right amount of fat and chewiness.

Porterhouse (T-Bone):  Those of you addicted to the filet mignon will still be able to enjoy it while getting a juicy and flavorful NY strip along with it.

Skirt Steak:  This inexpensive cut of meat is ideal for a dinner party.  It’s affordable, cooks quickly and is ultra-flavorful, even without being marinated.

Tri-Tip:  Also known as Santa Maria steak, is the triangular section of the sirloin primal and has become popular with grillers because it’s flavorful, costs less than other prime cuts of meat and is typically about 2 ½ pounds hence perfect for feeding a crowd.

2)  Get a Meat Thermometer

Chefs on cooking programs constantly show folks how to ball up or stretch out their hand to compare the resulting tautness of their skin to what a steak should feel at various cooking temperatures.  Who the heck can remember this stuff, and who needs to?!

Get yourself a meat thermometer for $5 – $10, actually use it and you’ll never fail again when mom asks for medium and spouse asks for rare.  I recommend taking the steaks off the grill five degrees before they reach each of the below temperatures as the meat will continue to cook as it rests:

  • Rare: 130 degrees
  • Medium-rare: 135 degrees
  • Medium: 145 degrees
  • Medium-well: 160 degrees
  • Well: Not provided as meat should never be cooked well done

Once you get comfortable using the thermometer, you’ll get to understand how the meat should look and feel at various doneness and can do away with the handy tool.  This might take you a couple of grilling seasons, but you’ll get there.  In the meantime, arm yourself!

Strip Steak

3)  Allow Steak to Come to Room Temperature

This is possibly the most crucial step to a goof grilled steak.  Remove you steak from the refrigerator at least 30-60 minutes prior to grilling.  Not doing this will result in a steak that’s overcooked on the outside and has a “bullet” of raw/overly-rare meat on the inside.

4)  Steak Grilling Tip – Season your Meat

One of the biggest mistakes home cooks make when grilling steak is to under season the meat.  Marinating some cuts of meat is a good idea, but even more important is to generously coat the entire outside of the meat with olive oil then with coarse salt and freshly cracked pepper.  I’m not talking a sprinkling of salt and pepper folks!  I mean a COATING.  Also, seasoning the meat after it’s grilled won’t do the trick – do it prior to grilling.

5)  Steak Grilling Tip – Let the Meat Rest

Most of us have heard of letting a steak rest after grilling, but how many actually have the patience to wait for a perfectly-grilled steak to rest 5-10 minutes!?

As the saying goes – just do it!  Get your steaks off the grill and onto a plate, then cover them with a piece of aluminum foil and have a cocktail to get your mind off cutting into those ribeyes.

Allowing the steak to rest will help the natural juices to redistribute within the meat without flowing out of the steak when you cut into it causing a dry, tough chewy experience.

Do you have steak grilling tips I’ve missed here?  Please share them!

Happy grilling,

Veronique

Simple Greek Yogurt and Berry Tart

Simple Greek Yogurt and Berry Tart

It’s strawberry season here in New Jersey and I was looking for a simple, refreshing dessert to serve on a warm summer day.  I came up with this tangy tart that features a crust which can be made a day in advance and a filling that’s a snap to prepare.  The addition of blueberries to the ripe strawberries makes it patriotic-looking enough to serve for your 4th of July party.

Ingredients:

  • 1 17.6-ounce container of plain Greek yogurt
  • 1 tbsp. honey
  • 3 tbsps. powdered sugar
  • Zest of ½ lemon
  • ¾ cup black currant jelly
  • 2 cups of blueberries
  • 2 cups chopped strawberries
  • Simple Tart Crust

Directions:

  1. In a medium bowl, combine the Greek yogurt, the honey, the powdered sugar and the lemon zest.  Set aside (can be made up to 4 hours prior to assembling the tart if kept refrigerated).
  2. About 30-60 minutes before serving the tart, in a heat-proof bowl or measuring cup, microwave the black currant jelly for 1 minute, until liquefied. Set aside.
  3. In a large bowl, combine the blueberries and strawberries.  Add the warm black currant jelly to the berries and gently stir to coat each fruit. Set aside.
  4. Spread the yogurt mixture over the tart crust forming an even layer.  Gently top the yogurt layer with the berries and spread evenly in an attempt to completely cover the yogurt.  Refrigerate until ready to serve.

Serves 8.

Notes: The tart crust can be made the day before if cooled then covered in aluminum foil and stored at room temperature.  Try not to assemble the tart more than an hour prior to serving to keep the crust from becoming soggy.

Gooey Caramel Squares

Gooey Caramel Squares

This is a variation on one of the first recipes I baked as a young teen.  It makes for a soft, gooey, caramel dessert that spoons out of the pan easier then it cuts into neat squares and is delicious and easy to bring to a friendly summer party.

Ingredients:

  • 2 cups whipping cream
  • 2 Tbsps. powdered sugar
  • Homemade Caramel Pudding recipe
  • 15 Graham crackers
  • ¾ cup brown sugar
  • 1 5-ounce can evaporated milk
  • Powdered sugar for final dusting (optional)

Directions:

  1. In the bowl of an electric mixer, whip the cream with 2 tablespoons of powdered sugar until stiff peaks form, about 4 minutes.
  2. Saving 1 cup for final serving, combine the remaining whipped cream with the pudding in a large bowl, ensuring the mixture is mostly homogenous, while avoiding over-mixing.
  3. Cover the bottom of an 8×8 pan with 5 Graham crackers, breaking pieces as needed to completely cover the surface.
  4. Spread ½ of the pudding mixture over the cracker layer.  Cover the pudding layer with 5 more Graham crackers, the second ½ of the pudding mixture then finally with the remaining 5 Graham crackers.  Set aside.
  5. In a small saucepan, combine the brown sugar and the evaporated milk.  Simmer the mixture over medium-high heat, stirring frequently, for about 4 minutes.  Remove from heat, whisk vigorously (mixture will not be completely smooth) then pour over the top Graham cracker layer covering the dessert.  Tilt pan around to ensure the entire surface of the dessert is covered with the hot mixture.
  6. Let the dessert stand for 20 minutes at room temperature, cover with shrink wrap and refrigerate at least 12 hours.
  7. Serve with whipped cream and a dusting of powdered sugar.

Makes 9 servings.

Notes: Don’t have time to make your own caramel pudding?  Take a short cut by using 6 single-serving cups of butterscotch pudding.  Waiting at least 12 hours before digging into this tasty treat will be difficult but you must in order for the flavors to meld and for the crackers to soften enough to create gooey results.

Homemade Caramel Pudding

Homemade Caramel Pudding

I know making homemade pudding is pretty old school with all the available, decent-quality commercial puddings on the market, but there truly is a tremendous taste difference that warrants rolling up one’s sleeves every once in a while.  Here’s a version with a deep caramel flavor you can enjoy on its own or you can use in various recipes.

Ingredients:

  • 2 cups whole milk
  • 1 ½ cups heavy cream
  • 4 Tbsps. (1/2 stick) butter
  • 1 cup brown sugar
  • 3 egg yolks
  • ¼ cup cornstarch
  • ¼ tsps. sea salt
  • 1 ½ tsps. pure vanilla extract

Directions:

  1. Add the milk and cream to a large saucepan and cook over medium heat until small bubbles start to form on the surface, about 4 minutes.  Remove from heat and set aside for later use.
  2. Melt the butter in a large, heavy skillet over medium-high heat. Raise the heat to medium-high and add the brown sugar.  Simmer, stirring frequently, until the mixture caramelizes and begins to have a nutty aroma, about 5 minutes.
  3. Gradually pour the hot caramel mixture into the reserved cream mixture, whisking vigorously to fully combine. If the mixture is lumpy, pass it through a fine sieve.
  4. In a medium bowl, whisk the egg yolks. Add about a cup of the hot liquid to the eggs and whisk vigorously to prevent curdling.  Add the cornstarch and salt to the egg mixture and whisk to fully combine.
  5. Add the egg/cornstarch mixture to the pan with the hot liquid and cook over medium heat until the mixture is thick and just begins to boil, about 3 minutes.  Take the pan off the heat and add the vanilla extract.
  6. Ladle the pudding into decorative cups, cover with shrink wrap and refrigerate several hours or overnight.

Makes about six 4-ounce servings.

Penne with Fresh Chorizo, Buffalo Mozzarella in a Yellow Tomato Sauce

Penne with Fresh Chorizo, Buffalo Mozzarella in a Yellow Tomato Sauce

Penne with Fresh Chorizo, Buffalo Mozzarella in a Yellow Tomato Sauce

I simply adore the sweetness of ripe yellow tomatoes and try to find multiple uses for them since I grow them in my garden every summer.  This dish is simple to prepare and very satisfying.  A great way to use up extra grilled sausages from last night’s BBQ.

Ingredients:

  • 3 cups, yellow cherry tomatoes
  • 10 fresh basil leaves
  • ½ cup extra virgin olive oil
  • ½ tsp. each red pepper flakes, salt and black pepper
  • ½ pound dry penne pasta, cooked one minute less than recommended on the box
  • 4 fresh Chorizo links, cooked on the grill then cut into bite-size slices
  • 1 cup cubed fresh buffalo mozzarella
  • Parmesan cheese, for grating

Directions:

  1. Add the tomatoes, basil, oil and spices to a food processor and pulse for 1 minute, until a smooth salsa is created.
  2. Pour the salsa mixture into a large saucepan and cook over medium heat for 3-4 minutes.  Add the cooked pasta to the sauce and gently stir to coat. Cook for 1-2 minutes.
  3. Add the Chorizo slices and the mozzarella to the pasta and stir to combine.  Cook an additional minute.
  4. Serve with a grating of Parmesan cheese.

Serves two generously with some leftovers.

Notes: Can’t find yellow cherry tomatoes? Substitute with red ones and add ½ teaspoon of sugar to the salsa when pureeing.  Fresh Chorizo not readily available where you are? Simply use another spicy sausage in its place.

5 Simple and Tasty Memorial Day Side Dishes

5 Simple and Tasty Memorial Day Side Dishes

Not sure what to make for your Memorial Day get-together?  Tired of fixing the same old stand-by dishes?  Mix it up a little by serving these five simple and tasty Memorial Day side dishes:

  1. Maple Glazed Parslied Baby Carrots
  2. Queso Fresco Grilled Corn on the Cob
  3. Quick and Easy Pan Fried Smashed Potatoes
  4. Chorizo and Manchego Bites
  5. Zesty Guacamole

If you try any of these recipes, please post a comment to let me know how you and your guests liked them.  Enjoy the long weekend while keeping in mind that there’s more to Memorial Day weekend than the food and celebrations.

Happy Memorial Day!

Veronique