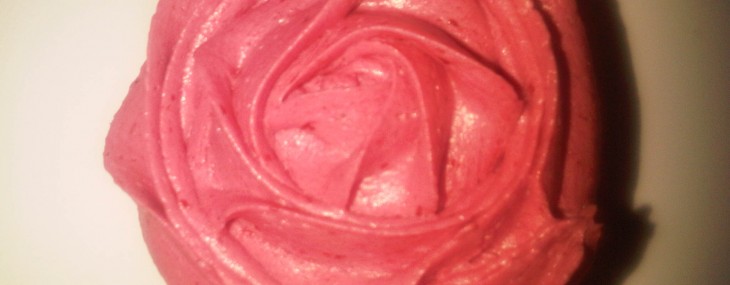
Blackberry Buttercream Frosting

Blackberry Buttercream Frosting

Ingredients:

  • 10 ounce bag of frozen blackberries, thawed
  • 1 cup butter, softened
  • 1/2 cup shortening
  • 1 tbsp pure vanilla extract
  • 1 pound box powdered sugar

Directions:

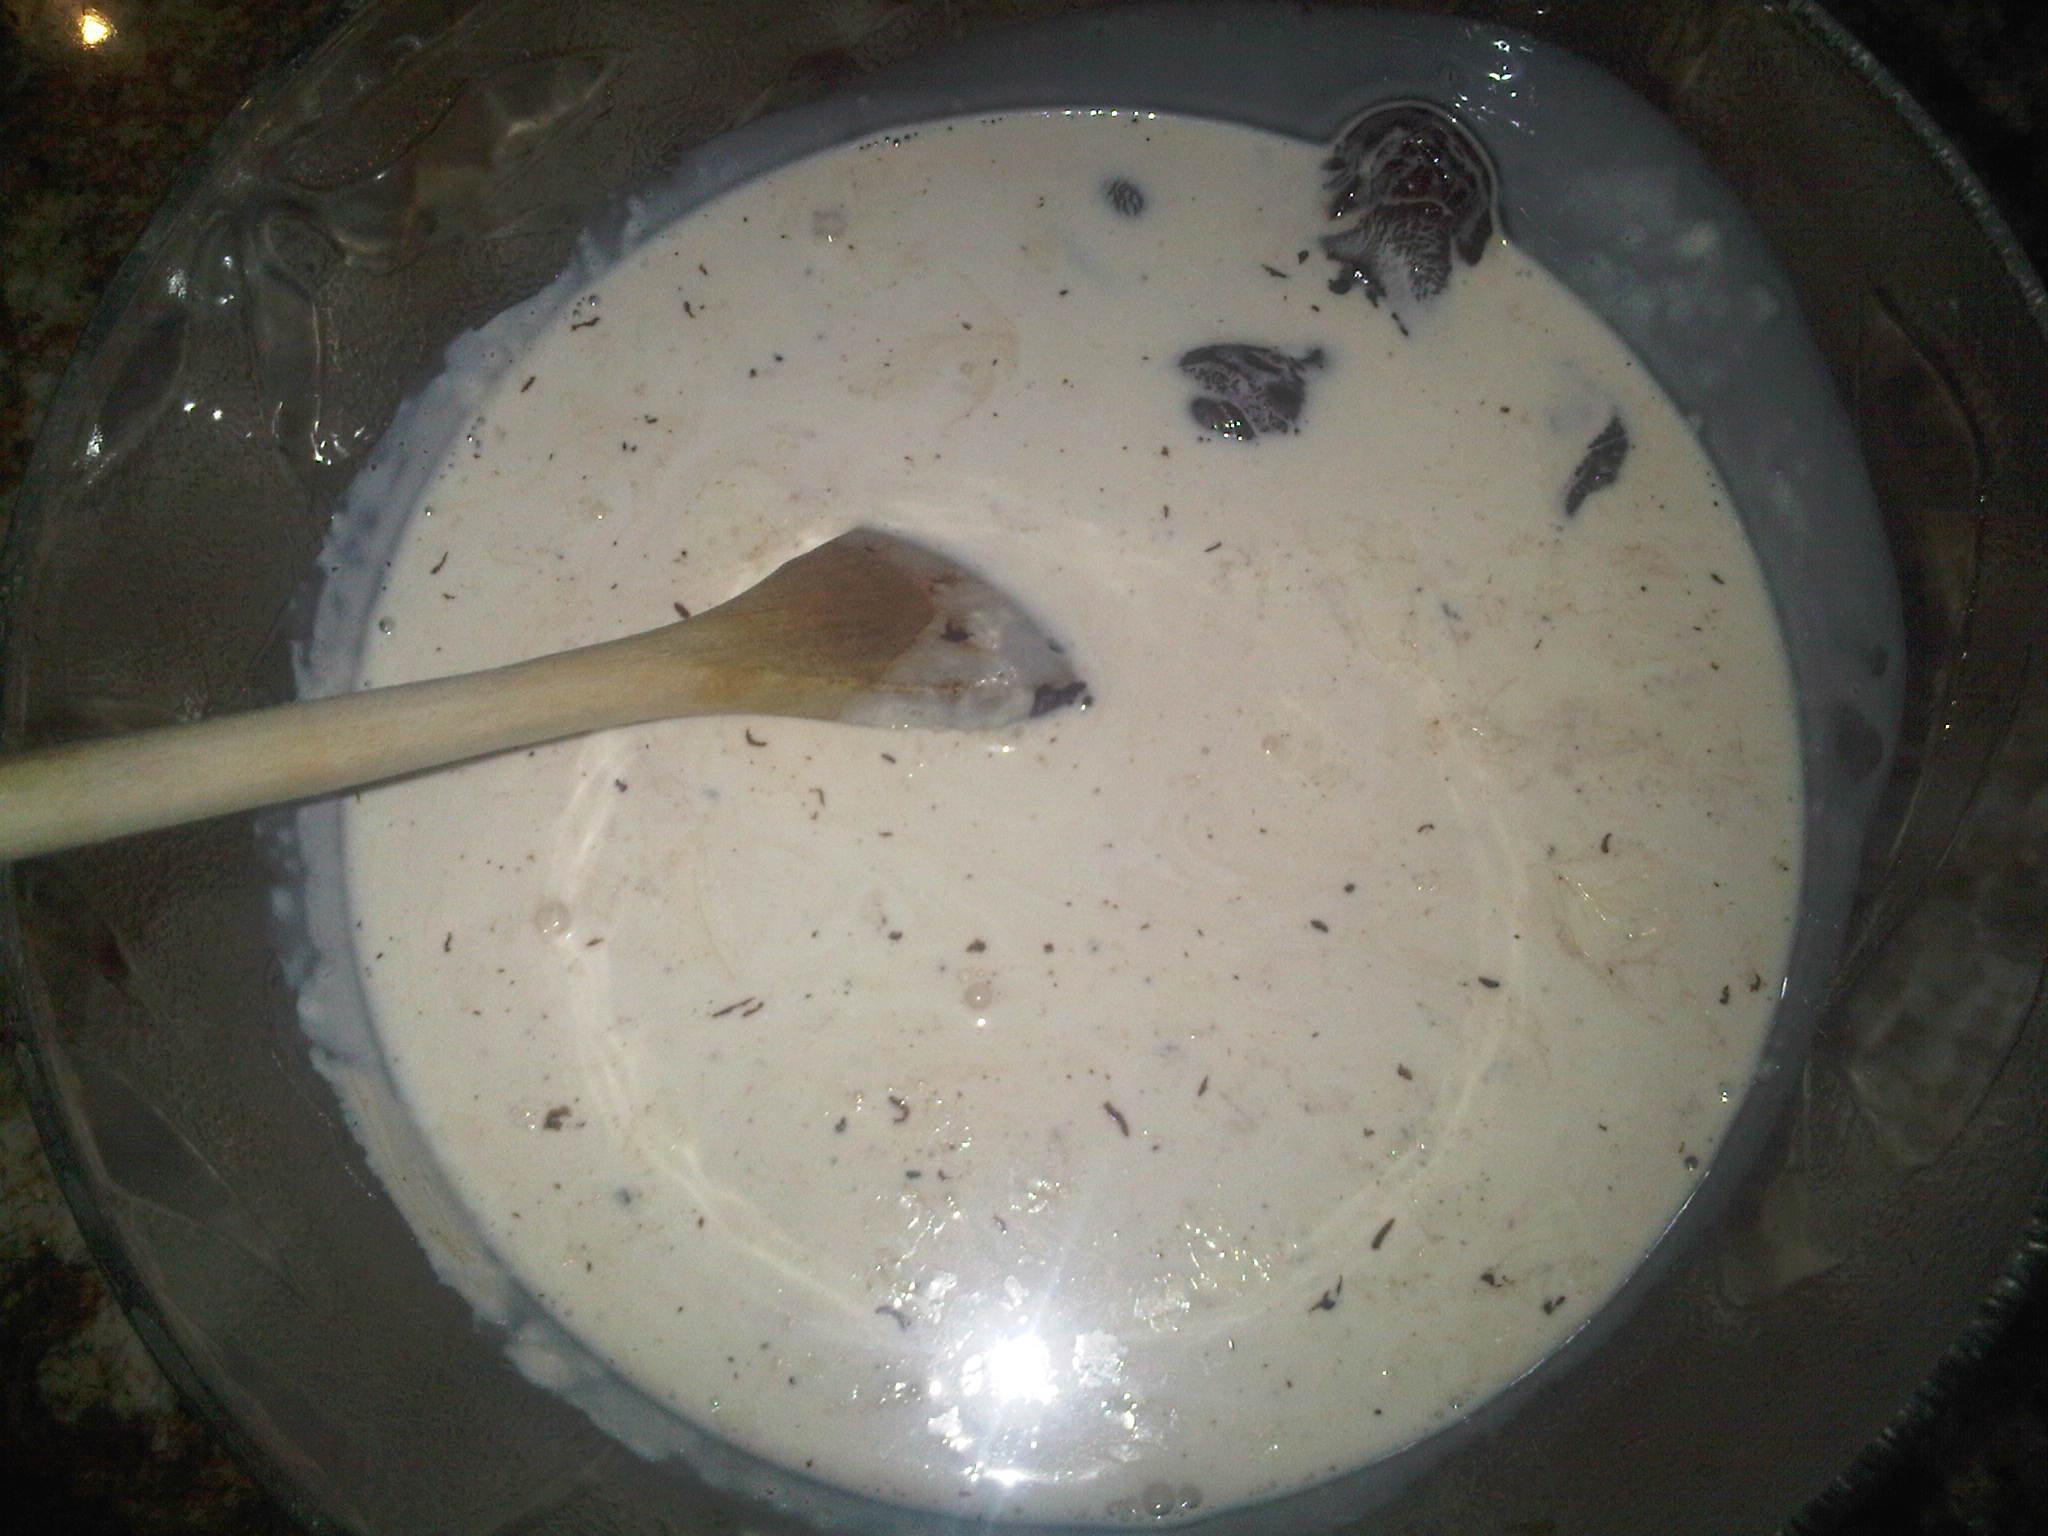
  1. Using a blender, puree the blackberries.  Pass the puree through a sieve, discard the seeds left behind and set seedless puree aside.
  2. In the bowl of an electric mixer, cream the butter and shortening until fluffy, about 1 minute.
  3. Add the vanilla and the blackberry puree to the butter mixture and mix until homogenous, about 2 minutes.  Add the powered sugar, 1 cup at a time, until fully incorporated.
  4. Use to frost an 8-inch cake or 12 cupcakes.
Meyer Lemon Tart

Meyer Lemon Tart

Meyer Lemon Tart

I got inspired to create this recipe after buying a bag of beautiful Meyer lemons at the market.  I combined the flavors of my Zesty Key Lime Tart with my family’s traditional lemon pie to create a refreshing, satisfying desert that’s simple to make yet beautiful to serve to company.

Ingredients

  • Juice from 2 Meyer lemons, about 1/2 cup
  • Peels from 2 Meyer lemons (okay to have some pith)
  • 1 1/2 cups granulated sugar
  • 1 stick, 8tbsp butter, cut into cubes
  • 4 eggs
  • 2 tbsp cornstarch
  • 1/2 tsp salt
  • 9-inch tart crust, pre-baked

Directions

  1. Preheat the oven 350 degrees.
  2. In the bowl of a food processor, add lemon juice, lemon peels, sugar and butter. Run the processor until the lemon peels are fully pureed, about 2 minutes. Add the eggs, cornstarch and salt and pulse for about 30 seconds.
  3. Place the baked tart crust in its pan on a cookie sheet.  Pour the tart filling into the baked tart crust until nearly full, you may have leftover liquid that you can discard.
  4. Bake for 35 minutes, until no longer jiggly and until lightly golden.
  5. Allow to cool for 15 minutes then unmold tart.

Notes: Tart can be served at room temperature or chilled – I prefer chilled.  This recipe would be great with key limes also.


5 Recipes to Treat Your Valentine To

Gnocchi with Butternut Squash

Need some inspiration for a romantic meal this Valentine’s Day (or any old day)?  Thought I’d share some of the recipes I’ve made recently that have earned me rave reviews.

5 recipes to treat your Valentine to:

  1. Gnocchi with Butternut Squash and Bacon in Sage and Danish Blue Cheese Sauce
  2. Porcini Mushroom and Lobster Macaroni and Cheese
  3. Ragu alla Bolognese (Bolognese Sauce)
  4. Grilled Salmon in Grape Leaves
  5. Red Velvet Cake with Chocolate-Covered Strawberries

Whichever dish you decide to prepare for your loved one(s) this Valentine’s Day, I hope your meal is paired with love.

Veronique

Red Velvet Cake with Chocolate-Covered Strawberries

Red Velvet Cake with Chocolate-Covered Strawberries

Red Velvet Cake with Chocolate-Covered Strawberries

There are many theories as to the true origin of the Red Velvet Cake.  Whether you believe it to be a southern traditional devil’s food cake tinted red with beet juice, a northern one dating back to the 1950s when Pillsbury Bake-Off contests were held at the Waldorf-Astoria and where the cake was possibly introduced or one first served at Eaton’s department store, and named Lady Eaton, in Canada, one thing is certain, this cake is loved by all.

My first try at this cake dates back to the early 1990s when I realized someone had switched the tiny bottle of red food coloring with a green one in a kit of four mini bottles.  This left me with only one small red bottle that resulted in my cake being Pepto-Bismol pink.  These days, one can find red food coloring in 1-ounce bottles that simplify the process.

Red Velvet Cake Ingredients

Ingredients:

  • 2 1/2 cups cake flour
  • 1 tsp salt
  • 1 tsp baking powder
  • 2 tbsp unsweetened cocoa powder
  • 2 ounces red food coloring
  • 1 1/2 cups granulated sugar
  • 1/2 cup (1 stick) butter, at room temperature
  • 2 large eggs, at room temperature
  • 1 tsp pure vanilla extract
  • 1 cup buttermilk
  • 1 tsp white vinegar
  • 1 tsp baking soda

Directions:

  1. Preheat oven to 350 degrees. Using cooking spray or a bit of softened butter, coat two 9-inch round cake pans.
  2. In a medium bowl, combine the flour, salt and baking powder.
  3. In a small bowl, blend the food coloring and cocoa powder with a teaspoon to create a smooth mixture.
  4. In the bowl of an electric mixer, cream the sugar and the butter until light and fluffy, about three minutes, scraping down the sides of the bowl with a rubber spatula every minute.
  5. Add the eggs to the butter mixture, one at a time, mixing well after each one.
  6. Add the food coloring mixture and mix well, about 1 minute, scraping down the sides of the bowl with a rubber spatula.
  7. Add half of the flour mixture to the creamed butter mixture, then add half of the buttermilk. Add the rest of flour mixture, then the rest of the buttermilk.  Be sure to scrape down the sides of the bowl with a rubber spatula to ensure the batter in completely blended without white streaks of batter.
  8. In a small bowl, combine the vinegar and the baking soda with a teaspoon to form a bubbly mixture.   Add the mixture to the cake batter and stir gently until just combined.
  9. Pour half of the batter evenly in each cake pans and place them in the preheated oven. Bake for 25-30 minutes.
  10. Cool the cakes in their pans for 10 minutes then remove the cakes from the pans and allow to cool completely on wire racks.
  11. Using a serrated knife, slice each cake in half horizontally.  Place one of the 4 cake slices on a large platter or cake stand, and cover with a thin layer (about 1/2 cup) of Cream Cheese Frosting using an offset spatula or butter knife.  Repeat process with the remaining 3 slices, ensuring that the top layer is the flattest slice – this will ensure a smooth surface for the finished cake.
  12. Crumb coat the entire cake with a thin layer of frosting (about a cup) then refrigerate for 30-60 minutes.  Finish frosting the cake with the rest of the frosting then refrigerate.  Serve within a day at room temperature.

Notes: To be extra festive, I dipped large strawberries into 3 ounces of dark chocolate that I microwaved in a small bowl for 90 seconds, stirring every 30 seconds.

Super Simple Cream Cheese Frosting

Super Simple Cream Cheese Frosting

Red Velvet Cake Inside

This cream cheese frosting is simple to make and is perfect on a carrot cake or a red velvet cake.

Ingredients:

  • 1/2 cup (1 stick) butter, at room temperature
  • 16 ounces (2 8-ounce packages) cream cheese, at room temperature
  • 1 tsp pure vanilla extract
  • 3 cups powdered sugar, sifted

Directions:

  1. In the bowl of an electric mixer, cream the butter and cream cheese until light and fluffy, about 3 minutes, scraping down the sides of the bowl with a rubber spatula every minute.  Incorporate the vanilla.
  2. Turn off the mixer and add the powdered sugar.  Turn mixer on low and blend until the powdered sugar has been incorporated, about 2 minutes, again scraping down the sides of the bowl with a rubber spatula.
  3. Use the frosting right away or refrigerate, covered, until ready to use.  To use refrigerated frosting, bring to room temperature then stir thoroughly using a wooden spoon.

Yield: This frosting can cover a 2-tier, 9-inch cake or 24 cupcakes.

Chicken Thighs with Bacon in Riesling

Chicken Thighs with Bacon in Riesling

Chicken Thighs with Bacon in Riesling

While I hate using a Riesling I enjoy drinking in this recipe, the flavor of the sauce when I’ve used Finger Lakes Riesling’s been outstanding.  Don’t have Riesling on hand, don’t fret!  Sauvignon Blanc, Pinot Grigio or another dry wine would work great also.

Ingredients:

  • 6 boneless, skinless chicken thighs
  • 2 tbsp all-purpose flour
  • 2 tsp. vegetable oil
  • 3 slices of thick-cut bacon, diced
  • 2 medium leeks, chopped, washed and patted dry
  • 3 medium carrots, diced
  • 1 medium Spanish onion, diced
  • 1 tsp. dried thyme
  • ½ tsp. each salt and pepper
  • 3 ½ cups ( 1-750 ml bottle) white wine, preferably Riesling
  • 1 cup chicken broth
  • ½  cup crème fraiche or sour cream

Directions:

  1. Heat oven to 350 degrees.
  2. Place chicken on a plate, sprinkle with flour then shake off excess.
  3. Heat oil in a large, heavy-bottom saucepan or Dutch oven on medium-high heat.  Add bacon and cook until browned and crispy, about 4-5 minutes.  Add chicken and brown on all sides, then remove the bacon and chicken from the pan to a plate.
  4. Add the leeks, carrots and onion to the saucepan, turn heat to medium and cook vegetables, stirring often, until softened, about 10 minutes.
  5. Return the chicken pieces and the bacon to the pan with the vegetables.  Add the thyme, salt, pepper, wine and broth.  Stir gently to combine, cover and transfer to the oven and bake for 45 minutes.
  6. Remove pan from the oven and stir in the crème fraiche to the chicken mixture to combine and create a thick sauce.  Serve over white rice.

6 Servings.

Boiled Cookies by Chris

Boiled Cookies by Chris

Photo By Chris Absheer

This simple yet delicious cookie recipe is the brainchild of St Louis Food & Wine Chickie friend Chris Absheer (here with adorable grandson Mikey).  What could be better than cookies you can enjoy WITHOUT baking!?

Ingredients:

  • 2 cups granulated sugar
  • 1/2 cup whole milk
  • 1/4 cup butter
  • 3 tbsp unsweetened cocoa powder
  • 1/2 cup creamy peanut butter
  • 2 cups old-fashioned oats
  • 1 teaspoon pure vanilla extract

Directions:

  1. Put sugar, milk, butter and cocoa powder in a heavy saucepan and bring to a boil over medium-high heat.  Boil for one minute.
  2. Remove from heat and quickly add peanut butter, oats and vanilla.  Stir well to combine the ingredients.
  3. Drop the cookie batter by teaspoonfuls onto wax paper.  Let stand 30 minutes before serving.

Yields 3 dozen cookies.

Chocolate and Raspberry Cake with Dark Chocolate Shell

Chocolate and Raspberry Cake with Dark Chocolate Shell

Chocolate Raspberry Cake

For New Year’s Eve, I was looking for a special chocolate dessert  to serve to my guests and found two recipes on the Bon Appétit website that I combined to give me the results I was looking for.

For the cake, I used this recipe as a base and for the shell I used the “bands” from this recipe.  I paced myself and made the cake over a 3-day period and it was both beautiful and tasty (see “notes” below for additional information on preparing the cake in advance).

Cake Ingredients

  • 2 cups all purpose flour
  • 1 3/4 cups granulated sugar
  • 3/4 cup unsweetened cocoa powder
  • 2 tsp baking soda
  • 1/4 tsp salt
  • 1 cup water
  • 3/4 cup buttermilk
  • 3/4 cup vegetable oil
  • 3 large eggs
  • 2 6-ounce containers fresh raspberries

Chocolate Ganache Ingredients

  • 18 ounces bittersweet chocolate (do not exceed 61% cacao), chopped
  • 2 1/4 cups heavy whipping cream
  • 6 tablespoons seedless raspberry jam, stirred to loosen, divided

Chocolate Shell Ingredients

  • 8 ounces bittersweet chocolate (do not exceed 61% cacao), chopped
  • 2 16×5-inch strips waxed paper

Chocolate Cake

  1. Position racks in top and bottom third of oven and preheat to 350°F. Coat two 9-inch round cake pans with 2-inch high sides with cooking spray. Line bottoms with parchment paper rounds then spray rounds with cooking spray.
  2. Sift flour, sugar, cocoa powder, baking soda, and salt into large bowl.  Whisk to blend and form well in center.
  3. Whisk the water, buttermilk, oil, and eggs in medium bowl to blend.
  4. Pour wet ingredients into the well of the dry ingredients and whisk just to blend.
  5. Divide cake batter between prepared pans (about 3 cups each).
  6. Bake cakes until tester inserted into center comes out clean, about 30 minutes. (If cakes form domes, place kitchen towel atop hot cakes, then press gently with palm of hand to level.) Cool completely in pans on cooling racks.

Chocolate Ganache Directions

  1. Place chopped chocolate in medium bowl. Bring cream just to boil in heavy medium saucepan. Pour over chocolate. Let stand 1 minute, then stir until ganache is melted and smooth.
  2. Transfer 1 1/4 cups ganache to small bowl. Cover and refrigerate until ganache is thick enough to spread, stirring occasionally, about 1 hour. Let remaining ganache stand at room temperature to cool until barely lukewarm.
  3. To assemble the cake:  a) Place rack inside rimmed baking sheet. b) Carefully run knife around pan edges to release cakes. c) Invert 1 cake layer onto cardboard round or bottom of 9-inch-diameter tart pan with removable bottom. Peel off parchment paper. Place cake layer on round on prepared rack. Spread 3 tablespoons jam over top. Spoon dollops of chilled ganache over, then spread evenly. d) Invert second cake layer onto another cardboard round or tart pan bottom. Peel off parchment paper. Carefully slide cake off round and onto frosted cake layer on rack. Spread remaining 3 tablespoons raspberry jam over top of second cake layer. e) Frost the entire cake with the remaining chilled ganache. f) Pour half of barely lukewarm ganache over cake, spreading over sides to cover (microwave for 15-20 seconds if mixture has completely cooled off).  g) Freeze until ganache sets, about 30 minutes. h) Pour remaining ganache over cake, allowing to drip down sides and spreading over sides if needed for even coverage and to smooth edges. i) Freeze to set ganache, about 30 minutes.
  4. Arrange raspberries in concentric circles atop cake.

Chocolate Raspberry Cake Slice

Chocolate Shell Directions (watch video directions)

  1. Line large baking sheet with foil; set aside.
  2. Place another large sheet of foil on work surface; place waxed paper strips atop foil, spacing apart.
  3. Stir chocolate in medium bowl set over pan of simmering water until melted and smooth.
  4. Pour half of melted chocolate down center of each waxed paper strip. Using small offset spatula, spread chocolate to cover strips evenly, allowing some of chocolate to extend beyond edges of paper strips, making sure strips are completely covered. Using fingertips, lift strips and place on foil-lined sheet. Chill until chocolate just begins to set but is still completely flexible, about 2 minutes.
  5. Using fingertips, lift 1 chocolate sheet from foil. Wrap sheet around cake, waxed-paper side out, lining up 1 long edge with bottom of cake (sheet will be higher than cake).
  6. Repeat with second sheet, arranging so ends just meet, pressing sheet onto uncovered side of cake. If sheets overlap, trim any excess paper and chocolate.
  7. Using fingertips, press top edge of sheet in toward cake, forming slight ruffle.
  8. Chill until chocolate sets, 5 minutes. Gently peel off waxed paper. Chill cake.

Notes: The cakes can be baked 2 days before assembling and I recommend making them at least 1 day ahead.  Simply wrap the cakes in the pans with foil at room temperature.  The assembled cake can be made 1 day before serving if stored in the refrigerator.  Be sure to let the cake stand at room temperature for 2 hours before serving.

5 Simple Soups to Try this Winter

5 Simple Soups to Try this Winter

Thai Soup

Soup is a favorite at my house and I try to make it most weekends.  Thought I’d share some of the soups I’ve made recently that have earned me some rave reviews.

5 Simple Soups to Try this Winter:

  1. Butternut Squash & White Asparagus Bisque
  2. Cremini Mushroom Velouté Soup
  3. Chunky Tomato-Basil Bisque
  4. Tom Ka Gai (Thai lemongrass and coconut soup)
  5. Cream of Leek and Celery Soup

Let me know which soup you end up trying!  Stay warm,

Veronique

Why Stop at Three or Four Courses?  Make it a Ten-Course Meal!

Why Stop at Three or Four Courses? Make it a Ten-Course Meal!

Brined Kurobota Pork

Chimichurri Skirt Steak in Handmade Tortilla

Some of you have already seen the photos I posted on my Facebook page of the 10-course tasting meal I served last week, but I wanted to take an opportunity to recap the evening.

During Thanksgiving week, I was fortunate enough to have dear friends in from out of town for a few days.  We made sure we had a few good foodie adventures, including a 10-course meal that my girlfriends and me prepared for most of the afternoon and ate for most of the evening.  What a great way to get caught up on each other’s lives than over a 4-hour meal!?  Here are the courses we enjoyed:

Course 1: Butternut Squash & White Asparagus Bisque (recipe).

Course 2: Panko-Crusted Goat Cheese & Beet Salad (photo).

Scallops in Sage Infused Irish Brown Butter

Course 3: Scallop in Sage-Infused Irish Brown Butter.

Course 4: Prawn Ravioli over Yellow Tomato Coulis (photo).

Course 5: Butter & Finger Lakes Riesling-Poached Sea Bass with Baby Bok Choy and White Asparagus.

Course 6: Indian-Spiced Chicken Tenderloin Bite Over Peanut Sauce (photo).

Course 7: Brined Kurobota Pork with Apricot Glaze & Potato Orbs.

Course 8: Chimichurri Skirt Steak in Handmade Corn Tortilla with Salsa Verde.

Course 9: Maple Bourbon Pecan Tartelette with Maple Profiterole.

Course 10: Cheese Course (Dunbarton Blue, Irish Cheddar, French Brie) with Dark Chocolate-Drizzled Candied Bacon and Honey Pearls.

Cheese Course with Dark Chocolate Candied Bacon

The key to the success of an ambitious meal is to be prepared and organized.  I have 4 tips to hosting a dinner party while not killing yourself.

Have I missed any tips that have served you well when hosting a dinner party?  Please share!