Strawberry Maple Butter

Strawberry Maple Butter

Every late spring, I make it my mission to go strawberry picking at Donaldson Farms, and amazing local farm. My love for picking berries started a long time ago when my grandma would take me to pick wild/wood strawberries in Quebec as a toddler. She’s sit me in the field with a pail and tell me to pick berries around me. Of course, that ended up with me eating the strawberries around me, but it’s a very fond memory nonetheless.

Cultivated strawberries are so easy to pick as farmers have rows and rows of plants with an abundant amount of berries on them. Within a few minutes, I have more strawberries that I know what to do with!
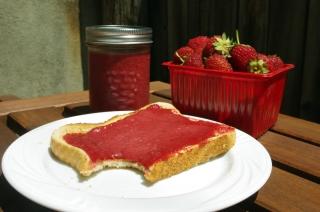
One way I like to use up my fresh berries is by making a very simple butter using maple syrup from back home in Quebec. This butter can be used on toasts, waffles, pancakes/crepes and in a multitude of ways. It keeps a couple of weeks in the fridge and it’s delicious!

Hope you make it out to a u-pick-it berry farm near you, it’s a fun and tasty activity for the whole family.

Ingredients:

  • 6 cups of fresh, chopped strawberries
  • 2/3 cups maple syrup
  • 1 ½ cups unsalted butter, cut into pieces
  • 1 Tbsp. pure vanilla extract
  • Pinch of salt

Directions:

  1. In a large saucepan over medium-high heat, add the chopped berries, the maple syrup and the butter. Bring to a boil then lower heat to medium-low and cook for 30 minutes, stirring occasionally.
  2. Turn the heat off, add the vanilla and salt and stir to combine.
  3. Puree the berry mixture in a blender or food processor until smooth, 30 seconds or so. You may need to puree in batches if your food processor/blender is on the small side.
  4. Pour the strawberry maple butter in small glass jars and refrigerate until ready to serve.

Makes 6 small canning jars.

Cheers,

Veronique

Chicken Bites with Tarragon Dipping Sauce

Chicken Bites with Tarragon Dipping Sauce

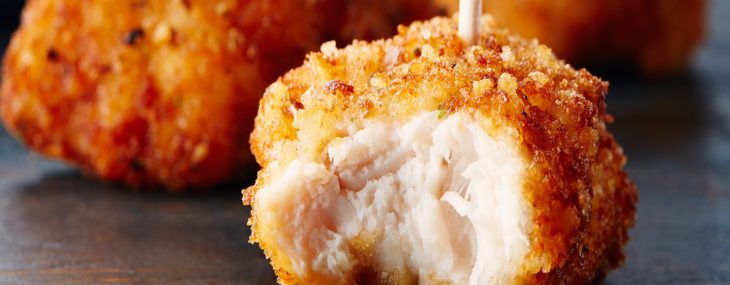
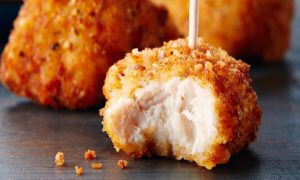
These Chicken Bites with Tarragon Dipping Sauce are a great little dish to make when company comes over and you don’t want to slave over a hot stove at the last minutes.

Chicken BitesI make the tarragon dipping sauce the day before and keep it in the refrigerator until I’m ready to serve the dish. This saves some time and keeps you out of the kitchen and with your guests come party time.
The bites will please adults and children and I often double the recipe as they’re a huge hit at parties. You could make the bites a little ahead of time and fry just 8 minutes then reheat in the oven, or my favorite, the toaster oven, for 2-3 minutes right before you want to serve the bites.

Bites Ingredients:

  • 2 cups peanut oil
  • 4 boneless, skinless chicken breast halves, patted dry and cut in 1½ inch bites.
  • 1 cup bread crumbs
  • ½ cup grated Parmesan cheese
  • ½ tsp. poultry seasonings
  • ¼ tsp. garlic powder
  • ½ tsp. dry thyme
  • 1 cup buttermilk
  • ½ tsp. each salt and pepper (plus additional salt for seasoning the cooked chicken)

Dipping Sauce Ingredients:

  • 1 cup sour cream
  • ¼ Dijon mustard
  • ½ tsp. dry tarragon or 1 Tbsp. fresh tarragon
  • 4 drops of hot sauce
  • Pinch of salt and pepper

Bites Directions:

  1. In a heavy saucepan or ideally a deep cast iron pan, warm the oil over medium-high heat until the temperature reaches 350°F.
  2. In a medium bowl, combine the bread crumbs, Parmesan, poultry seasonings, garlic power, thyme and ½ teaspoon each of salt and pepper.
  3. In another medium bowl, add the buttermilk.
  4. Dip the chicken in the buttermilk, shake to remove excess and toss in the bread crumb mixture to fully coat each piece. Add the coated chicken to the oil and cook in batches for 10 minutes, or until golden brown. You don’t want to crowd the pan with too much chicken or the oil will drop in temperature and your chicken will get soggy from oil penetrating the chicken instead of cooking the exterior. Place cooked chicken on paper towels and season with a pinch of salt.

Dipping Sauce Directions:

While the bites cook, in a medium bowl, add all the ingredients and whisk well to fully combine. Serve with the bites.

Serves 6-8 as appetizers/hors d’oeuvres.

Two Cheese Baked Macaroni

Two Cheese Baked Macaroni

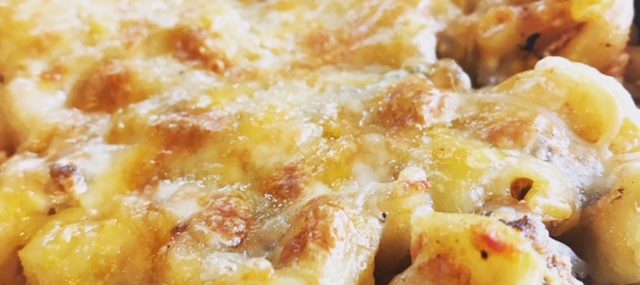
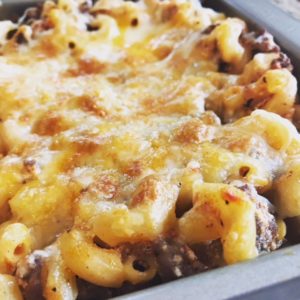
I love making big batches of marinara sauce and freezing some for easy weekday dishes. I took out 2 cups of sauce from the freezer and added it to some cooked ground beef, combined that with leftover Ricotta cheese and the recipe came together in the time it took to boil the macaroni and it’s tasty and satisfying….and cheesy.

Ingredients:

  • ½ pound macaroni pasta (I use Delverde brand)
  • 2 Tbsp. olive oil
  • 1 pound ground beef, I use 20% fat
  • Pinch of salt and pepper
  • 2 cups Easy Marinara Sauce (or other marinara sauce)
  • ½ cup Ricotta cheese
  • I cup grated Mozzarella cheese

Directions:

  1. Preheat oven to 400 degrees.
  2. Cook pasta 1 minute short of the directions state on the packaging.
  3. In a large sauté pan over medium-high heat, warm the oil. Add the beef, the salt and the pepper and cook, stirring frequently, until the meat is no longer pink, about 5 minutes. Lower the heat to medium and add the sauce. Cook for about 10 minutes, stirring occasionally.
  4. Add the cooked pasta and the Ricotta to the sauce and gently toss to combine. Place the pasta in a baking dish, top with the Mozzarella and cook for about 15 minutes, until the cheese is melted and golden brown.

Makes 2 generous entrée-size servings.

Cheese Stuffed Poblano Peppers

Cheese Stuffed Poblano Peppers

Poblanos are mild chili peppers with lots of great flavor and just a bit of spice. The peppers originated in Puebla, Mexico and can also be found dried, where they’re known as ancho chile.

Cheese Stuffed Poblano

I’m always looking for low-carb side dishes to serve when we grill meats. That’s not easy as we often go to carby sides when we grill…potato salad, mac & cheese, pasta.

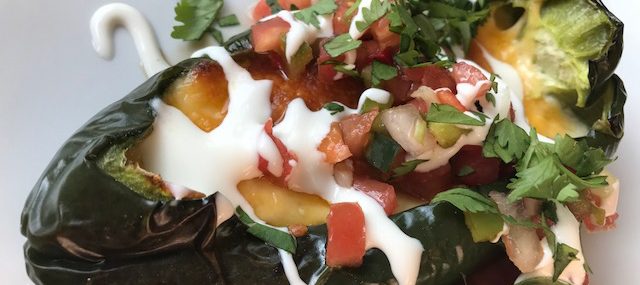
Last weekend, I’d made some of my fresh salsa (chopped tomatoes, cilantro, lime juice, jalapeno and minced onion) for another meal and thought…what if I used this tasty salsa to top a stuffed poblano!? This was a well-received and easy-to-make side dish that we served alongside grilled pork chops. One other thing I loved was that I was able to make these in the toaster oven so I didn’t have to heat up the whole kitchen with my standard oven – winning!

You can make these peppers in advance, cool them then reheat them for a few minutes in a 425 degree oven – party perfect!

Ingredients

  • 2 large poblano peppers
  • 1 Tbsp. vegetable oil
  • Pinch of sales and pepper.
  • 4 ounces grated Cheddar/Jack cheese mix
  • Homemade or store-bought salsa
  • 2 Tbsp. Crema Mexicana or sour cream
  • ½ lime

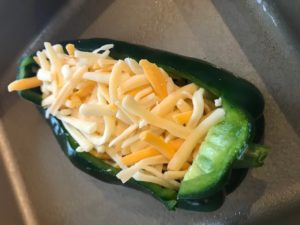
Poblano Cheese Stuffing

Directions:

  1. Preheat oven to 375 degrees.
  2. Find a flat spot on the poblano and lay it on your work surface. With a sharp paring knife, cut the top of the pepper (leaving the end and stem intact) to make an opening for the cheese to go into.
  3. Rub the oil over the peppers then salt and pepper the interior.
  4. Divide the grated cheese between the two peppers, note that you may have too much cheese depending on the size of your peppers.
  5. Place the stuffed peppers on a baking sheet and cook for about 20 minutes, until cheese is melted and beginning to brown.
  6. Top each pepper with fresh salsa and a drizzle of Crema Mexicana (or sour cream). Squeeze the lime over the peppers.

Makes two side dishes.

Seared Salmon & Lemon Labneh

Seared Salmon & Lemon Labneh

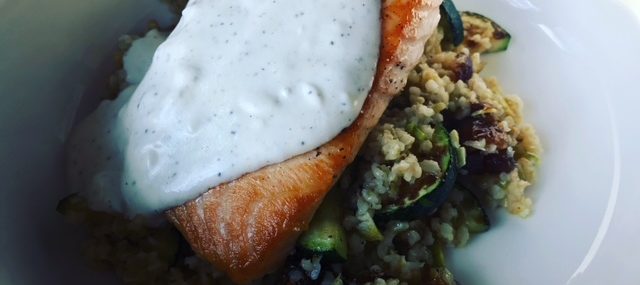
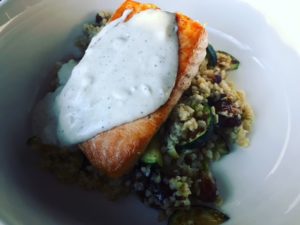
Seared Salmon & Lemon LabnehWe received this fabulous salmon and simple recipe in our Blue Apron kit this week and it was one of my favorite dishes from the meal program thus far. I loved all the bold flavors and the various texture. I don’t zest my lemon and instead finely chop the rinds it for bigger lemon flavors to match against the salmon.
I’ve written about freekeh before, it’s an ancient grain popular in the Middle East and the Mediterranean that I use in place of rice in hot dishes and salads.

The rich seared salmon paired with the chewy freekeh and dates then topped with creamy, lemony labneh is a sure winner that’ll become a staple dish at our home.

Ingredients:

  • 1 10-ounce skin-on salmon fillet
  • ½ cup cracked freekeh
  • 2 cloves garlic
  • 1 zucchini
  • 4 dried medjool dates
  • ¼ cup labneh cheese
  • 1 pink lemon (or regular lemon if you can’t find pink)

Freekeh Directions:

  1. Heat a medium pot of salted water to boiling on high. Once boiling, add the freekeh and cook, uncovered, 24 to 26 minutes, or until tender. Turn off the heat. Drain thoroughly and return to the pot. Cover to keep warm.

Food Prep Directions:

  1. Using a peeler, remove the rind of the lemon, avoiding the white pith; mince the rind to get 2 teaspoons of zest (or use a zester). Quarter and deseed the lemon.
  2. Halve the zucchini lengthwise, then cut crosswise into 1/4-inch thick pieces.
  3. Peel and roughly chop the garlic.
  4. Pit and roughly chop the dates.

Lemon Labneh Directions:

  1. While the freekeh continues to cook, in a bowl, combine the labneh, the juice of 2 lemon wedges, and a drizzle of olive oil. Season with salt and pepper to taste.

Fish Directions:

  1. Once the freekeh has cooked about 15 minutes, pat the fish dry with paper towels. Transfer to a cutting board, skin side down. Cut into 2 equal-sized pieces; season with salt and pepper on both sides.
  2. In a medium pan (nonstick, if you have one), heat 2 teaspoons of olive oil on medium until hot. Add the seasoned fish, skinless side down. Loosely cover the pan with aluminum foil and cook 4 to 5 minutes on the first side, or until lightly browned. Flip and cook 3 to 4 minutes, or until lightly browned and cooked through.
  3. Leaving any browned bits (or fond) in the pan, transfer to a plate. Cover with the aluminum foil to keep warm.

Zucchini Directions:

  1. To the pan of reserved fond, add the sliced zucchini in an even layer; season with salt and pepper. (If the pan seems dry, add a drizzle of olive oil.) Cook on medium-high, without stirring, 3 to 4 minutes, or until browned and slightly softened.
  2. Add the chopped garlic; season with salt and pepper. Cook, stirring frequently, 1 to 2 minutes, or until softened. Turn off the heat.

Serving Directions:

  1. To the pot of cooked freekeh, add the cooked zucchini, chopped dates, lemon zest, the juice of the remaining lemon wedges, and a drizzle of olive oil. Stir to combine; season with salt and pepper to taste.
  2. Serve the cooked fish with the finished freekeh. Top the fish with the lemon labneh.

Serves 2.

Bacon Wrapped Scallops

Bacon Wrapped Scallops

Bacon-Wrapped Scallops

Bacon-Wrapped Scallops

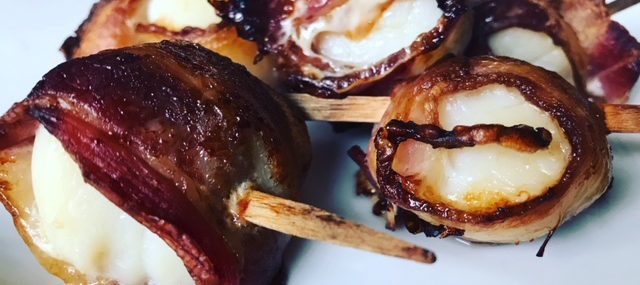
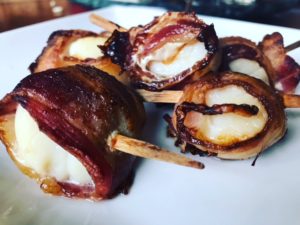
Bacon-wrapped scallops – add this to my list of ‘not really a recipe, but…’ deliciousness. I hadn’t made bacon-wrapped scallops since perhaps the 90s but needed to prepare something quick for a last minute invite of friends and had bacon and scallops so I thought…old school, but why not!?

I served these with a mixture of ketchup, mayo and Sriracha as a dipping sauce and the spice was pleasant with the fatty bacon.

Ingredients

  • 6 slices of thick-cut bacon
  • 12 large scallops

Directions

  1. Preheat oven to 375 degrees.
  2. Cover a baking sheet with foil and coat with cooking spray.
  3. Cut the bacon slices in half, lengthwise.
  4. Wrap a strip of bacon around each scallop and secure the bacon with a toothpick.
  5. Place the bacon-wrapped scallops on the foil-covered baking sheet and cook for 15 minutes or until the bacon is crisp.

Makes 12 bacon-wrapped scallops.

Bacon Wrapped Scallops
Serves 4
Delicious and easy appetizer that will be a favorite at your parties.
Write a review
Print
Prep Time
10 min
Cook Time
15 min
Total Time
25 min
Prep Time
10 min
Cook Time
15 min
Total Time
25 min
Ingredients
  1. 6 slices of thick-cut bacon
  2. 12 large scallops
Instructions
  1. Preheat oven to 375 degrees.
  2. Cover a baking sheet with foil and coat with cooking spray.
  3. Cut the bacon slices in half, lengthwise.
  4. Wrap a strip of bacon around each scallop and secure the bacon with a toothpick.
  5. Place the bacon-wrapped scallops on the foil-covered baking sheet and cook for 15 minutes or until the bacon is crisp.
Notes
  1. I served these with a mixture of ketchup, mayo and Sriracha as a dipping sauce and the spice was pleasant with the fatty bacon.
Food & Wine Chickie Insider https://www.foodandwinechickie.com/
Easy Pears Foster

Easy Pears Foster

Pears FosterBananas Foster is a dessert originally-created at Brennan’s Restaurant in New Orleans back in the 1950s. The popular dish consists of ripe bananas cooked in a butter, dark rum, banana liquor and brown sugar sauce then topped with vanilla ice cream. It’s decadent, old school and a most perfect dish.

When I was growing up in Canada, my mom recreated this dish with canned pears instead of bananas as canned goods were a necessity during long winter months. I don’t know if it’s because this was a childhood favorite, but I actually like the pear version even better than the original banana version. I don’t even care that we still make it using canned pears versus using fresh one – it’s fabulous.

Ingredients:

  • ½ stick (1/4 cup) butter
  • ½ tsp. ground cinnamon (optional. I leave it out as I don’t like cinnamon)
  • 1 cup brown sugar
  • ¼ cup banana liqueur
  • 29-ounce can of pear halves, drained of their liquid (rinsed if in syrup)
  • ¼ cup dark rum
  • 4 scoops vanilla ice cream
Pears Foster Flambe

Pears Foster Flambe

Directions:

  1. In a large skillet over medium heat, combine the butter, cinnamon (if using) and the brown sugar. Cook gently until sugar is dissolved, stirring continuously.
  2. Add the banana liqueur and pears to the skillet and cook until the pears begin to brown, turning them a few times for even color.
  3. Take the pan off the heat and carefully add the rum (SEE VIDEO OF THE FLAMBEED PEARS). Place the skillet back on the burner – be careful as the alcohol will ignite (we call this flambé). Allow the rum to cook off for a minute (flame will dissipate).
  4. Divide the pears among four serving dishes, top with the pan sauce and then ice cream. Serve immediately.

Serves 4.

Easy Pears Foster
Serves 4
Bananas Foster is a dessert originally-created at Brenna’s Restaurant in New Orleans back in the 1950s. The popular dish consists of ripe bananas cooked in a butter, dark rum, banana liquor and brown sugar sauce then topped with vanilla ice cream. It’s decadent, old school and a most perfect dish.
Write a review
Print
Prep Time
10 min
Cook Time
5 min
Total Time
15 min
Prep Time
10 min
Cook Time
5 min
Total Time
15 min
Ingredients
  1. • ½ stick (1/4 cup) butter
  2. • ½ tsp. ground cinnamon (optional. I leave it out as I don’t like cinnamon)
  3. • 1 cup brown sugar
  4. • ¼ cup banana liqueur
  5. • 29-ounce can of pear halves, drained of their liquid (rinsed if in syrup)
  6. • ¼ cup dark rum
  7. • 4 scoops vanilla ice cream
Instructions
  1. 1. In a large skillet over medium heat, combine the butter, cinnamon (if using) and the brown sugar. Cook gently until sugar is dissolved, stirring continuously.
  2. 2. Add the banana liqueur and pears to the skillet and cook until the pears begin to brown, turning them a few times for even color.
  3. 3. Take the pan off the heat and carefully add the rum. Place the skillet back on the burner – be careful as the alcohol will ignite (we call this flambé). Allow the rum to cook off for a minute (flame will dissipate).
  4. 4. Divide the pears among four serving dishes, top with the pan sauce and then ice cream. Serve immediately.
Food & Wine Chickie Insider https://www.foodandwinechickie.com/
Top Dishes for Mardi Gras Celebrations

Top Dishes for Mardi Gras Celebrations

According to Wikipedia, Mardi Gras, also called Fat Tuesday, refers to events of the Carnival celebrations, beginning on or after the Christian feasts of the Epiphany (Three Kings Day) and culminating on the day before Ash Wednesday. Mardi Gras is French for “Fat Tuesday”, reflecting the practice of the last night of eating richer, fatty foods before the ritual fasting of the Lenten season.

I’ve always liked Mardi Gras. When I was a young child in Canada, my grandma used to dress my sister and me up in costumes and take us trick or treating on her street. Back then, kids dressed up just like for Halloween and collected treats.

Now that I’m an adult, the holiday is still centered on treats, in the form of actual food and I don’t miss a chance to celebrate with New Orleans-worthy dishes. Here are some of my top dishes for Mardi Gras celebrations.

Crawfish Bisque

Easy Mardi Gras Beignets

Easy Crawfish Etouffee

New Orleans Jambalaya

Laissez les bons temps rouler!

Veronique


Easy Miso Butter Sauce

Easy Miso Butter Sauce

Miso Butter SauceMy hubby fixed our Blue Apron dinner last night and our dish, pork chop with miso butter sauce was outstanding. What made the dish was the rich, slightly salty, umami-packed miso butter sauce. It would go great with steaks or chicken or vegetables or just about anything.

Ingredients:

  • 3 Tbsp. sweet white miso paste
  • 1 Tbsp. soy glaze
  • 1/2 cup water
  • 2 Tbsp. butter

Directions:

  1. Whisk the first 3 ingredients in a bowl.
  2. Add sauce to a sauté pan (even better if you just cooked your protein in the pan and there’s fond leftover) over medium heat and cook for 30 seconds, whisking constantly.
  3. Turn off the heat, add the butter and whisk for another 30 seconds. Season with salt and pepper.

Yields enough sauce for two entrees.

Cheers,

Veronique

Prosciutto Wrapped Maple Sweet Potatoes

Prosciutto Wrapped Maple Sweet Potatoes

Sweet Potato Fries

Prosciutto Wrapped Maple Sweet Potatoes – come on, that sounds so good!

I’m from Quebec so my side dishes often feature maple syrup. It’s just a perfect ingredient, that’s great in both sweet and savory dishes and I use it frequently.

When I was asked to bring a Thanksgiving side dish recently, I wanted to do sweet potatoes, but not the traditional oversweet version with marshmallow topping that very few people actually like (in my circle anyways). This recipe is perfect as it still features the traditional sweet potatoes but they’re in finger food size in fries wrapped in salty prosciutto then glazed with maple syrup. There’s nothing to NOT like here folks.

The sweet potatoes will be in various size so aim to get to around 24 ‘fries’. If that means less than four potatoes, do less or add more prosciutto and do more fries!

Cooking for a crowd, double the recipe!

Ingredients:

  • 4 long medium-size sweet potatoes, peeled and cut into 24 fries/wedges
  • 1 Tbsp. vegetable oil
  • Sprinkling of salt and pepper
  • 6-8 ounces thinly-sliced Prosciutto
  • ¼ cup maple syrup
  • 1 tsp. ground cinnamon
  • ¼ tsp. cayenne pepper
Sweet Potato Fries

Unbaked Sweet Potato Fries

Directions:

  1. Preheat the oven to 425 degrees F. Line two large rimmed baking sheets with parchment paper.
  2. Place the sweet potato fries in a large bowl and drizzle them with oil. Sprinkle generously with salt and pepper, then toss to coat.
  3. Cut the Prosciutto pieces into two long strips. Wrap one Prosciutto strip around each potato fry, tucking the ends under the bottom. Bake for 20 minutes.
  4. In a small bowl, whisk together the maple syrup, cinnamon and cayenne pepper. Set aside.
  5. Brush the maple syrup mixture over the potato fries and bake an additional 5 minutes. Serve warm, or at room temperature.

Inspired from this recipe.