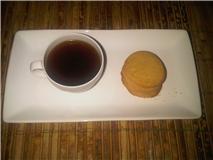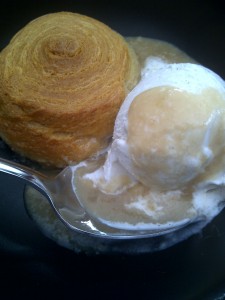
Maple Delights (Délices à l’Erable)

Maple Delights (Délices à l’Erable)

My aunt, Francoise, from Quebec shared her simple recipe for simple maple treats that’s a breeze to prepare.

Ingredients:

  • 3/4 cup light brown sugar
  • 1/4 cup maple syrup (see ‘notes’ below)
  • 1 cup heavy whipping cream
  • 1 8-ounce can of Pillsbury crescent rolls

Directions:

  1. Heat oven to 375 degrees.
  2. In a 9-inch pie plate, combine the brown sugar, maple syrup and heavy cream using a fork to create a homogenous mixture.  Set aside.
  3. Take the crescent rolls out of the packaging, but do not unroll.  Using a sharp knife, cut the rolls into 8 slices of the same width.  Place all the dough slices on their sides on top of the maple cream mixture.
  4. Place the pie plate unto a cookie sheets (who wants to risk spillovers?) then into the oven and bake for 25-30 minutes, until the treats are golden brown.
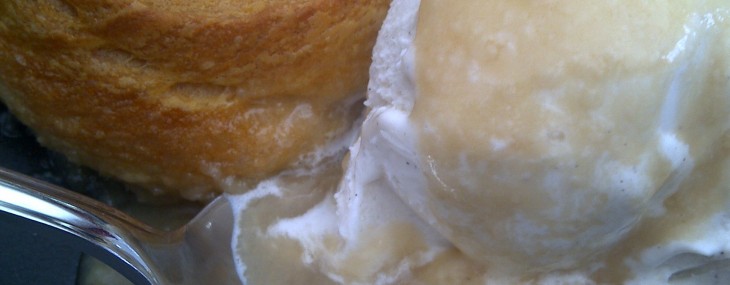
  5. Remove the pie plate from the oven, and let the treats cool for about 15 minutes before serving with either Maple Whipped Cream or vanilla ice cream.

Makes 8 servings.

Notes: Don’t waste top notch maple syrup to bake or cook with, less fancy grade will do just fine and often offers stronger maple flavors.
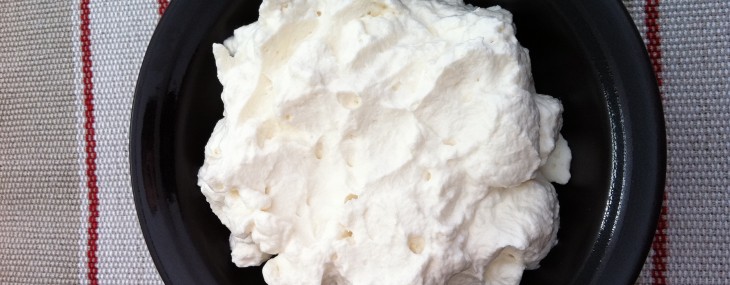
Maple Whipped Cream (Crème Fouettée à l’Erable)

Maple Whipped Cream (Crème Fouettée à l’Erable)

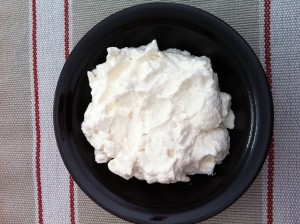
The addition of maple syrup to whipped cream is a stroke of genius by my aunt, Francoise, who generously shared her recipe.

Ingredients:

  • 3/4 cup heavy whipping cream
  • 1/4 cup maple syrup (see ‘notes’ below)

Directions:

  1. In the bowl of an electric mixer, add the cream.  Start the mixer on low for 30 seconds, then increase the speed to high and mix until very soft peaks form, about 1 1/2 minutes.
  2. With the mixer running, add the maple syrup in a steady stream to the whipping cream until fully incorporated.  Mix until medium peaks form, an additional 2 minutes.  Serve.

Makes 6 dollop-size servings.

Notes: Don’t waste top notch maple syrup to bake or cook with, less fancy grade will do just fine and often offers stronger maple flavors.  For best results, chill the bowl of the electric mixer for 20 minutes in the freezer before making the whipped cream.
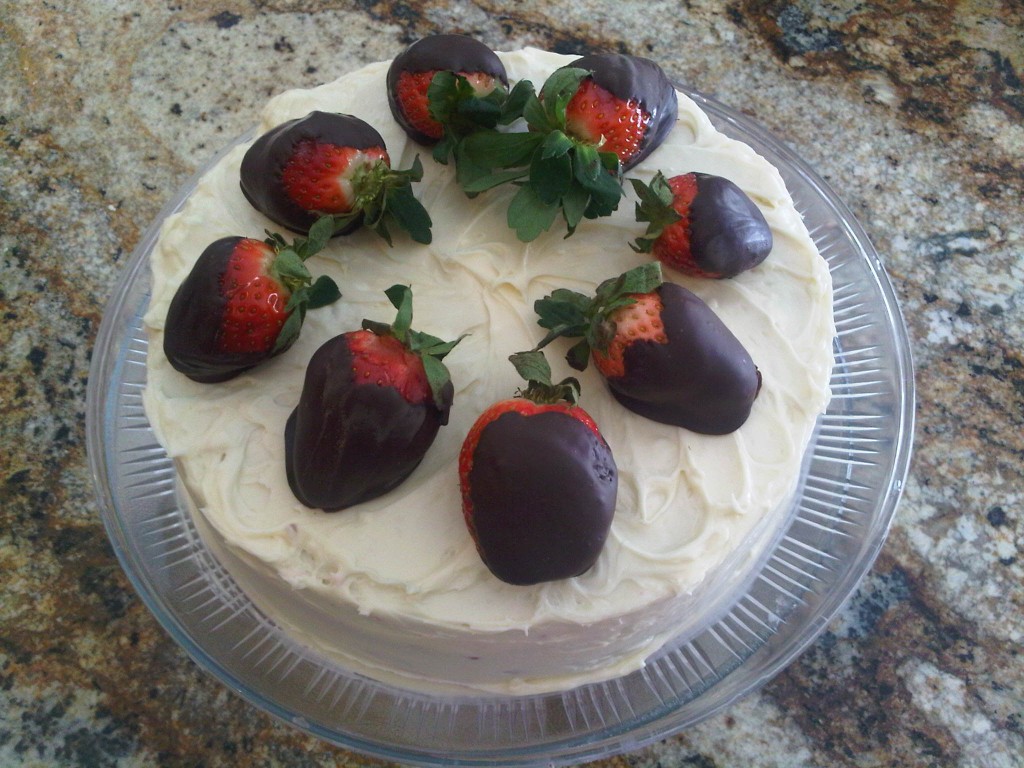
Red Velvet Cake with Chocolate-Covered Strawberries

Red Velvet Cake with Chocolate-Covered Strawberries

Red Velvet Cake with Chocolate-Covered Strawberries

There are many theories as to the true origin of the Red Velvet Cake.  Whether you believe it to be a southern traditional devil’s food cake tinted red with beet juice, a northern one dating back to the 1950s when Pillsbury Bake-Off contests were held at the Waldorf-Astoria and where the cake was possibly introduced or one first served at Eaton’s department store, and named Lady Eaton, in Canada, one thing is certain, this cake is loved by all.

My first try at this cake dates back to the early 1990s when I realized someone had switched the tiny bottle of red food coloring with a green one in a kit of four mini bottles.  This left me with only one small red bottle that resulted in my cake being Pepto-Bismol pink.  These days, one can find red food coloring in 1-ounce bottles that simplify the process.

Red Velvet Cake Ingredients

Ingredients:

  • 2 1/2 cups cake flour
  • 1 tsp salt
  • 1 tsp baking powder
  • 2 tbsp unsweetened cocoa powder
  • 2 ounces red food coloring
  • 1 1/2 cups granulated sugar
  • 1/2 cup (1 stick) butter, at room temperature
  • 2 large eggs, at room temperature
  • 1 tsp pure vanilla extract
  • 1 cup buttermilk
  • 1 tsp white vinegar
  • 1 tsp baking soda

Directions:

  1. Preheat oven to 350 degrees. Using cooking spray or a bit of softened butter, coat two 9-inch round cake pans.
  2. In a medium bowl, combine the flour, salt and baking powder.
  3. In a small bowl, blend the food coloring and cocoa powder with a teaspoon to create a smooth mixture.
  4. In the bowl of an electric mixer, cream the sugar and the butter until light and fluffy, about three minutes, scraping down the sides of the bowl with a rubber spatula every minute.
  5. Add the eggs to the butter mixture, one at a time, mixing well after each one.
  6. Add the food coloring mixture and mix well, about 1 minute, scraping down the sides of the bowl with a rubber spatula.
  7. Add half of the flour mixture to the creamed butter mixture, then add half of the buttermilk. Add the rest of flour mixture, then the rest of the buttermilk.  Be sure to scrape down the sides of the bowl with a rubber spatula to ensure the batter in completely blended without white streaks of batter.
  8. In a small bowl, combine the vinegar and the baking soda with a teaspoon to form a bubbly mixture.   Add the mixture to the cake batter and stir gently until just combined.
  9. Pour half of the batter evenly in each cake pans and place them in the preheated oven. Bake for 25-30 minutes.
  10. Cool the cakes in their pans for 10 minutes then remove the cakes from the pans and allow to cool completely on wire racks.
  11. Using a serrated knife, slice each cake in half horizontally.  Place one of the 4 cake slices on a large platter or cake stand, and cover with a thin layer (about 1/2 cup) of Cream Cheese Frosting using an offset spatula or butter knife.  Repeat process with the remaining 3 slices, ensuring that the top layer is the flattest slice – this will ensure a smooth surface for the finished cake.
  12. Crumb coat the entire cake with a thin layer of frosting (about a cup) then refrigerate for 30-60 minutes.  Finish frosting the cake with the rest of the frosting then refrigerate.  Serve within a day at room temperature.

Notes: To be extra festive, I dipped large strawberries into 3 ounces of dark chocolate that I microwaved in a small bowl for 90 seconds, stirring every 30 seconds.

Asian Meatball Stew

Asian Meatball Stew

Asian Meatballs

My dad’s mother, Antoinette, raised 10 kids on limited financial resources and managed to provide healthy meals while stretching her food budget.  Even now, if someone happens to stop by her home unexpectedly around lunchtime, she keeps them for a meal consisting of a soup, salad, entrée and dessert!  At the young age of 87, Grandma’s finally sharing some of her family-favorite recipes, and here’s one for Asian Saucy Meatballs that she serves over white rice.

Meatball Ingredients:

  • 1 pound ground beef
  • 1 pound ground pork
  • 1 large onion, chopped
  • 1 tsp Chinese 5 Spice powder
  • ½ tsp each salt and pepper
  • 12 saltine crackers, crushed

Sauce Ingredients:

  • 1 12-ounce bottle chili sauce
  • 1 cup water
  • ¼ cup brown sugar
  • 1 tbsp soy sauce
  • 1 tbsp lemon juice
  • 1 tbsp mustard, yellow or Dijon

Meatball Directions:

  1. In a large bowl, combine all the ingredients and form golf ball-size meatballs.
  2. Place meatballs in a single layer in an oven-proof dish.

Sauce Directions:

  1. Heat oven to 350 degrees.
  2. In a medium bowl, whisk all the ingredients.
  3. Pour sauce over the meatballs, cover dish with aluminum foil and bake for 1 hour.

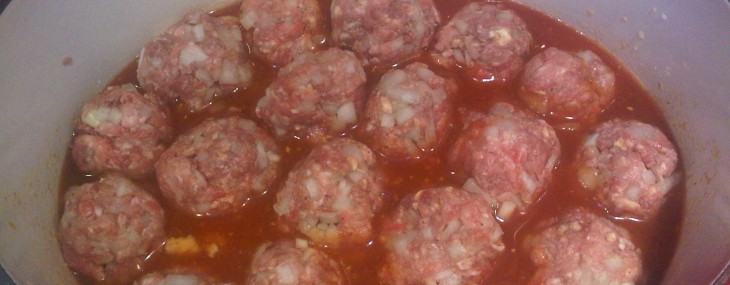
    Uncooked Meatballs

  4. Serve over white rice.

6 servings, about 20 meatballs.

Note: Finished product freezes well.  Recipe can be made in a slow cooker – cook meatballs in sauce on low for 6-8 hours.  You’ll see from the uncooked meatballs photo that the onions are roughly chopped.

5 Simple Soups to Try this Winter

5 Simple Soups to Try this Winter

Thai Soup

Soup is a favorite at my house and I try to make it most weekends.  Thought I’d share some of the soups I’ve made recently that have earned me some rave reviews.

5 Simple Soups to Try this Winter:

  1. Butternut Squash & White Asparagus Bisque
  2. Cremini Mushroom Velouté Soup
  3. Chunky Tomato-Basil Bisque
  4. Tom Ka Gai (Thai lemongrass and coconut soup)
  5. Cream of Leek and Celery Soup

Let me know which soup you end up trying!  Stay warm,

Veronique

Québec Sucre à la Crème

Québec Sucre à la Crème

Sucre a la Creme

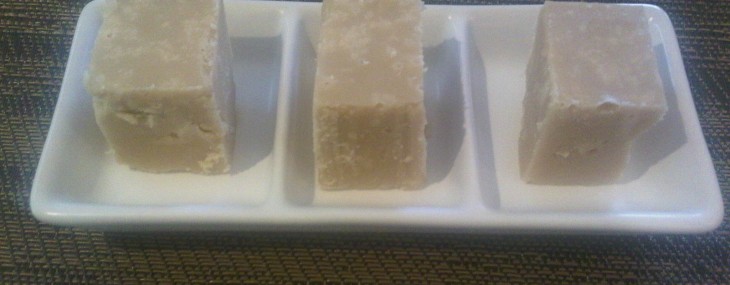
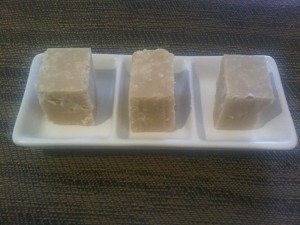
Sucre a la creme (butterscotch fudge) is a French-Canadian tradition. Growing up in Quebec, my grandma, who was an amazing baker, made sucre à la crème for us and froze batches of it so we’d have this sweet treat year-around.

Conceptually, sucre à la crème is similar to fudge, but with a sugary-grainy consistency and caramel flavor that’s decadent and delicious. Back in the day, mom or grandma would hand-mix the hot butterscotch mixture to its desired texture. For me, the hand-mixer works just as well and saves me 30 minutes of arm wrestling with my wooden spoon.

Although several of my family members have great recipes for sucre à la crème, my grandma’s sister, Marie-Laure, was the queen of the sweet treats and here is her interpretation.

Ingredients:

  • 3 cups brown sugar
  • 3 cups granulated sugar
  • 3 cups heavy cream
  • 2 tsp. pure vanilla extract

Directions:

  1. Place the sugars and cream in a large, heavy saucepan over medium-high heat. Stirring constantly, bring the sugar mixture to a boil, and then cook for 12 minutes.  Don’t stop stirring as the mixture will quickly stick to the bottom of the pan or worse, boil over causing a HUGE mess.
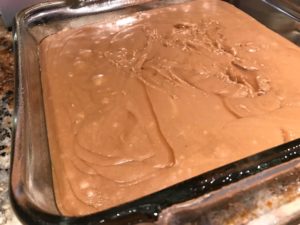
  2. Place 2 cups of ice cubes in a large bowl, then add 4 cups of cold water. Place a slightly smaller bowl over the ice bath then pour the hot sugar mixture in the medium bowl over the ice bath, making sure no water touches the hot mixture. Add the vanilla to the sugar mixture then beat with an electric hand-mixer for 8 minutes, or until the mixture lightens in color and has thickened.
  3. Pour the thickened sugar mixture in a greased 8×8 pan, cover with aluminum foil and refrigerate for several hours to harden. Cut into small squares.

Yields about 30 candy pieces.

Notes: You could add a cup of chopped walnuts to the mixture before pouring into the 8×8 pan.  The candies can be frozen for up to a month, wrapped in plastic wrap and stored in an air-tight container.

Cauliflower au Gratin

Cauliflower au Gratin

Cauliflower au Gratin

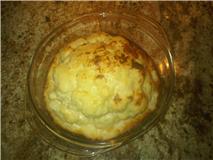
My mother used to make this dish while I was growing up and it was always a special treat.  She’d serve cauliflower florets, and I’ve modernized the recipe a little to feature a whole head of cauliflower for a bit of ‘wow’.

Ingredients:

  • 1 tbsp kosher salt
  • 1 medium cauliflower head
  • 3 tbsp butter
  • 2 tbsp all-purpose flour
  • 1 cup whole milk
  • 1 cup light cream
  • 1/2 tsp each salt & pepper
  • 1/4 tsp grated nutmeg
  • 1/2 cup grated Gruyere or Emmental
  • 1/2 cup grated Mozzarella
  • 1/2 cup grated Parmesan

Directions:

  1. Preheat the oven to 400 degrees.
  2. In a deep pot of boiling water, add the salt then the cauliflower, core side down (top of the head up) and cook for 20-25 minutes, until tender but still a bit form.  Drain, then return to warm pot until ready to use.
  3. While the cauliflower is boiling, melt the butter in a medium saucepan over medium-low heat. Sprinkle the flour over the butter and stir for about 2 minutes, creating a light roux.
  4. Increase the heat to medium-high under the roux.  Add the milk and the cream and whisk the mixture until it boils, then cook for 2 minutes, until a thick sauce is created.  Add salt, pepper and nutmeg.
  5. In a medium bowl, combine the Gruyere/Emmental, the Mozzarella and the Parmesan.
  6. Add 1 ladleful of sauce on the bottom of a 2 quart baking dish.  Place the cauliflower on the sauce then pour the rest of the sauce over the cauliflower.
  7. Sprinkle the cheeses over the cauliflower then bake for 25 to 30 minutes, until the cheese is melted and browned.

6 Servings.

Note: You can easily replace the cauliflower with broccoli or do a combination of both vegetables.

There’s Nothing to Eat in this House – Maple Sugar Candy

There’s Nothing to Eat in this House – Maple Sugar Candy

Maple Sugar Candy

Maple Sugar Candy

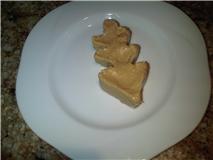
This ‘recipe’ goes into my ‘There’s Nothing to Eat in this House’ sweet treats archive since my guy was in the mood for a sweet treat last night and I didn’t have some of the ingredients required for proper baking on hand.  Don’t shy away from trying this candy if you don’t have a cookie cutter to use as most of the time, when I make it, the softened candy doesn’t make it out of the saucepan!

Ingredient:

  • 1/2 cup maple syrup

Directions:

  1. Pour syrup into a small saucepan over high heat.  Bring to a boil and cook until the syrup forms small bubbles and appears foamy, about 4 minutes.
  2. Remove from the heat and let cool for 2 minutes over a trivet or potholder.  Using a wooden spoon, stir constantly until the syrup thickens to a pale tan, but spreadable consistency (think Nutella consistency) – about 15 minutes.  Don’t stir past this consistency or you’ll not be able to mold the candy (which is okay if you’re not trying to make the candy look cute – what I do 90% of the time).
  3. Coat any medium-sized cookie cutter with cooking spray, then spoon the maple mixture into it.  Use spoon and fingertips to get the mixture completely into the mold, then smooth the top.
  4. Let cool for 30 minutes and unmold.  Enjoy by breaking small pieces.

Makes one candy.

Notes:  I know that when you’re stirring the syrup, before it begins to cool, it seems like the mixture will never turn to the buttery, creamy mixture from the photos, but it absolutely will.  If you cook the syrup too long for the type of saucepan you have, the mixture will harden quickly and you’ll have to enjoy the candy by breaking into small bites – which is completely okay!

Biscuits Frigidaire (Icebox Cookies)

Biscuits Frigidaire (Icebox Cookies)

Growing up, my mom made the most succulent food one could ever want, but she wasn’t a baker.  In her short baked goods repertoire, is what we French Canadians call “Biscuits Frigidaire”.  Each time I make these icebox cookies, it brings back memories of getting the wax paper-wrapped cookie dough log out of the freezer so we could enjoy fresh baked treats within minutes.  This is truly one of the easiest cookie recipes, but one that yields crisps-chewy golden cookies on a moment’s notice.  Perfect for when unexpected guests stop by for coffee and you need a quick treat to serve.

Icebox Cookies

Icebox Cookies

Ingredients:

  • 1 cup (2 sticks) butter, softened
  • 1/2 cup light brown sugar
  • 1/2 cup granulated sugar
  • 1 egg, lightly beaten
  • 1 tsp pure vanilla extract
  • 2 cups all-purpose flour
  • 1/2 tsp baking soda
  • 1/4 tsp salt

Cookie Dough Directions:

  1. In the bowl of an electric mixer, cream the butter and the two sugars until light and fluffy – 4 minutes.
  2. Add the egg and the vanilla extract and beat to incorporate.
  3. In a medium bowl, sift the flour, the baking soda and the salt.
  4. Add the flour mixture to the butter-sugar mixture in half cup additions, beating to just incorporate between additions, then finally beat until dough begins to come together – no more than 2 minutes total.
  5. Divide the dough in half and place each half on a large sheet of wax paper (dough should be at the top of the sheet – think top of a sheet of paper).  Shape the dough into a log using the wax paper to help smooth the dough (think sushi roll), then wrap each dough log completely with the wax paper and twist each end to seal the logs.  Place logs in the refrigerator for several hours and up to three days (logs can be frozen for up to a month).

Baking Directions:

  1. Preheat oven to 400 degrees.  Line two cookie sheets with parchment paper or lightly spray with cooking spray.
  2. Cut the logs into 1/4 inch thick slices using a sharp, thin-blade knife.  Place the cookies on the cookie sheets approximately two inches apart.
  3. Bake 10-11 minutes or until lightly golden brown. Remove from oven and cool completely on a wire rack (waiting for the cookies to cool completely will be extremely difficult).

Makes about three dozen cookies.

Notes:  Cooled, baked cookies can be stored in an air-tight container at room temperature for a week (you’ll never have these cookies on hand for a week – trust me).  Thaw frozen cookie dough in the refrigerator before slicing.  Want to vary the recipe a bit?  Add mini chocolate chips to one of the dough logs!

5 Fall Recipes to Warm Up To

5 Fall Recipes to Warm Up To

Autumn is here whether we were ready for summer to end or not.  Embrace the new season with these five comfy recipes:

What are some of your favorite fall recipes?  Please share links, photos or general instructions!