Prosciutto Wrapped Maple Sweet Potatoes

Prosciutto Wrapped Maple Sweet Potatoes

Sweet Potato Fries

Prosciutto Wrapped Maple Sweet Potatoes – come on, that sounds so good!

I’m from Quebec so my side dishes often feature maple syrup. It’s just a perfect ingredient, that’s great in both sweet and savory dishes and I use it frequently.

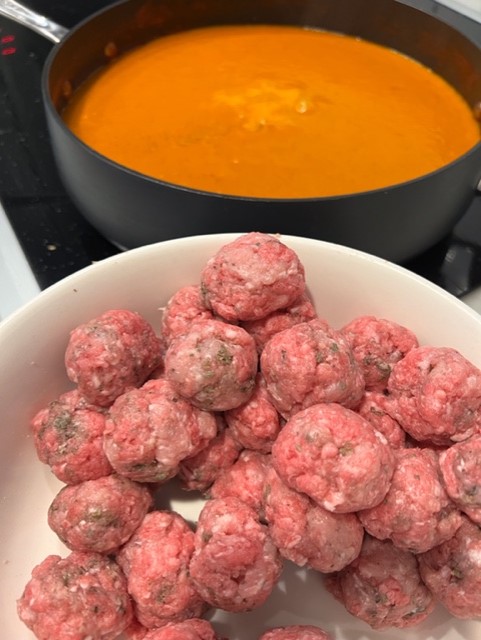
When I was asked to bring a Thanksgiving side dish recently, I wanted to do sweet potatoes, but not the traditional oversweet version with marshmallow topping that very few people actually like (in my circle anyways). This recipe is perfect as it still features the traditional sweet potatoes but they’re in finger food size in fries wrapped in salty prosciutto then glazed with maple syrup. There’s nothing to NOT like here folks.

The sweet potatoes will be in various size so aim to get to around 24 ‘fries’. If that means less than four potatoes, do less or add more prosciutto and do more fries!

Cooking for a crowd, double the recipe!

Ingredients:

  • 4 long medium-size sweet potatoes, peeled and cut into 24 fries/wedges
  • 1 Tbsp. vegetable oil
  • Sprinkling of salt and pepper
  • 6-8 ounces thinly-sliced Prosciutto
  • ¼ cup maple syrup
  • 1 tsp. ground cinnamon
  • ¼ tsp. cayenne pepper
Sweet Potato Fries

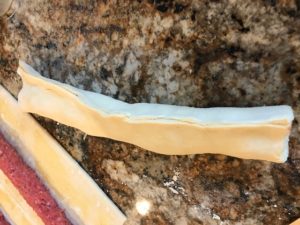
Unbaked Sweet Potato Fries

Directions:

  1. Preheat the oven to 425 degrees F. Line two large rimmed baking sheets with parchment paper.
  2. Place the sweet potato fries in a large bowl and drizzle them with oil. Sprinkle generously with salt and pepper, then toss to coat.
  3. Cut the Prosciutto pieces into two long strips. Wrap one Prosciutto strip around each potato fry, tucking the ends under the bottom. Bake for 20 minutes.
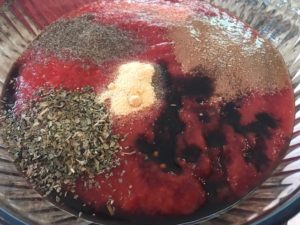
  4. In a small bowl, whisk together the maple syrup, cinnamon and cayenne pepper. Set aside.
  5. Brush the maple syrup mixture over the potato fries and bake an additional 5 minutes. Serve warm, or at room temperature.

Inspired from this recipe.

Short Cut Creamy Chicken and Rice Soup

Short Cut Creamy Chicken and Rice Soup

Creamy Chicken and Rice Soup
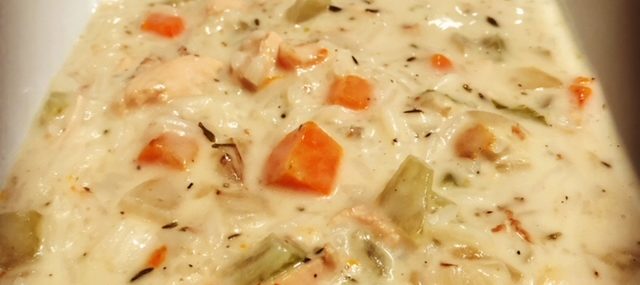
Creamy chicken and rice soup has been a favorite of mine since my youth going to St Hubert restaurant in Quebec. St Hubert is a popular restaurant chain and the rice and creamy chicken soup it makes is pure comfort in a bowl.

This week as I was prepping for my pot of Sunday soup, I decided to make my typical chicken soup, creamy. Then I decided to replace the hand-cut spaghetti (popular at my home) with the rice from a boil-in bag. The result – velvety texture, big chicken flavor and hearty enough to almost use a fork to eat!

The “Short Cut” Part

I had leftover cooked chicken and homemade chicken broth in the freezer so I used that, but you could poach your own chicken to use or simply buy a rotisserie chicken at the grocery store and grab store-bought broth. I’m a big believer in taking shortcuts in the kitchen, especially when they result in the heaven-in-a-bowl that is this Creamy Chicken and Rice Soup.

Ingredients

  • 4 Tbsp. vegetable oil
  • 1 small yellow onion, diced
  • 2 medium-large carrots, diced
  • 3 stalks celery, diced
  • 1 garlic clove, minced
  • 6 cups low-sodium chicken broth
  • ½ tsp. each dried thyme and sage
  • 1 tsp. each salt and pepper
  • 2 cups diced roasted chicken
  • 1 cup heavy cream
  • 3 tsp. corn starch diluted into ½ cup cold water
  • 1 Uncle Ben’s Boil-In Bag rice packet, uncooked OR 2 cups cooked long grain rice

Directions

  1. In a large pot over medium-high heat, warm the oil. Add the onion, carrot, celery and sauté until tender, about 10 minutes, stirring frequently. Add the garlic and cook an additional minute.
  2. Add chicken broth, thyme, sage, salt, black pepper and chicken and cook for 10 more minutes.
  3. Add the cream and bring the soup to a simmer. Add the corn starch mixture and stir for 2 minutes until the soup has thickened.
  4. Add the uncooked rice, lower heat to medium-low and cook 15 more minutes. If using cooked rice, reduce the cooking time for 2 minutes.

Serves 6 generously.

Easy Dutch Sausage Bread (Saucijzenbroodjes)

Easy Dutch Sausage Bread (Saucijzenbroodjes)

Dutch Sausage Breads
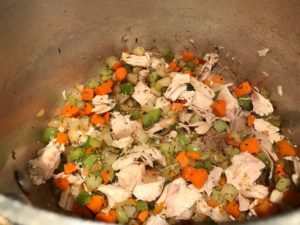
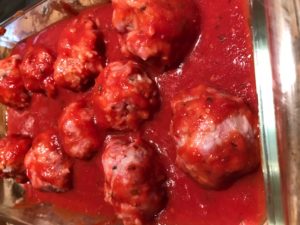
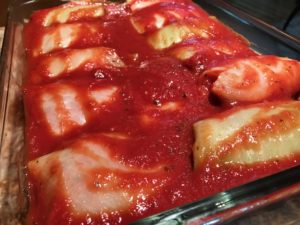
My guy is Dutch and every time we go to Holland (okay, The Netherlands), the one food item he has to have right away is a warm Dutch sausage bread, also known as Saucijzenbroodjes in Dutch. Every bakery and grocery store there sells Saucijzenbroodjes and they’re just as the name sounds – sausage stuffed into bread. My Mother-In-Law’s boyfriend usually brings a brown bag full of them each morning and it’s a quick way to get my hubby out of bed.

I’ve been looking for a recipe for Dutch Sausage Bread and didn’t want to have to make my own dough, so found a recipe that uses puff pastry. The sausage mix comes together very quickly – think meatballs – and gets shaped in long meat “snakes” that are then rolled in the defrosted puff pastry and baked.

These Saucijzenbroodjes reheat really well in the oven or, as we do, in the toaster oven for a quick breakfast. After baking them, I let them cool completely then place in storage containers in the fridge for up to 5 days.

Dutch Sausage Bread would be great when family is in town for the holidays as you could make them a couple days in advance and simply reheat them in the morning.

Ingredients

  • 1 pound lean ground beef
  • 1 large egg
  • 2 Tbsp. milk
  • 1 tsp. salt
  • 1/8 tsp. nutmeg
  • ½ tsp. freshly ground pepper
  • ½ cup panko bread crumbs
  • 1 tsp. Worcestershire sauce
  • 4 sheets puff pastry, thawed (I use two 17.3-ounce boxes of Pepperidge Farm Puff Pastry Sheets).
  • 1 egg yolk
  • 1 tsp. milk

Directions:

  1. Preheat oven to 400° F. Line two baking sheets with parchment paper, set aside.
  2. Carefully unfold the pastry sheets. Lengthwise, cut each rectangular sheet in half to create 8 separate sheets (see photo).
  3. In a medium mixing bowl, combine first 8 ingredients – don’t overmix to keep the mixture tender and moist. Divide into 8 equal portions.
  4. Roll each of the 8 portions of meat into long snakes and place across the middle of each of the 8 puff pastry rectangles (see photo). Fold each pastry sheet around its meat “sausage” and, using wet fingers, pinch the top and bottom edges together, enclosing the sausage. Note that if you end up with excess pastry when you pinch both ends, you can cut some off (I had to do this). Cut each of the 8 rolls into 4 equal sized portions, for a total of 32 sausage breads.
  5. Beat egg yolk with milk and brush egg mixture over the breads.
  6. Place the sausage breads onto the parchment-lined baking sheets and bake for 20-25 minutes or until pastry is crisp and golden brown (mine took 25 minutes).

Adapted from this recipe.

Stuffed Cabbage Rolls (Galumpkis)

Stuffed Cabbage Rolls (Galumpkis)

Stuffed Cabbage

While stuffed cabbage rolls are common to the cuisines of the Balkans, Central, Northern, Eastern Europe, Iran, West Asia and Northern China, when I think of this comfy dish, I think of Eastern Europe.

Galumpkis, as stuffed cabbage is known in Eastern Europe, are typically meat-filled steam cabbage leaves bakes in tomato sauce. As is common, I add cooked white rice to my meat mixture, which consists of pork, veal and beef. The rolls steam under a foil-wrapped baking dish and then I remove the foil to let the tops crisp up a bit.

Note that you’ll have leftovers of the meat mixture. I roll the meat up in meatballs and cook in tomato sauce for 30 minutes.

Ingredients:

For the sauce:

  • 1 (15 ounce) can tomato sauce
  • 1 tsp. each dried basil, garlic powder and onion powder
  • 3 Tbsp. brown sugar
  • 3 Tbsp. Worcestershire sauce
  • 2 Tbsp. lemon juice

For the cabbage rolls:

  • 12 cabbage leaves, boiled in salted water for 5 minutes
  • 2 pounds of ground meats – pork, veal, beef (known as meatloaf mix)
  • 1 cup cooked white rice ( I use boil-in bags)
  • 1 large egg, beaten
  • ¼ cup milk
  • ½ medium onion, diced
  • 2 garlic cloves, minced
  • ½ tsp. each salt and black pepper
  • 1 tsp. dried basil

Instructions:

  1. Preheat oven to 350 degrees.
  2. Mix together tomato sauce, basil, garlic powder, onion powder, brown sugar, Worcestershire sauce and lemon juice. Add ½ cup of the sauce on the bottom of a 9×13 oven-proof pan. Set aside.
  3. In large bowl, combine the meats, rice, egg, milk, onion, garlic, salt, pepper and basil. Place about 2 tablespoons of the meat mixture in center of each cabbage leaf and roll up (like a burrito). Place the rolls, seam side down in the prepared pan. Cover the cabbage rolls with the rest of the tomato sauce, cover with aluminum foil and bake for 60 minutes. Remove the foil and cook an additional 15 minutes, until the tops of the rolls are a little crisp.

Makes 12 cabbage rolls, 4-6 healthy servings.

Blueberry Panna Cotta

Blueberry Panna Cotta

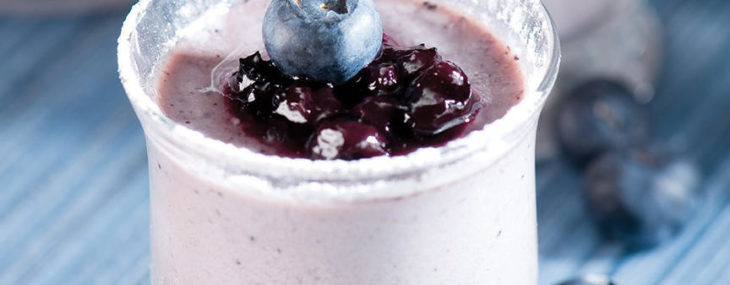
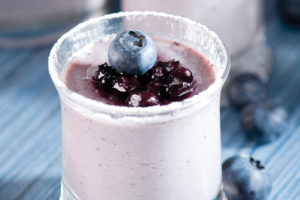
Panna cotta, which means “cooked cream” in Italian, is a popular dessert of sweetened cream that’s thickened with gelatin. Since I love custards of all kinds, I’m a fan of panna cotta.

I’ve been in a blueberry mood since the start of the season. I put blueberry on my cereal to start the day and end the day with blueberries on my Greek yogurt – just yum!

This is a simple recipe that’s easy enough to make for a week night but impressive enough to make for a special occasion.

Ingredients:

  • 3 cups whole milk
  • 4 ounce cream cheese
  • 1 Tbsp. honey
  • 10 Tbsp. blueberry jam
  • 1 tsp. pure vanilla extract
  • 1 packet (7 grams or 2 ½ tsp.) flavorless gelatin (I use Knox)
  • 6 ½ Tbsp. water
  • ½ cup fresh blueberries

Directions:

  1. In a heavy saucepan over low heat, cook the milk, cream cheese, honey, 4 tablespoons of jam and the vanilla for 15 minutes, stirring frequently. Set aside for later use.
  2. In a small bowl, dissolve the gelatin in 1/5 cup of cold water. Add the rest of the water to a saucepan and bring to a boil. Add the hot water to the dissolved gelatin and whisk to fully incorporate. Add the gelatin mixture to the milk/cheese mixture and whisk to incorporate.
  3. Using a hand mixer, blend the mixture until mostly smooth, about 2 minutes, then push through a fine sieve to remove any lumps. Add to small glass cups (yields enough for 6) and refrigerate at least 6 hours. Garnish with the remaining jam and fresh blueberries.

Yields 6 panna cottas.

Mini Meatball Tomato Basil Soup

Mini Meatball Tomato Basil Soup

My guy’s been asking me to make his childhood favorite – tomato soup with mini meatballs, for a while now. I just didn’t get it…what could be better than rich tomato soup on its own, or perhaps served with a melty grilled cheese? Mini meatballs and tomato soup is actually better, that’s the answer.

Last weekend, I finally agreed to try to replicate this soup from my hubby’s childhood in The Netherlands and he loved it! I used my tomato basil soup as the base and just made tiny, the size of large marbles, meatballs that simmered in the rich soup.

To make things really easy, I used my stick blender to pure the soup but you could follow the recipe and use a standard blender also – up to you how much clean up you’re looking to do!

Ingredients:

  • Recipe for Tomato Basil Soup
  • 1 pound ground beef
  • 1 large egg
  • 2 Tbsp. bread crumbs
  • 1 tsp. Worcestershire sauce
  • 1 Tbsp. grated Parmesan cheese
  • 1 tsp. each, salt, black pepper and dry basil

Directions:

  1. Make the soup according to the linked recipe. Once the soup is cooked and has been pureed, turn the heat to low and keep warm.
  2. In a large bowl, combine all the remaining ingredients and stir to fully combine, making sure to not over mix. I use my hands for this. For meatballs the size of a large marble. Add the mini meatballs to the simmering soup and cook, stirring occasionally, for 20 minutes.

Makes 6 servings.

Vermont Cheddar Cheese Soup

Vermont Cheddar Cheese Soup

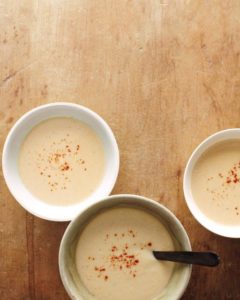
Rich, comforting, decadent…just some words to describe this cheesy soup. To take this soup from starter to entree, I sometimes serve it with a bacon grilled cheese…can there ever be too much cheese?

Ingredients:

  • 1/4 cup (1/2 stick) butter
  • 1 large onion, chopped
  • 2 celery stalks, chopped
  • 2 garlic cloves, minced
  • 1/4 cup all-purpose flour
  • 1/2 tsp. paprika
  • 1/4 tsp. cayenne pepper
  • 4 cups chicken broth
  • 1 1/2 cups half and half (or light cream)
  • 2 1/2 cups white Vermont cheddar cheese, grated (10 ounces)
  • 1/2 tsp. Worcestershire sauce
  • Dash Tabasco
  • 1/4 cup parsley

Directions:

  1. Melt butter in a heavy saucepan over medium-high heat.
  2. Add onions, celery and garlic and sauté 5 minutes.
  3. Mix in flour, paprika, and cayenne pepper and cook, stirring frequently, for 3 minutes.
  4. Gradually stir in broth, bring to a simmer and cook for 2 minutes, stirring frequently. Reduce heat to medium-low, cover and simmer 15 minutes. 
  5. Using a stick blender or standard blender, purée the soup until completely smooth.
  6. Add half and half to soup and bring to a simmer over medium heat. 
  7. Add cheese 1/2 cup at a time, stirring until cheese melts after each additions. 
  8. Add Worcestershire sauce, Tabasco and parsley. 
  9. Season to taste with salt and pepper.

Yields 6 Servings.

Easy Apple Butter

Easy Apple Butter

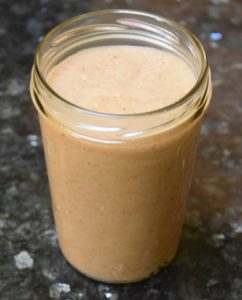
It’s fall and since I love to go apple picking at our local orchard, I’m always looking for recipes that involve apples. My main issue with apple recipes – I don’t like cinnamon! With this simple apple butter recipe, one could use or leave out the cinnamon – brilliant!
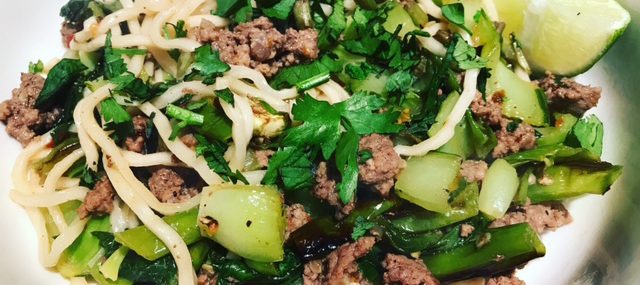
This recipe yields about 4 8-ounce canning jars and they can be kept refrigerated for a month. They make great hostess gifts!!  

I replace regular butter with this fab concoction on my toasts in the morning – it’s incredible.

Ingredients:

  • 12 apples, peeled, cored and cut into bite-size chunks (I always use my old favs – McIntosh)
  • ½ cup light brown sugar
  • 1 tsp. pure vanilla extract
  • 1 pinch of cinnamon, optional
  • ½ cup softened butter

Directions:

  1. Add the apple chunks and the brown sugar to a heavy pan over medium heat. Cook for 15 minutes partially covered, stirring occasionally. If the apple mixture gets dry, add ¼ cup water. Some apples are juicier than others are. After the 15 minutes have elapsed, add the vanilla and the cinnamon (if using).
  2. Add the cooked apples to the bowl of an electric mixer and mix until very smooth, about 2 minutes. Add the butter and continue to mix until fully incorporated and creamy, another minute.
  3. Add the apple butter to 8-ounce canning jars and keep refrigerated up to a month.
Sesame Beef Lo Mein

Sesame Beef Lo Mein

I’ve been using Blue Apron on and off for a few years and always love their recipes, fresh ingredients and simple-to-follow-directions.

Last week, our favorite of three meals was the Sesame Beef Lo Mein with its big flavors and slightly chewy, fabulous noodles.

Blue Apron’s allowing me to publish this recipe that I can’t wait to try again.

Ingredients:

  • 10 ounces ground beef
  • ½ pound fresh lo mein noodles
  • 3 ounces fresh shishito peppers, chopped
  • 2 cloves garlic, minced
  • 1 lime, quartered
  • ½ pound baby bok choy, chopped
  • 1 tsp. each chopped fresh cilantro and fresh mint
  • 2 Tbsp. sushi sauce
  • 1 Tbsp. sesame oil
  • 1 Tbsp. Sambal Oelek

Directions:

  1. Preheat the oven to 475°F.
  2. Heat a small pot of salted water to boiling on high.
  3. Roast the peppers: Place the peppers on a sheet pan; drizzle with olive oil and season with salt and pepper. Toss to coat. Arrange in a single layer. Roast 7 to 8 minutes, or until lightly browned and softened. Remove from the oven. Set aside in a warm place.
  4. Start the beef: While the peppers roast, in a medium pan, heat a drizzle of olive oil on medium-high until hot. Add the ground beef; season with salt and pepper. Cook, frequently breaking the meat apart with a spoon, 4 to 6 minutes, or until browned and cooked through. Add the garlic and bok choy to the pan. Cook, stirring frequently, 1 to 2 minutes, or until slightly softened and fragrant. Add ⅓ cup of water and as much of the sambal oelek as you’d like (I used the full amount), depending on how spicy you’d like the dish to be; season with salt and pepper. Cook, stirring occasionally, 3 to 4 minutes, or until saucy. Turn off the heat. Stir in the juice of 2 lime wedges. Season with salt and pepper to taste.
  5. Cook the noodles: While the bok choy cooks, add the noodles to the pot of boiling water (carefully separating with your hands before adding). Cook 2 to 4 minutes, or until tender. Reserving ½ cup of the noodle cooking water, drain thoroughly.
  6. Finish the noodles & plate your dish: To the pan of cooked bok choy and beef, add the cooked noodles, roasted peppers, sesame oil, sushi sauce, and half the reserved noodle cooking water. Season with salt and pepper. Cook on medium high, stirring vigorously, 30 seconds to 1 minute, or until thoroughly combined. (If the sauce seems dry, gradually add the remaining noodle cooking water to achieve your desired consistency.) Season with salt and pepper to taste.
  7. Divide the finished noodles between 2 dishes. Garnish with the cilantro and mint (tearing the mint leaves just before adding). Serve with the remaining lime wedges on the side.

Makes 2 servings.

Coconut Milk Roasted Chicken

Coconut Milk Roasted Chicken

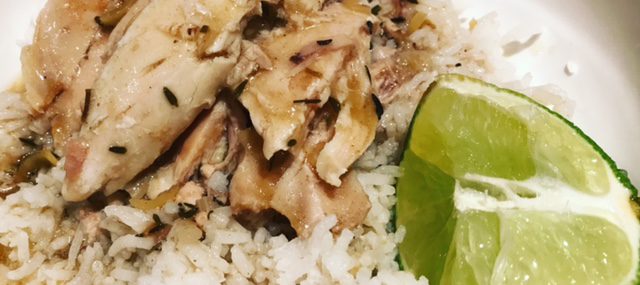
I had a couple of whole chickens in the freezer that I wanted to cook now that fall is here and I need the space in the freezer for bags of foods from my summer crops.

This recipe follows in my goal to make tasty dishes even when “there’s nothing to eat in this house” so I opened the pantry and gathered leftover produce and made a roasted chicken with tons of Thai/Indian flavors that was a huge hit at my home.

I know roast chicken and white rice isn’t the easiest to photograph BUT, this was definitely a tasty dish that took about 20 minutes to prepare (plus roasting time).

Ingredients:

  • 5-6 pound whole chicken, washed under cool water and patted dry with paper towels
  • 1 tsp. each salt and black pepper
  • 3 large garlic cloves, minced
  • 2 Tbsp. finely chopped lemongrass
  • 1 Tbsp. grated ginger
  • 1 tsp. thyme
  • 1 Tbsp. olive oil
  • ¼ cup vegetable oil
  • 2 tsp. smoked paprika
  • 1 tsp. garam masala (use curry powder if you don’t have)
  • ½ tsp. cayenne pepper
  • 1 medium onion diced
  • 13-ounce can coconut milk (I used light)
  • 1 cup chicken broth (or 14.5-ounce can)
  • Slurry – 1 Tbsp. cornstarch whisked with ¼ cup water
  • Squeeze of lime juice (optional)

Directions:

  1. Preheat the oven to 375 degrees.
  2. Rub the chicken all over with salt and pepper.
  3. In a small bowl, combine garlic, lemongrass, ginger, thyme and olive oil to create a paste.
  4. Rub half the garlic mixture on the chicken, reserving the other half. You can use the chicken right away or store it for a day, wrapped in the fridge.
  5. In a large Dutch oven over medium-high heat, allow the vegetable oil to warm for a minute. Add the chicken, breast-side down and brown for about 5 minutes then turn and brown the other side of the chicken for 5 minutes.
  6. Remove the chicken from the Dutch oven to a platter.
  7. To the hot Dutch oven, add the second half of the garlic mixture, the paprika, the garam masala and the cayenne pepper and cook for a minute until fragrant.
  8. Add the diced onion to the spices and cook until softened, about 4 minutes, stirring frequently.
  9. Add the coconut milk and the broth to the onion mixture and stir.
  10. Return the chicken to the Dutch oven, cover and place in the oven. Cook for 1 ½ – 2 hours, until very tender, basting the chicken with the broth periodically.
  11. Remove the chicken from the pot to a serving dish and place the Dutch oven on the stove over high heat. When the broth is simmering, add the corn starch slurry and whisk for 2 minutes until the sauce has thicken.
  12. Carve the chicken and serve with Easy Basmati Rice and the sauce. I love adding a squeeze of lime juice to this dish, but it’s optional.

Serves 6.


Inspired by this recipe.