Sugarpova Chocolate Mousse

Sugarpova Chocolate Mousse

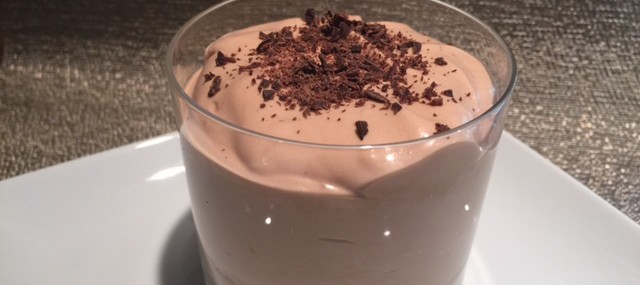
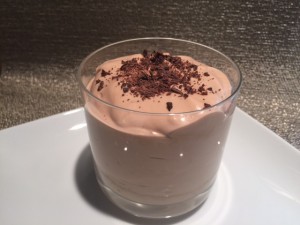
Chocolate Mousse CupA few weeks ago, I was approached by a new chocolate line to create an exclusive recipe using its product. I don’t typically do product reviews, but I was intrigued since the new brand, Sugarpova Premium Chocolates, is by Maria Sharapova, the international tennis sensation, who is the company’s founder.
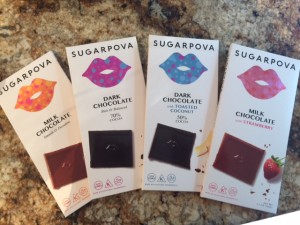
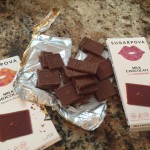
Sugarpova offers a decadent collection of 100g chocolate bars in Dark, Milk, Dark with Toasted Coconut and Milk with Strawberry. The unique product is non-GMO, Certified Kosher, Halal and made with natural ingredients. The bars have a suggested retail price of $3.99 to $4.99 and are available at www.sugarpova.com.

The samples I received were:

Sugarpova Bars

DARK CHOCOLATE COCONUT – “50% cocoa dark chocolate is made all the richer with the delightful addition of toasted coconut. A match made in heaven, you’re sure to fall in love with this tempting combination”.

MILK CHOCOLATE STRAWBERRY – “Is there anything better than chocolate dipped strawberries? Treat yourself to a taste of luxury anytime with the only bar that combines creamy milk chocolate with the flavor of fresh strawberries”.

70% COCOA DARK CHOCOLATE – “Kick back, relax, and indulge in the full-bodied flavor of 70% premium dark chocolate. Not too sweet, it engages all your senses with every perfect bite”.

MILK CHOCOLATE – “Take a break from the hustle and bustle with a smooth, creamy bite of premium milk chocolate. We won’t tell if it ends up being more than just one bite”.

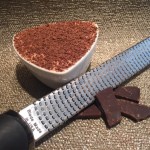
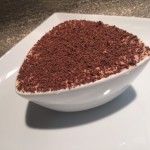
I wanted to use as many of the bars as I could in my recipe, but since I’m not a coconut fan, I skipped using that one. I thought of doing a mousse as soon as I saw the chocolate/strawberry bar – what a great compliment in flavors! I combined the strawberry bar with the milk chocolate one in the mousse and topped each serving with a healthy grating of the dark chocolate. I plated a couple different ways to showcase the mousse in various portion sizes and appearance.

Ingredients:

  • 1 100g Sugarpova Milk Chocolate bar and 1 100g Sugarpova Milk Chocolate Strawberry bar, chopped into small pieces (could also use 200g semisweet chocolate chips)
  • 1/3 cup plus 1 Tbsp. granulated sugar, divided
  • 2 cups heavy cream
  • 4 large egg yolks
  • 1-ounce piece of Sugarpova Dark Chocolate, optional

Directions:

  1. Place the chopped chocolate in a microwave-safe bowl and microwave on medium power for 30 seconds. Stir and continue to cook for another 30 seconds. Allow to cool while proceeding with the following steps.
  2. In the bowl of an electric mixer, add the tablespoon of sugar to the cream. Beat for 2-3 minutes or until soft peaks form. Set aside.
  3. In a metal or heat-resistant glass bowl placed over a saucepan of barely simmering water, combine the remaining sugar and the egg yolks. Whisk the mixture for 3 minutes until smooth, fluffy and doubled in volume.
  4. Using a rubber spatula, combine the melted and cooled chocolate with the yolk mixture until no eggy streaks are left.
  5. Gently fold half the whipped cream into the chocolate mixture. Once fully combined, add the remaining whipped cream and again, gently fold in. Don’t overmix, you want this light and fluffy – a few darker chocolate streaks are okay.
  6. Pipe or spoon the mousse into single-serving size dishes or glasses and refrigerate until set, at least 2 hours. The mixture will feel a bit runny but that’s okay, the mousse will stiffen after chilling.
  7. Grate the dark chocolate over the individual mousse cups and serve.

About Sugarpova: Sugarpova continues to have double-digit growth year after year since its launch. Currently, the brand has retail penetration in 22 countries all over the world and is sold in a variety of retail partners and online. The founder and international tennis sensation is Maria Sharapova, whose sweet tooth and love for little indulgences, motivated her to create a candy company specializing in gummies and sweets of quality and craftsmanship. For more information, visit http://www.sugarpova.com.

Cheers,

Veronique

Quick and Easy Pesto

Quick and Easy Pesto

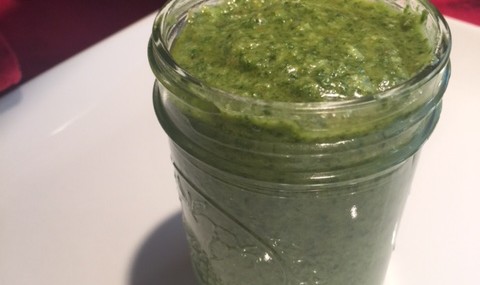
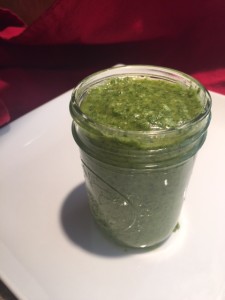
Jarred PestoEvery spring, I plant basil in my garden as it’s one of my favorite fresh herbs. By mid-summer, I have so much basil that I wonder why I planted so much for a 2-person household. Every summer is the same “why did I plant so much again”.
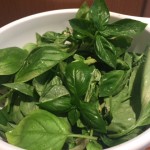
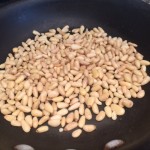
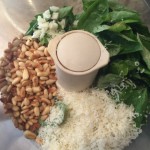
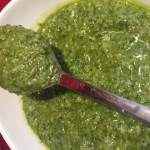
Luckily, there’s pesto. Yesterday, I picked a whole bunch of basil leaves and made thick, luscious pesto that I’ll toss with gnocchi tonight and freeze in ice cube trays for future use.

This recipe yields about a cup of pesto, but it can easily be doubled if you have tons of basil, like I do.

It’s perfect tossed with pasta, spread on sandwiches or used as a topping for grilled/roasted chicken or fish.

Ingredients

  • 1/3 cup, pine nuts (could use cashews or slivered almonds)
  • 4 cups fresh basil leaves, cleaned, dried and slightly packed
  • ⅓ cup freshly-grated Parmesan cheese
  • 2 garlic cloves, finely chopped
  • 2 tsp. freshly-squeezed lemon juice
  • Zest of half a lemon
  • 2 teaspoons lemon juice
  • ¼ tsp. red pepper flakes, optional
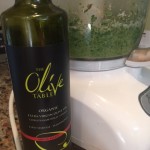
  • ½ cup high-quality olive oil

Instructions

  1. In a small skillet over medium heat, toast the pine nuts for 2-3 minutes until golden brown. Carefully watch this process and shake the skillet periodically to ensure the nuts don’t burn.
  2. In a food processor (could use a blender), add the remaining ingredients, including the nuts, except the oil. Pulse for about a minute then run for about 30 seconds until the ingredients are finely incorporated.
  3. With the food processor running, stream the oil into the pesto until fully emulsified, about 30 seconds. Taste the pesto and add more Parmesan cheese if you want a cheesier pesto.
  4. I store the pesto I’m going to use within a week in a canning jar in the fridge. For anything over a week, I place the pesto in ice cube trays, freeze fully then pop out of the trays, place in zip top bags and freeze for up to a couple months.
Make Ahead Twice Baked Potatoes

Make Ahead Twice Baked Potatoes

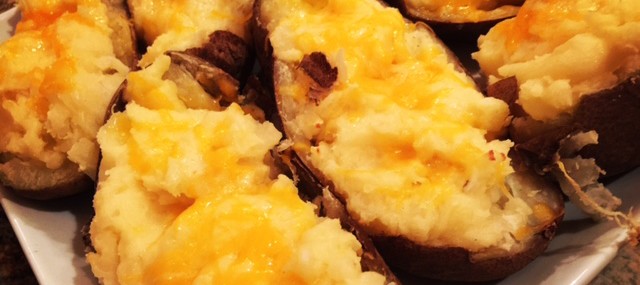
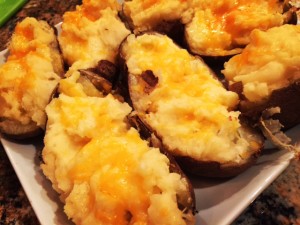
Twice Baked PotatoesSummer’s all about BBQs and outdoor parties and the last thing I want to do once my guests have arrived is to slave over a hot stove in the kitchen. We also attend a lot of outdoor events where I’m always puzzled with what to bring besides desserts.
These old-school twice-baked potatoes are simple-to-make and can be prepared ahead and reheated on the grill or a camp fire before dinner.

Don’t feel like making your own mashed potatoes? Just buy some at the grocery store and doctor them up with the cheese, bacon (if using) and scallions.

Ingredients:

  • 3 large baking potatoes
  • 2 Tbsp. softened butter
  • 1/3 cup half & half (could use whole milk), warmed in the microwave for a minute
  • 4 bacon slices, cooked and crumbled (optional)
  • 1 cup sharp Cheddar cheese
  • ½ cup sour cream (optional)
  • ½ cup chopped scallions (optional)

Directions:

  1. Cook potatoes until fork-tender and allow to cool until just cool enough to handle. Cut each potato lengthwise and, using a spoon, scoop out most of the flesh without cutting through the skins. Place the scooped out flesh in a bowl and add the butter, half & half, bacon (if using) and cheese and mash until mostly smooth.
  2. Fill the potato skin shells with the mashed potatoes. At this point, you may wrap the potatoes in foil and keep in the fridge for a couple days until ready to use (go to step 3 when ready to cook) or, place on a cookie sheet for immediate use.
  3. Preheat oven to 400 degrees and cook room-temperature potatoes for 25 minutes, until slightly golden.
  4. Top the hot potatoes with sour cream and chopped scallions, if using.

Makes 6 servings.

Streusel Top Blueberry Custard Pie

Streusel Top Blueberry Custard Pie

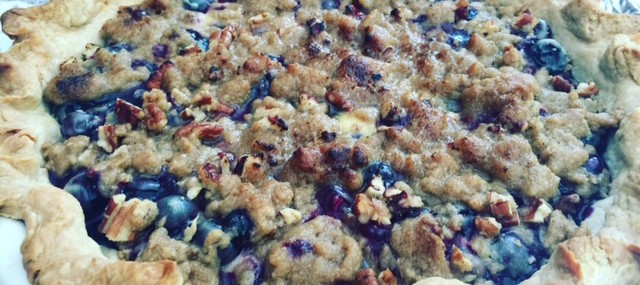
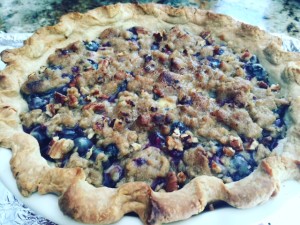
Blueberry Streudel PieEvery summer, I host at least a couple lobster parties and what could scream “Maine” more than a blueberry pie?! I live in New Jersey where blueberries abound and are sweet and delicious, so double whammy.
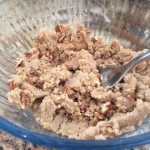
I typically make my Crumb Top Blueberry Pie, but this weekend, I decided to change the crumble top to a nutty streusel top and it was a nice change with the extra crunchiness from the pecans. I also did a custard-like bottom which was well-received by my guests.

As always, don’t fret if you’re not into making your own pie dough, just use a store-bought one. I make my own Fail Proof Pie Crust using my VERY simple food processor technique.  

Filling Ingredients

  • 8 ounces sour cream (I used reduced-fat but don’t recommend non-fat)
  • 1 large egg
  • ¾ cup granulated sugar
  • 2 Tbsp. all-purpose flour
  • ¼ tsp. salt
  • 2 tsp. pure vanilla extract
  • 3 cups fresh blueberries
  • 1 9-inch pie crust, unbaked

Streusel Topping:

  • ⅓ cup flour
  • ½ cup brown sugar
  • ¼ cup butter, softened
  • ½ cup chopped pecans

Filling Instructions

  1. Preheat oven to 400 degrees.
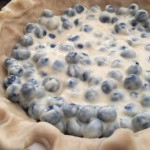
  2. In a large bowl, combine the sour cream, egg, ¾ cup sugar, 2 tablespoons flour, salt and vanilla extract until smooth. Using a rubber spatula, gently add the blueberries to the sour cream mixture then pour into the unbaked pie crust. Bake for 25 minutes.

Streusel Instructions:

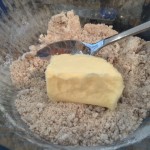
  1. Combine the flour and brown sugar in a medium bowl. Using your fingertips, incorporate the butter into the dry ingredients until the mixture is the texture of course sand. Add the pecans. Sprinkle the streusel topping over the surface of the pie after it has baked 25 minutes. Bake an additional 20 minutes, until the topping has browned – after 10 minutes of baking, if the crust or the streusel gets too dark, cover loosely with foil.
  2. Serve the pie warm with vanilla ice cream.

The addition of pecans and the custard bottom were inspired by this recipe.

Baby Back Ribs with Balsamic BBQ Sauce

Baby Back Ribs with Balsamic BBQ Sauce

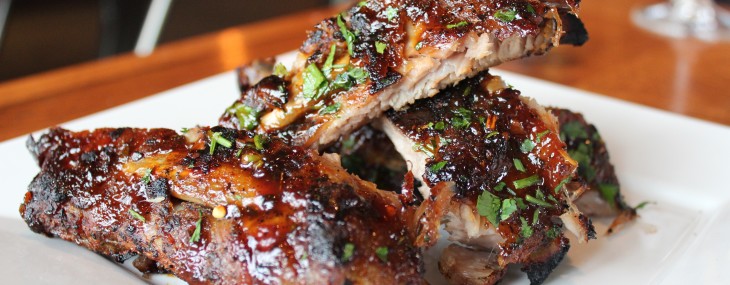
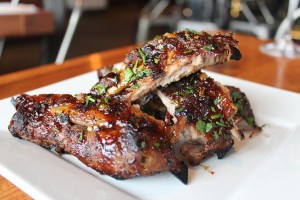
Pork RibsWhile I have my go-to ribs recipe, I’m always looking for new ideas and variations from the old standard. This recipe, provided by Executive Chef Josh Bernstein of Spuntino Wine Bar & Italian Tapas, puts a bit of an Italian spin on the backyard BBQ favorite.

Ingredients:

Rib Spice Rub:

  • 1/4 cup dried basil
  • 1/4 cup dried oregano
  • 1/2 cup paprika
  • 1/2 cup garlic powder
  • 1/2 cup onion powder
  • 1/2 cup ground fennel seed
  • 3/4 cup dark brown sugar           
  • 1 cup kosher salt
  • 2 Tbsp. red pepper flakes
  • 2 Tbsp. ground black pepper

Balsamic BBQ Sauce:

  • 2 cups balsamic vinegar
  • 1-1/2 cups ketchup
  • 3/4 cup dark brown sugar
  • 1 Tbsp. fresh chopped garlic
  • 2 Tbsp. Worcestershire sauce
  • 2 Tbsp. Dijon mustard
  • 1 tsp. Kosher salt             
  • 1/2 tsp. ground black pepper

Ribs:

  • 4 racks of baby back ribs
  • 1 cup rib spice rub
  • 2 Tbsp. chopped Italian parsley
  • 1 cup balsamic BBQ sauce

Method:

For the Rib Spice Rub:
Place all of the ingredients into a bowl.  Mix well.  Keep in an air tight container for up to 3 weeks.  This recipe will make more than needed for the ribs.  It is a good marinade for other meats as well.

For the Balsamic BBQ Sauce:
Combine all of the ingredients in a sauce pot.  Bring to a boil.  Reduce the flame and simmer for 45 minutes.  Stir every 10 minutes.  Strain and cool.

For the Ribs:
Spread the spice rub evenly over the ribs.  Wrap each in aluminum foil.  Allow to marinate overnight in the refrigerator for at least 12 hours.  Place the ribs, still wrapped in aluminum foil, into a 350 degree oven for 2 hours.  At this point you can cool them down and refrigerate up to 7 days or freeze for up to 2 months.  If not, brush the ribs with the BBQ sauce and place onto a hot grill.  Cook until the sauce is hot on the ribs.  Cut into 1-2 rib portions and garnish with parsley.

Serves 4.

Black Skillet Frittata by Piattino

Black Skillet Frittata by Piattino

Black Skillet FrittataI love brunch and am always looking for creative dishes to serve at home when I host. I received this easy recipe for a meatless frittata from Piattino: A Neighborhood Bistro and wanted to share as it sounds delish.

Piattino, serving up modern twists to traditional Italian fare, is now serving an a la carte brunch menu on Saturday and Sundays from 11:00AM to 3:00PM, so locals could also go to the restaurant to try this dish!

Ingredients:

  • 2 ounces wild mushroom mix cooked
  • 2 ounces asparagus cut ½ inch long, blanched
  • 1 ounce blended oil
  • 1 tsp. chopped rosemary
  • 4 eggs cracked and beaten
  • 1 ounce prepared pesto
  • 2 ounces baby arugula
  • 1 tsp. olive oil
  • Pinch each of salt and pepper

Directions:

  1. Heat a black cast iron skillet over medium high heat on a burner. Once hot add blended oil and cooked vegetables. Stir vegetables with a wooden spoon until heated through. Add rosemary and eggs and stir again to combine the vegetables. Place the skillet in a 350 degree oven for 5-7 minutes or until eggs are semi firm to the touch.
  2. Remove skillet from oven and drizzle pesto on top of the egg. Toss arugula with olive oil, salt and pepper and place in center of the cast iron skillet, you want to create height from the arugula.

Makes one frittata.

About Piattino:

Nestled in Historic Mendham, Piattino brings its authentic, new age Italian dining experience directly to New Jersey.  Sourcing artisan ingredients from around the world and our own backyard, Piattino’s scratch-made, chef-driven menu includes a variety of mouthwatering antipasti’s, insalates, pastas and entrees. Piattino is also known locally for its delicious, hand-stretched Neapolitan style pizzas and sandizza’s (our version of a Panini) baked at 800 degrees in its imported Italian stone-fired oven using premium ingredients, ranging from truffled wild mushrooms to 24-month-aged prosciutto di Parma. The menu also features a regional food and drink specialties section celebrating the various styles served across the boot – including current items from the Aosta Valley Region – such as Charred Octopus, White Bean and Sausage soup, Mezzaluna Carbonnade artisan pizza, and much more.

88 East Main Street, Mendham, NJ – 973-543-0025.

Cheers,

Veronique

Spaghetti alla Carbonara

Spaghetti alla Carbonara

This Roman dish was created in the middle of the 20th century using simple ingredients: pasta, eggs, pork jowls (think bacon) and cheese, typically Pecorino.

I’m all about simple pasta dishes, especially during the week, so this is one of my go-to recipes. I’ve made this decadent dish using a few variations, adding peas, morel mushrooms and shrimps…it’s delicious any ways. Note that garlic isn’t authentic to pasta carbonara, but it’s so darn tasty that I include it. Don’t like garlic – omit it! I used red pepper flakes too, which aren’t authentic either…sue me purists!

While the eggs do get warmed when tossed with the hot pasta, they aren’t fully cooked. If slightly cooked eggs aren’t your thing, this is likely not the dish for you. If you can get past that, you’ll get addicted, like I am, to the creamy “sauce” created by the eggs, pasta water and cheese.

Ingredients:

  • 1 pound good quality spaghetti, I use Delverde
  • 1 Tbsp. olive oil
  • 8 ounces diced pancetta or slab bacon
  • 1 large garlic clove, finely minced
  • 3 large eggs
  • 1 cup grated Pecorino-Romano or Parmesan cheese, divided
  • ½ tsp. red pepper flakes (or black pepper if you prefer)

Directions:

  1. Bring a large pot of salted water to a boil over high heat. Add the spaghetti and cook 1 minute less than the cooking directions on the packaging recommend.
  2. While the pasta’s cooking, warm the oil in a medium skillet over medium-high heat. Add the pancetta and cook until browned, about three minutes, stirring occasionally. Add the garlic and cook for another minute. Place the pancetta/garlic and the oil they cooked in, in a large, heat-proof bowl and set aside to cool.
  3. In a medium bowl, whisk the eggs, 1/2 cup of the cheese and pepper flakes. Whisk until well blended.
  4. When the pasta’s just al dente, scoop it out of the water using a pasta fork or tongs, and into the bowl with the pancetta – don’t drain the pasta water out of the pot! Toss the pasta until coated in the oil from the pancetta.
  5. Add the egg mixture to the pasta and toss quickly to ensure the eggs don’t scramble – you might need to give this method a couple tries to get it right – it’s worth it!
  6. Add ¼ cup of pasta cooking water to the pasta then the remaining cheese. Keep tossing to create a silky, creamy sauce that coats the pasta. Serve immediately.

Serves two for dinner or four as a starter.

Pig & Prince Restaurant Duck Fat Grilled Cheese

Pig & Prince Restaurant Duck Fat Grilled Cheese

Today is National Grilled Cheese Day, a day dedicated to celebrating a national favorite: the grilled cheese sandwich. Chef Mike Carrino, of popular restaurant Pig & Prince Restaurant in Montclair, NJ, has masterfully created an elegant and delicious twist on a classic sandwich – the Duck Fat Grilled Cheese.

Duck Fat Grilled Cheese _ pig and princeThis elevated take on the ‘old reliable’ of sandwiches is sure to please die-hard grilled cheese lovers.

Duck Fat Grilled Cheese

  • 8 – ½ inch slices of artisanal rosemary sourdough
  • (or your favorite type of rustic bread)
  • 12 slices of muenster cheese
  • 12 slices of cypress grove, midnight moon cheese
  • 8 large slices of tomato
  • House made boursin cheese (see recipe below)
  • 16 slices of duck bacon (regular pork bacon can also be used)
  • 4 tbls melted butter
  • 4 tbls rendered duck fat (duck confit fat would be best)

Housemade Boursin:

  • 16oz cream cheese softened
  • ½ cup soft butter
  • 3 cloves garlic (microplane)
  • 1 tbsp chopped herbs
  • ¼ tsp chopped dried oregano
  • ¼ tsp chopped dill
  • ¼ tsp chopped basil
  • Salt and lemon to taste

In a medium bowl, mix all the boursin ingredients together until fully incorporated.

To assemble the grilled cheese:

  1. Spread some melted duck fat on the inside of the bread with a pastry brush.
  2. Smear your homemade boursin on the inside of each slice of bread.
  3. Layer 3 slices of Muenster on one side of the sandwich bread and 3 slices of Midnight Moon on the other side of the sandwich.
  4. Lay the tomato on the Midnight Moon side and then the duck bacon (or bacon) on top of the tomato.
  5. Place Muenster side on top in a large skillet, on medium heat, pour in melted butter and the remaining duck fat.
  6. Cook on each side for about 3 minutes each, moving often to keep the heat equally distributed.
  7. Remove from pan and allow to sit one to two minutes before cutting.

Happy National Grilled Cheese Day!

Veronique

Warm Brie with Honeyed Raspberries and Pistachios

Warm Brie with Honeyed Raspberries and Pistachios

This is an easy yet festive recipe I received from the folks at Driscoll’s Berries.

Original File Name: 4186-Rasp_Brie-014.tif

Ingredients:

  • 1/2 cup (2 ounces) shelled pistachios
  • 1 wheel (13.3 ounces) ripe Brie, box reserved, top rind sliced off, cheese chilled
  • 1/4 cup honey
  • 1 tsp. balsamic vinegar
  • 1/2 tsp. finely chopped fresh rosemary
  • 1 package (6 ounces or 1 1/4 cups) Driscoll’s Raspberries
  • Water crackers or baguette slices for serving

Directions:

  1. Preheat the oven to 350˙F.
  2. Spread the pistachios on a rimmed baking sheet. Bake, stirring occasionally, until lightly toasted and fragrant, about 10 minutes. Transfer to a plate.
  3. Place Brie, in its box, on baking sheet. Bake until warm and the top is softened, but not until cheese is oozing, about 15 minutes. Transfer cheese in box to serving platter.
  4. Stir honey, vinegar, and rosemary in a medium skillet over medium heat just until warm. Add raspberries and pistachios and gently fold in with a rubber spatula. Pour raspberry mixture over warm cheese. Serve at once, with the crackers for spreading.

Servings: 4 to 6

Easy Egg Cups

Easy Egg Cups

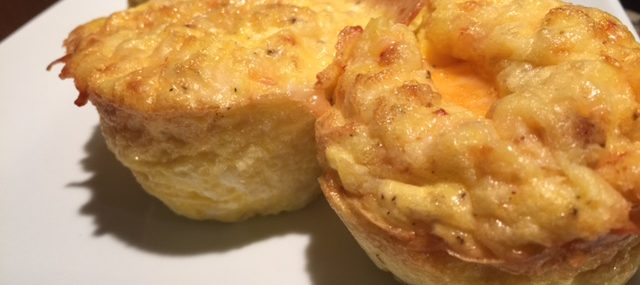
Breakfast, often said to be the most important meal of the day, is my favorite meal is the day. On the weekends, with more time on my hands, I have no issues making delicious, hearty breakfast, but on hectic weekday mornings…not as easy.

I’ve been making these cute and delicious egg cups on Sundays that I can have anytime during the week. They’re great for a quick breakfast with a piece of toast and even perfect for lunch with a side salad.

Ingredients:

  • 1 Tbsp. vegetable oil
  • 5 ounces baby spinach
  • 4 large eggs
  • ¼ cup water
  • ½ tsp. each salt and pepper
  • ½ cup shredded sharp cheddar cheese

Directions:

  1. Preheat the oven to 350 degrees.
  2. Generously coat two 4-ounce ramekins (or other small dishes) with cooking spray.
  3. Warm the oil in a large skillet over medium-high heat, add the spinach and sauté until fully wilted, 3-4 minutes. Set aside to cool for a few minutes.
  4. In a large mixing bowl, whisk the eggs with the water, salt and pepper until fully blended, about 1 minute. Don’t whisk less than a minute if you want fluffy, light eggs.
  5. Divide the cooked spinach in the ramekins. Divide the cheese over the spinach then pour the gg mixture over the cheese and spinach. Use a small fork to gently move the spinach and cheese around so the egg mixture gets evenly distributed to the bottom of the ramekins.
  6. Place the ramekins on a sheet tray to catch any drips and bake for about 25 minutes, or until the egg is set and not jittery.
  7. Let the egg cups cool completely then cover in plastic wrap and refrigerate until ready to use.
  8. To reheat, cover a ramekin with a paper towel and microwave for 60-90 seconds.

Makes 2 servings.