Chocolate Truffles

Chocolate Truffles

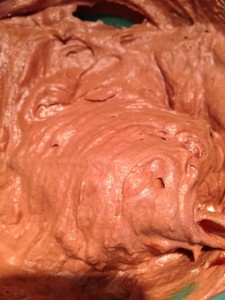
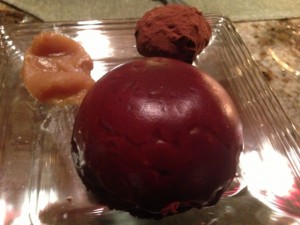
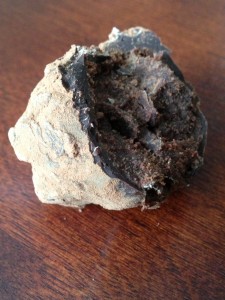
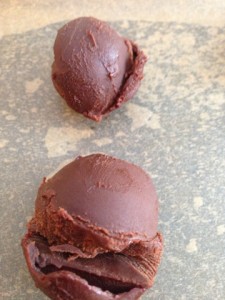
TruffleSomeone on Twitter shared a recipe for chocolate truffles by Alton Brown that had a great tip in it: use an ice cream scoop to coat the truffles in chocolate.

I changed a few of the ingredients and the directions, but use Alton’s basic recipe. Love using a good-quality Dutch-processed cocoa like Ghirardelli Unsweetened Cocoa Powder which is a bit bitter next to the rich chocolate ganache.

Ingredients

  • 10 ounces bittersweet chocolate, chopped
  • 3 Tbsp. butter
  • ½ cup heavy cream
  • 1 Tbsp. light corn syrup
  • ¼ cup Scotch Whiskey or Grand Marnier (for an orange flavor)
  • ½ cup Dutch process cocoa powder
  • 4 ounces semisweet chocolate, chopped
  • 4 ounces bittersweet chocolate, chopped

Truffle CentersDirections

  1. Place 10 ounces of bittersweet chocolate and the butter in a medium size bowl. Microwave for 1 minute, stirring well after 30 seconds. Allow to cool.
  2. Warm the heavy cream and the corn syrup in a small saucepan over medium heat until simmering. Remove from the heat and pour over the melted chocolate mixture. Let stand for 2 minutes. Using a rubber spatula, stir gently until all chocolate is melted and mixture is smooth and creamy. Gently stir in the Whiskey. Pour the mixture into an 8” x 8” baking dish and place in the refrigerator for 1 hour.
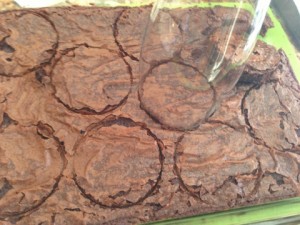
  3. Using a melon baller, scoop chocolate into your hands and roll gently between your palms to create a ball. Place balls onto a baking sheet lined with parchment paper and return to the refrigerator for 30 minutes.
  4. Place the cocoa powder on a plate and set aside.
  5. Place the 4 ounces each of semisweet and bittersweet chocolates into a medium size bowl. Microwave for 90 seconds, stirring well every 30 seconds.
  6. Remove the truffles from the refrigerator. Dip an ice cream scoop into the chocolate and turn upside down to remove excess chocolate. Place truffles 1 at time into the scoop and roll around until coated. Place the truffle into the plate with the cocoa powder. Move the truffle around to coat, leaving the truffle in the coating for 10 to 15 seconds before removing to a parchment-lined baking sheet. Repeat until all truffles are coated. Allow to set in a cool dry place for at least 1 hour then store in an airtight container in the refrigerator for up to 4 days, Serve at room temperature.

Makes about 30 truffles.

Smoked Salmon Lollipops

Smoked Salmon Lollipops

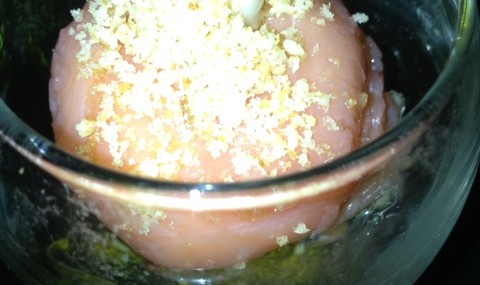
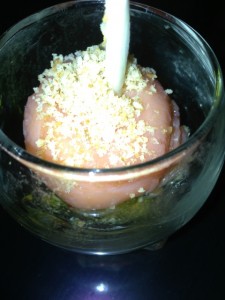
Salmon LollipopI ran across Chef Eric LeVine’s Smoked Salmon Lollipop recipe when compiling my New Year’s Eve dinner menu. I liked the idea of an upscale amuse-bouche that’s simple to create and can mostly be crafted in advance. I took a short cut by simply using bagels chips to create the ‘bagel dust’.

Ingredients:

  • 6 plain bagel chips
  • 10 ounces smoked salmon
  • 8 ounces cream cheese (don’t use the ‘soft’ kind)
  • 2 Tbsp. green onions sliced thinly
  • 1 tsp. capers
  • 2 tsp. lemon juice
  • ½ tsp. lemon zest
  • ½ tsp. each salt and pepper
  • 10 lollipop sticks (can be found at craft stores or Bed, Bath and Beyond)

Directions:

  1. Pulse the bagel chips in a food processor until they are finely ground, about 30 seconds. DO AHEAD: Bagel dust can be made in advanced and stored in a zip top bag for up to a week.
  2. Combine 6 ounces of smoked salmon, cream cheese, scallions, capers, lemon juice, zest and salt and pepper in a stand mixer with the paddle attachment until ingredients are combined. Refrigerate until firm, at least 2 hours.
  3. Roll the chilled mixture into 10, one-inch balls. Place on a sheet pan lined with parchment paper and put back into the refrigerator to firm up, at least 4 hours. DO AHEAD: Can be done up to this point two days prior to serving if covered in plastic wrap.
  4. Cut the remaining 4 ounces of salmon into 10 julienne strips and wrap around each of the cream cheese-salmon balls.
  5. Push lollipop sticks into smoked salmon balls. Sprinkle a generous pinch of bagel crumbs over the lollipops just before serving.

Makes 10 lollipops.

Festive and Simple Prime Rib

Festive and Simple Prime Rib

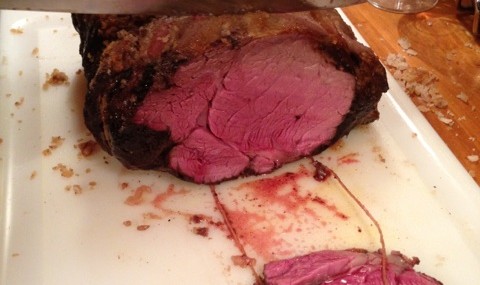
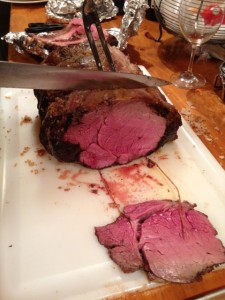
Prime Rib RareIn my small town in Quebec, there was always a place where one could be guaranteed a great meal – L’Arnold. The steakhouse closed a few years ago and what folks missed most about it was the fork-tender prime rib (rosbif as we refer to it back home).

My bother-in-law Etienne

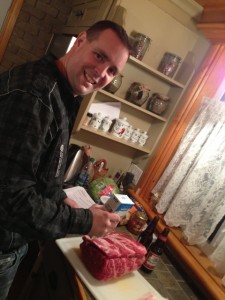
My brother-in-law Etienne

Last year, the former cook from the restaurant began hosting cooking classes where he taught the art of his prime rib. My brother-in-law, Etienne, attended the class and prepared a stellar prime rib for us for Christmas.

The gist of the prime rib preparation:

  1. Get a bone-on prime rib with the bones removed but reattached with kitchen twine.
  2. Salt and pepper the bone side moderately.
  3. Coat the entire surface (not the ends) of the prime rib with salt (1/8”) then lightly pepper over the salt. It’ll appear to be WAY more salt than you’d ever need, but don’t fret, it’ll be removed at the end of the cooking time.
  4. Roast uncovered in the oven at 350 degrees until a meat thermometer reads 124 degrees for medium-rare.
  5. Remove the roast from the oven, leaving the meat thermometer in place, and wrap with foil. Cover the foil with a dry kitchen towel. Let the roast rest covered in foil and the kitchen towel for 30-60 minutes until the meat thermometer reads 134.
  6. Uncover the meat, scrape the salt crust off, slice portions and serve with jus or brown sauce.

This method works well for any size prime rib. If you want the meat rare, remove the roast when the temperature is 122 degrees and let rest until it’s at 132 degrees. For medium, remove the roast when the temperature is 127 and let rest until it’s at 137.

Happy roasting!

Smooth as Silk Fantasy Fudge

Smooth as Silk Fantasy Fudge

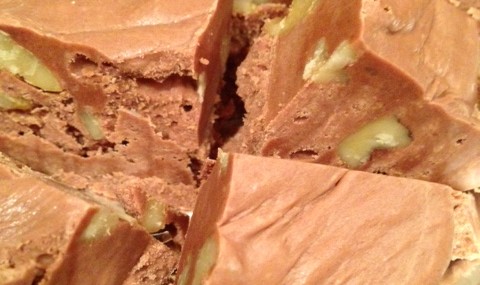
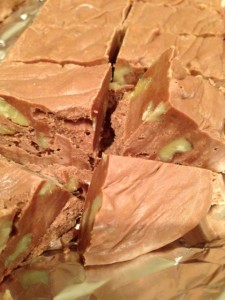
I’ve been making the Kraft Fantasy Fudge recipe for as long as I can remember. I find that I get great results every time. About 10 years ago, I began pulsing my granulated sugar in the food processor or the blender to get it to an almost powder consistency. This extra little effort has resulted in the silkiest of fudges and I highly recommend adopting this extra step.

Ingredients:

  • 3 cups granulated sugar, pulsed in the food processor for 1 minute
  • ¾ cup butter
  • 1 5-ounce can evaporated milk
  • 1 ½ cups semi-sweet chocolate chips
  • 1 7-ounce jar marshmallow crème
  • 1 tsp. pure vanilla extract
  • 1 cup chopped walnuts (optional)

Directions:

  1. Coat either a 9” x 9” or a 9” x 13” pan with cooking spray. Use a 9” x 9” pan for thicker fudge or a 9” x 13” for thinner fudge. I find the 9” x 13” works just fine as a little of this fudge goes a long way.
  2. In a heavy-bottom pan over medium heat, bring the sugar, butter and evaporated milk to a rolling boil, stirring occasionally. Once the sugar mixture starts to boil, cook for 4 minutes, stirring constantly. Remove from heat.
  3. Add the chocolate and the marshmallow crème to the hot sugar mixture and stir until fully melted. Add the vanilla and, if using, the walnuts. Stir to incorporate.
  4. Pour the mixture into the pan. Cool completely then cut into squares. Store in the refrigerator for a week or in the freezer for a month.

Makes about 40 treats.

World’s Best Hollandaise Sauce

World’s Best Hollandaise Sauce

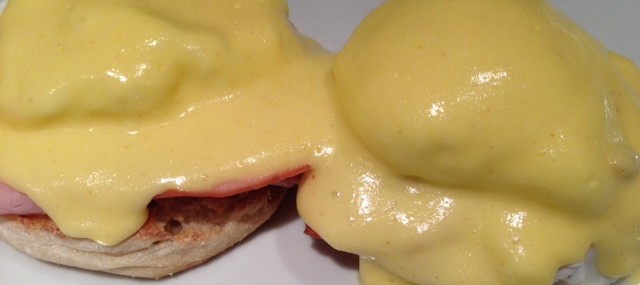
They are decadent and indeed not a dish to be consumed every day, but Eggs Benedict rank at the top of my list of special occasion breakfast dishes.

To me, the best part is the Hollandaise Sauce with its eggy, lemony perfectness. This recipe for the rich sauce couldn’t be easier and is also great on fish or asparagus.

Hollandaise Sauce Ingredients:

  • 7 egg yolks, at room temperature
  • 1 cup butter
  • Pinch of cayenne pepper
  • ½ tsp. sea salt
  • 2 Tbsp. freshly-squeezed lemon juice

Hollandaise Sauce Directions:

  1. Melt the butter in a small saucepan over medium-low heat. Cool for 3 minutes.
  2. In a tall container, like a pitcher, add the egg yolks. Using an immersion blender, add the butter to the yolks in a slow, steady stream until the sauce thickens, about 30 seconds.
  3. Add the cayenne pepper, the salt and the lemon juice.  Keep sauce at room temperature until ready to use.

Makes about ¾ cup.

Chocolate Turtle Cookies

Chocolate Turtle Cookies

This over-the-top cookie recipe was shared by my friends Carole and Nathan of Educated Foodie. The recipe was inspired by a cookie recipe from America’s Test Kitchen Holiday Cookies 2010 Special Issue.

Ingredients:

  • 1 cup all-purpose flour
  • 1/3 cup cocoa powder
  • 1/4 tsp. salt
  • 8 Tbsp. (1 stick) unsalted butter, softened
  • 2/3 cup granulated sugar
  • 1 large egg, separated, plus 1 egg white
  • 2 Tbsp. milk
  • 1 tsp. pure vanilla extract
  • 1 ¼ cups pecans, chopped finely
  • 14 soft caramel candies
  • 3 Tbsp. heavy cream

Directions:

  1. Combine flour, cocoa, and salt in a bowl.
  2. In the bowl of an electric mixer, beat butter and sugar on medium speed until light and fluffy, about 2 minutes. Add egg yolk, milk and vanilla and mix until incorporated. Reduce mixer speed to low and add the flour mixture until just combined – do not overmix. Wrap the dough in plastic wrap and refrigerate until firm, about 1 hour.
  3. Adjust oven rack to upper-middle and lower-middle positions and pre-heat oven to 350 degrees. Line 2 baking sheets with parchment paper.
  4. Whisk egg whites in a bowl until frothy.
  5. Place pecans in a bowl.
  6. Roll dough into 1” balls, dip them in the egg whites then roll them in pecans. Place balls 2” apart on prepared baking sheets. Using ½ teaspoon measure, make an indentation in the center of each ball. Bake until set, about 12 minutes, switching and rotating sheets halfway through the baking process.
  7. Microwave caramels and cream in a bowl, stirring occasionally, until smooth – 1 to 2 minutes.
  8. Once cookies are removed from oven, gently re-press existing indentations. Fill each cookie indentation with ½ teaspoon caramel mixture. Cool 10 minutes, then transfer to wire rack to cool completely.

Yields about 2 ½ dozen cookies.

Berliner Kranser Cookies

Berliner Kranser Cookies

My friend Kim is of Norwegian decent and has kindly shared this family recipe for Norwegian Christmas Cookies called Berliner Kranser (Berlin Wreaths). “They are a melt-in-your-mouth butter cookies” says Kim.

Ingredients:

  • 2 hard-boiled egg yolks (here’s help on how to make the perfect hard-boiled egg)
  • 2 raw egg yolks
  • ½ heaping cup granulated sugar
  • 1 cup unsalted butter, softened
  • 2 ½ cups all-purpose flour
  • 2 raw egg whites, beaten
  • Green decorating sugar

Directions:

  1. Preheat oven to 375 degrees.
  2. Mash together hard and raw egg yolks. Add sugar and beat until a light lemon color, about 4 minutes.
  3. Alternately add the butter and the flour to the egg/sugar mixture, beating well to incorporate.
  4. Put the cookie dough in a cookie press fitted with a wreath shaped attachment. Arrange on cookie sheet lined with parchment paper. Cookies can be close as they will not spread while cooking.
  5. Brush the egg whites over the cookies and decorate with green sugar. If you want to get fancy, you can use candy holly berries to add some red to the wreaths.
  6. Bake for 8-10 minutes. Remove from cookie sheet to cooling rack immediately out of the oven.

Makes about 2 dozen cookies.

The Great Food Blogger Cookie Swap 2012

The Great Food Blogger Cookie Swap 2012

I was approached a couple months ago to participate in The Great Food Blogger Cookie Swap 2012. I love baking and thought it’d be fun to share cookies with other food bloggers across the country.

The concept is simple:

  1. Sign up to participate
  2. Get matched up to three other food bloggers
  3. Bake one dozen cookies for each of these three bloggers and ship the cookies to them.
  4. Receive a dozen cookies from three other bloggers!

The difficult part of this project was deciding which cookie was worthy! In the end, I opted for a cookie not many people have had, Koulourakia, a Greek cookie that’s completely addictive.

My cookies have been bundled in cute festive packaging and will ship tomorrow to Wisconsin, Alabama and Kentucky. I’m excited to contact the bloggers receiving them to see what they thought of them. I’m also very enthusiastic to receive the cookies coming my way from parts unknown. How fun!

Which special cookie recipe would you have chosen for this cookie swap?

Veronique

Tourtiere du Lac St Jean (Meat Pie from Quebec)

Tourtiere du Lac St Jean (Meat Pie from Quebec)

tourtiere

Photo by Eat with Dan

RECETTE EN FRANCAIS

A tourtiere is a traditional dish from Quebec. Although this giant meat pie isn’t from the region of Quebec I’m from, it’s actually from a place called Lac St Jean, it’s very popular around the holidays everywhere in Quebec.

Last weekend I hosted a small dinner party where I wanted to feature some traditional dishes from Quebec. Tourtiere just had to be on the menu! 

This dish is a labor of love with the time-consuming part being the small dicing of the meats and potatoes and the tricky part the rolling of a sheet of pastry big enough to cover the bottom of my huge cast iron Dutch oven. Don’t forget to start the process the day BEFORE you’re going to bake this dish. The result – homey deliciousness.

This dish could easily feed ten guests as a main entrée. I served it in a buffet for 15 people and we ate half of it. The good part is that the leftovers are super tasty.


Ingredients:

  • 1 ½ pounds beef top round, cut into ½ inch cubes
  • 1 ½ pounds veal shoulder, cut into ½ inch cubes
  • 1 ½ pounds pork shoulder (pork butt), cut into ½ inch cubes
  • 1 chicken breast, cut into ½ inch cubes
  • ½ pound salt pork, cut into ½ inch cubes
  • 3 large onions, diced
  • 3 bay leaves
  • 1 Tbsp. each dried Summer Savory and salt
  • 1 tsp. pepper
  • 4 pounds, Yukon Gold (or similar) potatoes
  • 2 batches of Fail Proof Pie Crust, enough for four 9” crusts
  • 1 large egg combined with 2 Tbsp. water
  • 28 ounces chicken broth

Directions:

24 hours before baking the Tourtiere:

  1. Combine the meats, onions, bay leaves and spices in a large, non-reactive bowl. Stir the mixture and cover the bowl with plastic wrap. Refrigerate for 24 hours.

The day you’re baking the Tourtiere:

  1. Preheat oven to 425 degrees.
  2. Peel the potatoes and cut into ½ inch dice.
  3. From the 4 portions of pie dough, divide the dough into two balls – one that’s ¾ of the whole recipe and one that’s ¼ of the whole recipe. Roll out the bigger ball and cover the bottom of a 9-quart Dutch oven, ensuring there’s a 1” overhang.
  4. Add about 1/3 of the meat mixture to the Dutch oven then cover the meat with 1/3 of the potatoes. Repeat the process until all the meat and potatoes have been used.
  5. Roll out the small pie dough ball and cover the meats/potatoes in the Dutch oven. Seal the bottom and top crusts by pinching them then rolling them over themselves to create a rope around the perimeter of the Dutch oven.
  6. Cut a 2’ round vent hole in the center of the Tourtiere. Decorate the surface of the Tourtiere with scraps of pie dough (optional) then brush the egg wash over the entire surface.
  7. Using a small funnel, add the broth to the Tourtiere by inserting the funnel into the vent hole. You may need to shake the pot in order for the broth to get distributed thoroughly throughout the Tourtiere. Don’t overfill the Tourtiere with broth to the point where broth overflows – use less if need be.
  8. Place the Tourtiere, uncovered, in the oven for 15 minutes. A baking sheet directly under the Tourtiere is a good idea to prevent spills.
  9. Turn the heat down to 250 degrees, cover the pot and bake for 6 hours.
  10. Turn the heat up to 400 degrees, uncover the pot and allow the Tourtiere to brown for about 30 minutes.

Makes 15 hearty portions.

Fail Proof Pie Crust

Fail Proof Pie Crust

I have been using this pie crust recipe by Martha Stewart for several years and it never fails to produce flaky crusts with minimal efforts.

Throw all the ingredients in the food processor and voila, perfect pie crust everytime!

This pie crust recipe makes enough for two 9″ crusts and they freeze amazingly well for up to three months if wrapped in plastic wrap then placed in a zip top bag.

Ingredients:

  • 2 3/4 cups all-purpose flour
  • 2 tsp. sugar
  • 1 1/4 tsp. coarse salt
  • 2 1/4 sticks (18 tablespoons) cold unsalted butter, cut into small pieces
  • 10 Tbsp. ice water, plus more if needed

Directions:

  1. Pulse flour, sugar, and salt in a food processor to combine. Add butter, and process until mixture resembles coarse meal, about 10 seconds. With machine running, add ice water in a slow, steady stream through the feed tube until dough just holds together (no longer than 30 seconds).
  2. Divide dough in half, and shape into disks. Wrap each in plastic. Refrigerate for at least 1 hour (or up to 2 days).

Makes two 9″ pie crusts.