Chocolate Caramel Tart

Chocolate Caramel Tart

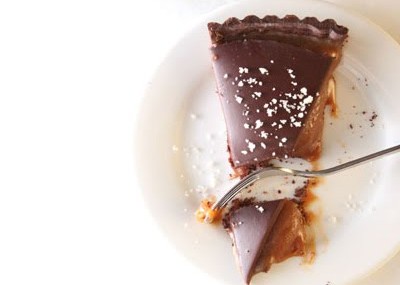
{photo by Andre Baranowski, via Saveur}

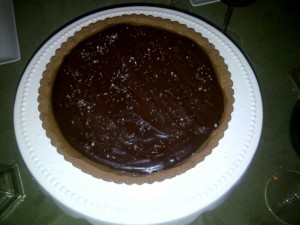
When Saveur showcased this dessert (from Brooklyn’s Marlow & Sons) on its cover, I thought I’d go mad.  Wow, what a beauty!  At a friend’s request, I made it for my New Year’s Eve dinner party and it was as delicious and it is gorgeous.

Originally published in Saveur magazine

Crust Ingredients:

  • 1 1⁄2 cups flour
  • 1⁄4 cup plus 1 tbsp. Dutch-process unsweetened cocoa powder
  • 1⁄4 tsp. kosher salt
  • 10 tbsp. unsalted butter, cubed and softened
  • 1⁄2 cup plus 2 tbsp. confectioners’ sugar
  • 2 egg yolks, preferably at room temperature
  • 1⁄2 tsp. vanilla extract

Caramel Ingredients:

  • 1 1⁄2 cups sugar
  • 3 tbsp. light corn syrup
  • 1⁄4 tsp. kosher salt
  • 6 tbsp. unsalted butter
  • 6 tbsp. heavy cream
  • 1 tbsp. crème fraîche

Ganache Ingredients:

  • 1⁄2 cup heavy cream
  • 4 oz. bittersweet chocolate, finely chopped
  • Gray sea salt for garnish

Crust Directions:

  1. Heat oven to 350˚.
  2. Combine flour, cocoa powder, and salt in a medium bowl and set aside.
  3. Using a handheld mixer, cream the butter and sugar in a large bowl until mixture is pale and fluffy; mix in yolks and vanilla. Mix in dry ingredients.
  4. Transfer dough to a 9″ fluted tart pan with a removable bottom and press dough evenly into bottom and sides of pan. Refrigerate for 30 minutes.
  5. Prick the tart shell all over with a fork and bake until cooked through, about 20 minutes.  Transfer to a rack and let cool.

Caramel Directions:

  1. In a 1-qt. saucepan, whisk together sugar, corn syrup, salt, and 6 tbsp. water and bring to a boil. Cook, without stirring, until a candy thermometer inserted into the syrup reads 340°.
  2. Remove pan from heat and whisk in butter, cream, and crème fraîche (the mixture will bubble up) until smooth. Pour caramel into cooled tart shell and let cool slightly; refrigerate until firm, 4–5 hours.

Ganache Directions:

  1. Bring cream to a boil in a 1-qt. saucepan over medium heat.
  2. Put chocolate into a medium bowl and pour in hot cream; let sit for 1 minute, then stir slowly with a rubber spatula until smooth.
  3. Pour ganache evenly over tart and refrigerate until set, 4–5 hours.
  4. Sprinkle tart with sea salt, slice, and serve chilled.

Serves 8.


Baked Beans – It’s What’s for Breakfast

Baked Beans – It’s What’s for Breakfast

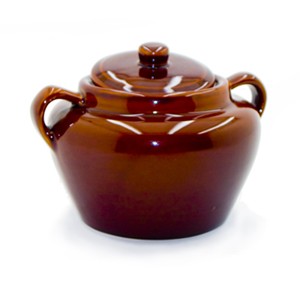
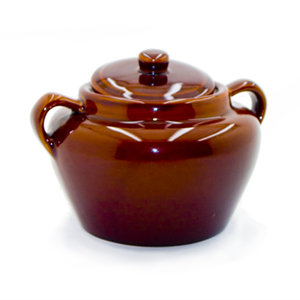
Traditional Bean Pot

When I was growing up in Quebec, the family would gather at Grandma’s house for baked beans breakfast several times a year.  She’d bake fresh loaves of bread and the aromas would be divine.

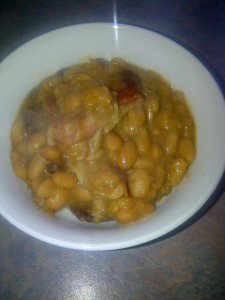
Grandma would soak her dry beans overnight then cook them slow and low overnight, with Grandpa adding a little water throughout the night.  The beans were prepared simply: salt pork, a whole onion (that uncle Dan would always get to have) and some molasses.  Grandma would serve the beans on mismatched plates, no two alike, and I’d pour Quebec maple syrup on them and scarf then down – bliss.  I’ve eaten my way around a bunch of cities and this meal is still my favorite breakfast.


This year, with Grandma’s passing, my mom, Diane, decided to fix this dish for us as a sort of an ode to Grandma.  She’d even bought a handsome bean pot for them to simmer in!  I’m providing the recipe below, but it’s not really about making this dish, it’s about the story behind it.  Way to go mom for keeping this tradition alive and the family well-fed!

Ingredients:

  • 2 cups dried white beans
  • 1/2 pound salt pork, cut into 1″ cubes
  • 1 medium onion, peeled
  • 1/4 cup molasses
  • 1 tsp. dry mustard
  • 1 tsp. each salt and pepper

Directions:

  1. Place the beans in a medium saucepan and cover with cold water then cover with foil.  Place the saucepan in the refrigerator at least 12 hours.

  2. Preheat oven to 250 degrees.  Take the beans out of the refrigerator and put on the stovetop on high heat.  Boil the beans for 30 minutes, then, using a colander, drain the water.
  3. Place half of the cubed salt pork in the bottom of a heavy, oven-proof pot or Dutch oven (if you have a traditional bean pot, even better).  Add the beans and top with the remaining salt pork.  Tuck the onion in.  Combine the rest of the ingredients and pour over the beans and pork.
  4. Cover the beans with hot water, place in the oven, covered, and cook for 7-8 hours.  Halfway through the cooking process, add more hot water to once again cover the beans.

Makes 6-8 servings.


Keeping Family Traditions Alive

Keeping Family Traditions Alive

This is the first Christmas the family will spend without Grandma.  I’ve mentioned in past posts what an amazing cook and baker she was and that she had a huge part in my love of food.

One of the items that belonged to Grandma that I was fortunate enough to get was a small 3-section glass dish that she displayed her Christmas treats on.

I’ve made Grandma’s Chocolate and Peanut Butter Treats over the weekend and plan on proudly displaying them on the dish to my guests.

It’s one of my small contributions to keeping traditions alive.

Cheers,

Veronique

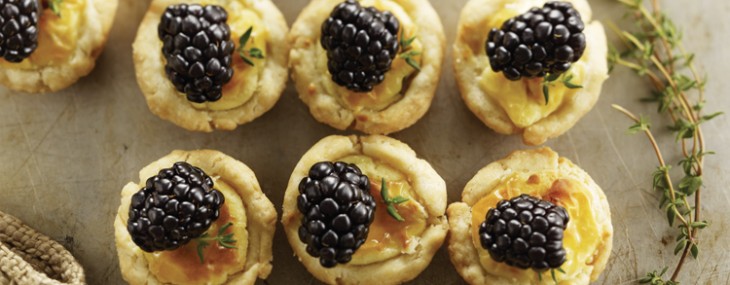
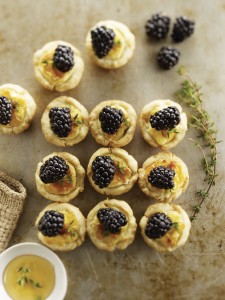
Savory Cheese Tartlets with Blackberries

Savory Cheese Tartlets with Blackberries

I got this recipe from the fine folks at Driscoll’s® and had to share it as it is perfect for holiday entertaining.

Filling Ingredients:

  • 5 oz. rindless goat cheese, at room temperature
  • 3 oz. cream cheese, at room temperature
  • 1 large egg
  • 1 large egg yolk
  • 1 tsp. minced fresh thyme
  • ¼ tsp. salt
  • ¼ tsp. freshly ground black pepper
  • 2 Tbsp. honey, preferably full flavored, such as chestnut or thyme, warmed

Cream Cheese Dough Ingredients:

  • 1 cup all-purpose flour
  • Pinch of salt
  • 7 Tbsp. unsalted butter, cut into tablespoons, at room temperature, plus more for pans, if needed
  • 3 oz. cream cheese, cut into tablespoons, at room temperature

 Directions:

  1. Combine flour and salt in a food processor fitted with metal chopping blade and pulse to combine. Add butter and cream cheese and pulse about 10 times, until mixture begins to clump together. Gather up dough and shape into a thick disk. Wrap in plastic wrap and refrigerate until chilled and easy to handle (about 2 hours).
  2. Position rack in the center of the oven and preheat to 350°F. Have ready two 12-cup miniature muffin pans (each cup measuring 1 7/8 inches across the top and 7/8 inches deep), preferably nonstick. If the pans are not nonstick, lightly butter them.
  3. Divide dough into 24 equal pieces. Place one piece in each muffin cup.  Using fingers, press dough firmly and evenly up sides to make a pastry shell.  (A wooden tart tamper can help the job go quickly.) Freeze 5 minutes.
  4. Mash goat cheese and cream cheese together in a medium bowl until smooth. Add egg, yolk, minced thyme, salt and pepper and whisk until combined. Spoon equal amounts of filling into chilled pastry shells.
  5. Bake tartlets until crust is golden brown and filling is puffed (about 25 minutes). Let cool for 10 minutes in pans. Remove tartlets from pans and transfer to a wire cake rack to cool completely.
  6. Just before serving, lightly brush tops of tartlets with about 1 tablespoon of honey. Arrange berries on top as desired. Drizzle with the remaining honey. Sprinkle with the thyme leaves and serve.

Servings: 24 tartlets, 8 to 12 servings


Stufato di Vitello – Veal Stew

Stufato di Vitello – Veal Stew

It is that time of year when braised meats and stews just sound wonderful.  This week, my local grocery store had beautiful cubed veal available, so I created this simple-to-prepare, make-ahead, one-pot stew that is great reheated on a week night but elegant enough to serve at a dinner party.

Ingredients:

  • ¼ cup all-purpose flour
  • 2 pounds boneless veal shoulder, cut into 2” pieces
  • 2 Tbsp. vegetable oil
  • ½ tsp. each oregano, salt and pepper
  • 1 medium onion, chopped
  • 1 pound Cremini mushrooms, quartered
  • 2 Tbsp. Dijon mustard
  • 3 cups chicken broth
  • 1 cup dry white wine
  • ½ cup heavy cream

Directions:

  1. Preheat oven to 300 degrees.
  2. In a shallow dish sprinkle the flour over the veal cubes then coat the meat lightly.
  3. Heat the oil in a large Dutch oven over high heat until it is nearly smoking.  Season floured meat with salt and pepper, add to hot pot and brown on all sides, about 3 minutes.  If your pot isn’t wide enough to accommodate all the meat in one layer, brown in two batches.  Place cooked veal on a platter and reserve for later use.
  4. In the same pot the meat was seared in, add the onion and cook over medium-high heat until softened and slightly golden, about 4 minutes.  Add the mushrooms to the pot and sauté for 5 minutes, stirring often.  If the onion-mushroom mixture becomes dry while cooking, add 1 tablespoon of vegetable oil and lower the heat to medium.
  5. Add the Dijon mustard, the oregano, the broth and the wine to the onion-mushroom mixture and cook for 5 minutes over medium heat, scraping the browned bits from the bottom of the pot with a wooden spoon.
  6. Return the veal and its juices to the pot, add the cream, stir well to combine all the ingredients and place in the oven.  Cook for 3 hours.

Serves 4.

Notes:  The stew can be refrigerated for up to 3 days.  Serve over white rice or egg noodles.

Buche de Noel with Browned Butter Salted Caramel Frosting

Buche de Noel with Browned Butter Salted Caramel Frosting

Growing up, my Grandma made jelly roll cake all the time.  A favorite was the vanilla cake with raspberry jam tucked inside and confectioner’s sugar lightly dusted over.  Every Christmas, our family shares a Bûche de Noël, in recent years, it has been purchased because nobody has wanted to tackle making it from scratch.  This will be the first Christmas we spend without Grandma and I have decided to bite the bullet and make our family’s Yule log.  Here is a version I might use, unless I have a chocolate craving.

Ingredients:

Directions:

  1. Preheat oven to 400 degrees.  Coat an 11×17 jelly roll pan with cooking spray.  Line the pan with a sheet of parchment paper and coat the paper with additional cooking spray.
  2. Using a stand mixer, beat the eggs for 5 minutes, until light and fluffy.  Add the sugar, Grand Marnier, zest, vanilla and salt and beat for another 2 minutes.
  3. Add flour in quarter cup additions, incorporating with a rubber spatula very gently. Do not over mix!
  4. Spread the batter evenly into the pan and bake for 10 minutes.  Wait 3 minutes and remove the cake from the pan and onto a large kitchen towel dusted with confectioner’s sugar.  Peel off the parchment paper.  Wait 2 minutes and roll the shorter side onto itself using the kitchen towel as a guide until a tight roll is created.  Chill rolled cake for 30 minutes then unroll the cake gently, removing the towel as you go.
  5. Spread 1 cup of frosting on the cake in an even layer then roll back into a tight log.  Cut a 2-inch piece at one end of the cake at an angle and place atop the cake to create a branch stump.  Frost the outside of the cake, including the stump, run a fork over the surface of the cake to create mock bark then refrigerate until ready to serve.

Serve 10.

Browned Butter and Salted Caramel Frosting

My friend Lisa is a huge caramel fan and I’ve designed this simple-to-make frosting with her in mind.  Great used as icing on a cake or as frosting on cupcakes.

Ingredients:

  • 1 stick (1/2 cup) butter
  • 1 cup brown sugar
  • 1/3 cup heavy cream
  • 1 Tbsp. pure vanilla extract
  • 1 pound box confectioners’ sugar
  • 1/4 tsp. sea salt

Directions:

  1. In a small saucepan, melt the butter over medium-high heat then cook until lightly browned, about 2 minutes.  Add the brown sugar and the cream to the browned butter, lower heat to medium and cook for additional 2 minutes, until the sugar has completely dissolved.  Remove from heat, add the vanilla then transfer to the bowl of an electric mixer.
  2. Beat the butter mixture on low for about 4 minutes, until it has cooled a bit.  Add the confectioners’ sugar, 1/2 cup at a time, until the frosting is smooth.  Add the sea salt and stir well to fully incorporate.  Refrigerate for 20 minutes before using.

Makes about 2 cups of frosting.

Dulce de Leche Mini Cheesecakes

Dulce de Leche Mini Cheesecakes

This weekend, I was asked to bring dessert to a potluck dinner.  The hostess is a caramel fanatic, so I knew that my Dulce de Leche Cheesecake would be well-received, but I wanted something more portable.  This recipe yields 24 two-bite cheesecakes, but can easily be halved if you only need a dozen.

Ingredients:

  • 24 round vanilla cookies (I used Nabisco Nillas)
  • 2 8-ounce packages cream cheese, room temperature
  • 1 14-ounce can sweetened condensed milk
  • 4 eggs
  • 1/2 cup good quality, Dulce de Leche (I used La Salamandra)

Directions:

  1. Preheat oven to 300 degrees.
  2. Add cupcake liners to two 12-muffin pans.  Place one vanilla cookie in the bottom of each liner.
  3. In the bowl of an electric mixer fitted with the paddle attachment, beat the cream cheese until light and fluffy, about a minute.  Add the condensed milk then the eggs, one at a time, and beat for about 2 minutes, scraping down the sides of the bowl as needed.
  4. Divide the batter (I use a measuring cup) among the cupcake liners and bake until the centers of the cheesecakes are nearly set and outer edges are firm, about 23 minutes.
  5. Cool the muffin pans to room temperature then refrigerate the cheesecakes in the muffin pans for at least an hour.
  6. Microwave the Dulce de Leche for about 20 seconds and use to top each mini cheesecake with about a half teaspoon of warm Dulce de Leche.

Yields 24 mini cheesecakes

Fig Jam and Cambozola Grilled Cheese

Fig Jam and Cambozola Grilled Cheese

Cambozola blue cheese has the rich flavor of Gorgonzola with the lovely gooey texture of Camembert.  The off-white interior offers striking blue veins.  It’s a cheese that’s growing in popularity because of its creamy texture and buttery, slightly tangy flavors.

This grilled cheese sandwich uses fig jam to compliment the delicious sharpness of the blue cheese.  The mayonnaise adds to the comfort level of an already comforting dish.

Ingredients:

  • 2 tsp. mayonnaise
  • 2 slices white sandwich bread
  • 1 Tbsp. fig jam
  • 3 thin slices of Cambozola cheese

Directions:

  1. Heat up Panini press or a grill pan over high heat.
  2. Spread 1 teaspoon of mayonnaise on one side of each bread slice.
  3. Spread the fig jam on the un-mayonnaised side of one bread slice.
  4. Arrange the Cambozola slices over the jam.
  5. Top the Cambozola with the un-mayonnaised side of the second bread slice so that both mayoed sides are on the outside and the goodies are on the inside.
  6. Place the sandwich in the Panini press and grill for 3 minutes.  Alternatively, place the sandwich on the grill pan (still on high heat) and top with the weight of multiple pans or a pan with a 2-3 pound weight in it and cook 1 1/2 minutes per sides.
  7. Transfer sandwich to a cutting board and cut sandwich diagonally using a serrated knife.

1 serving.

Peanut Butter, Banana and Nutella Panini

Peanut Butter, Banana and Nutella Panini

My grandma used to make my sister and me peanut butter and banana grilled sandwiches in a cast iron contraption when we were kids.  This contraption, an early version of a Panini press, had long handles that could be flipped on the stovetop until the bread was perfectly browned and gorgeous.  I miss those days and decided to sort of recreate the sandwich using my modern day Panini press and a little twist – Nutella!

Ingredients:

  • 2 tsp. softened butter
  • 2 slices whole wheat bread (I like oatmeal and whole wheat for this)
  • 2 Tbsp. chunky peanut butter
  • 1 Tbsp. Nutella
  • ½ ripe banana, sliced

Directions:

  1. Heat up Panini press or a grill pan over high heat.
  2. Spread 1 teaspoon of butter on one side of each bread slice.
  3. Spread the peanut butter on the unbuttered side of one bread slice.
  4. Spread Nutella on the unbuttered side of the second bread slice then arrange the banana slices over Nutella.
  5. Top the Nutella/banana slice with the peanut butter slice so that the buttered side of each bread slice is on the outside and the goodies are on the inside.
  6. Place the sandwich in the Panini press and grill for 3 minutes.  Alternatively, place the sandwich on the grill pan (still on high heat) and top with the weight of multiple pans or a pan with a 2-3 pound weight in it and cook 1 1/2 minutes per sides.
  7. Transfer sandwich to a cutting board and cut sandwich diagonally using a serrated knife.

1 serving.