Vermont Cheddar Cheese and Beer Fondue

It’s getting cooler outside and this type of weather calls for me to fondue.  This past weekend, I hosted a fondue party where I served a cheese fondue as an appetizer that was made using Cabot Seriously Sharp Cheddar and Victory Headwaters.  Great combination and prepared in a snap.

Ingredients:

  • 6 ounces medium-bodied beer (half a bottle)
  • 2 tsp. Worcestershire sauce
  • 1 Tbsp. Dijon mustard
  • 1 Tbsp. all-purpose flour
  • 16 ounces sharp cheddar cheese, grated
  • Pinch of grated nutmeg

Preparation:

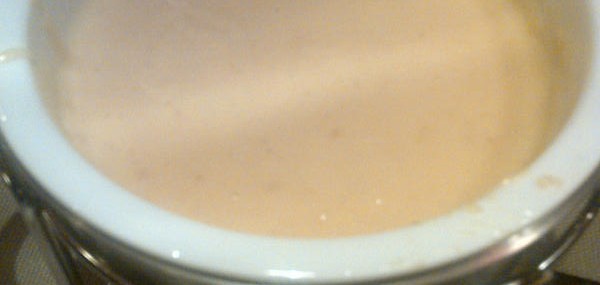
  1. In a heavy-bottomed saucepan set over medium-high heat, combine the beer and Worcestershire sauce.  In a small dish, combine the mustard and flour to form a paste.  Add the paste to the beer mixture, whisking vigorously to fully incorporate.  Bring to a boil then reduce heat to medium.
  2. Add the cheese to the beer mixture by the handful, allowing the cheese to melt before adding more, stirring constantly.  Reduce heat to medium-low, add nutmeg and simmer for about 5 minutes, until the mixture is smooth.  Keep on low until ready to serve, then pour the cheese into a warm fondue pot.
  3. Serve with crusty bread cubes and baby potatoes that have been par boiled.

Makes 6 appetizer-size servings.

Notes: Can’t find Cabot Seriously Sharp Cheddar?  No sweat – use any other sharp cheddar.  The fun part of cheese fondue is that you can vary the cheese and the liquid you use.  Gruyere and white wine would be amazing.

Happy Lazy Sunday, Post Fondue Night

Happy Lazy Sunday, Post Fondue Night

Last night, I had some friends over for fondue night.  We don’t fondue as often as we should because when we do, it’s a great time.  There’s no better way to stretch out a meal than to fondue.

I served a cheese fondue made using Cabot Seriously Sharp Cheddar from Vermont and Victory Headwaters.  Sharp cheese and beer – winning!  For dinner, I typically do a fondue pot with beefy, wine broth for shrimp, chicken and cheese cubes and a pot with hot oil for beef tenderloin.  The dinner fondues are served with three dipping sauces, this time: Sriracha and maple mayo, a Dijon mustard and tarragon mayo and a garlic mayo.  Just a fun concept and please ping me if you’d like fondue tips.

Today is football day at our home and we usually take it super easy on Sunday afternoons.  This means that I typically make dinner in the morning so we can just eat in front of the television later.  Today, I made my Grandma’s amazing meat sauce that we’ll eat with spaghetti.  I double the sauce recipe as it freezes beautifully.

Hope you’re having as great a weekend as I’m having!

Cheers,

Veronique

Andouille and Crawfish Etouffée

Andouille and Crawfish Etouffée

When we lived in Ft Lauderdale, we often lunched at a small Cajun restaurant called Creolina’s.  The food was amazing and one of my favorite dishes was the crawfish etouffée they served over plain white rice.  This version calls for Andouille sausage as I like its porky flavor with the seafood.

Ingredients:

  • ¼ cup vegetable oil
  • 3 Andouille sausage links (about ½ pound), cut into bite size pieces
  • 2 Tbsp. butter
  • 3/4 cup all-purpose flour
  • 2 celery ribs, chopped
  • 1 green or red bell pepper, chopped
  • 1 medium onion, chopped
  • 3 large garlic cloves, halved
  • 1 12-ounce bottle of medium-bodied beer
  • 1 cup bottled clam juice
  • 3 cups chicken broth
  • ½ tsp. each salt and pepper
  • 2 Tbsp. paprika
  • 1/8 tsp. cayenne pepper
  • 2 bay leaves
  • 1 pound crawfish tails, cooked
  • 1/2 cup flat-leaf parsley, chopped

Directions:

  1. Add oil to a heavy Dutch oven set over medium heat.  Add the sausage links and cook for 2-3 minutes until browned.  Using a slotted spoon, remove the sausage from the pot and set aside for later use, keeping the rendered fat in the pot on medium heat.
  2. Add the butter to the hot fat in the pot and when completely melted, add the flour.  Whisk the flour into the fat to incorporate and create a roux.  Cook the roux, stirring frequently with a wooden spoon, until it is the color of peanut butter, about 10 minutes.
  3. Place the celery, bell pepper, onion and garlic in the bowl of a food processor.  Pulse to roughly chop, about 1 minute.
  4. Add the processed vegetables to the roux in the pot and stir with a wooden spoon to fully combine.  Cook the mixture over medium heat for 5 – 7 minutes, stirring frequently.
  5. Add the beer, clam juice and broth to the vegetable mixture and scrape the bottom of the pot with a wooden spoon to loosen up all the brown bits.  Return the sausage to the pot, add the spices, bay leaves and simmer for about 1 hour.
  6. Add the crawfish tails to the pot and cook for about 5 minutes to warm through.
  7. Serve the etouffée over white rice and garnish with parsley.

Makes 6 servings.

Notes:  If you have crawfish in the shells, simply remove the tails, then add the shells to a pot with 4 cups of water.  Simmer for 30 – 45 minutes, then strain the crawfish juices.  Use 1 cup of the crawfish juice in place of the clam juice.  Don’t have crawfish?  Simply replace with shrimps!

Boeuf en Croûte (Beef Wellington)

Boeuf en Croûte (Beef Wellington)

I know beef Wellington is pretty old-school, but I love recreating these types of recipes and I find that my guests really enjoy them – either for the first time or for the first time in a long time.

Although beef Wellington looks fancy and difficult to make, it is not, even for novice home cooks.  The dish is beautiful to present to special guests but straight-forward enough to make on any weekend night.

Ingredients:

  • 2 Tbsp. vegetable oil
  • 1 ½ pound piece of beef tenderloin, patted dry with paper towels
  • 1 tsp. each salt and freshly cracked pepper
  • 2 Tbsp. butter
  • 1 large shallot, fined minced
  • 1 pound Cremini mushrooms, roughly chopped
  • 1 tsp. each salt and freshly cracked pepper
  • ½ tsp. dry thyme
  • 4 ounces mousse of duck foie gras (1/2 an 8-ounce container)
  • 1 sheet from a 17 ¼-ounce frozen puff pastry box, thawed
  • 2 Tbsp. all-purpose flour for dusting when rolling out the pastry
  • 1 egg, scrambled

Directions:

  1. Preheat oven to 450 degrees.
  2. In a large frying pan, heat oil over high heat.  Sprinkle the salt and pepper over the surface of the beef and add to the hot pan.  Sear on all sides until deeply browned, about 5 minutes total.  Remove beef from the pan (reserve pan for later use) to a platter and allow to cool completely.
  3. Melt butter in the reserved large pan over medium-high heat.  Add the shallot and sauté for 2 minutes.  Add the mushrooms, salt, pepper and thyme to the shallots and sauté until completely softened and lightly browned, about 5 minutes.  Remove the pan from heat, and allow to cool completely.  Drain any liquids that might have been released from the mushrooms and pat the mixture well with paper towels.
  4. Add the mushroom mixture and the foie gras to a food processor and pulse until nearly smooth with a few small pieces, about 1 minute.
  5. Spray an unrimmed baking sheet with cooking spray.  Place a piece of parchment paper on the baking sheet, ensuring it adheres to the cooking spray.
  6. Unfold a puff pastry sheet on a floured work space.  Using a rolling pin, lightly roll the pastry to enlarge the rectangular sheet by 2 inches in each direction.  Move the pastry to the baking sheet by rolling it over the rolling pin.
  7. Place the tenderloin in the center of the pastry and spread the mushroom / foie gras mixture over it, patting down the mixture with your hand to ensure it coats the beef completely and evenly.  Fold the pastry over the beef and seal all the seams – there will be extra pastry that needs to be cut away using a sharp knife.  Delicately, turn the pastry-wrapped beef over so that the seams are beneath the Wellington.  Cut a few slits on the pastry top and brush the Wellington with the egg mixture.
  8. Bake 10 minutes, then reduce heat to 425 degrees for 5-10 additional minutes, or until pastry is golden brown and a meat thermometer inserted into the tenderloin is a few degrees short of the desired doneness.  Let the Wellington rest for 5-10 minutes then slice into 4 portions with a serrated knife.

Serves 4.

Notes:  This recipe can easily be doubled to serve 8.  Don’t like or want to use foie gras?  Simply replace with softened butter.  Serve this dish with mashed potatoes and pepper / Béarnaise sauce.

Please Meet Gâteau St Honoré

Please Meet Gâteau St Honoré

I’m sure you’ve noticed through my posts that I entertain quite a bit.  I love cooking, baking and having friends over – it’s sort of my ‘thing’.  The tough part is being creative with my menus so that friends who visit often don’t have the same meal multiple times.  That’s why I’ve relied on my friend Lisa to make suggestions based on the blogs she visits or recipes she finds interesting.  Two weeks ago, she shared a recipe for a Gâteau St-Honoré she saw in Bon Appétit magazine and suggested I make it for a dinner party I hosted last weekend.  Little did I know how much work it would take to put my own spin on this very traditional recipe that I grew to enjoy with my Grandma at a local French bistro when I was a little girl.

Although I felt the presence of St Honoré, the patron saint of French pastry bakers (pâtissiers), with me as I baked this cake for 7 hours, I’m not sure I’d recommend novice bakers attempt this recipe, but it’s darn tasty if you put in the effort.

Pastry Base Ingredients:

  • 2 sheets of frozen puff pastry from a 17 ¼-ounce box, thawed
  • 2 Tbsp. all-purpose flour for dusting when rolling out the pastry

Choux (Cream Puffs) Ingredients:

  • 1 cup whole milk
  • 5 Tbsp. butter
  • 1 tsp. granulated sugar
  • ½ tsp. coarse salt
  • I cup all-purpose flour
  • 4 large eggs

Crème Pâtissière (Pastry Cream) Ingredients:

  • 3 egg yolks
  • ¼ cup granulated sugar
  • 3 Tbsp. all-purpose flour
  • 1 cup whole milk
  • ¼ heavy cream
  • 1 tsp. pure vanilla extract

Salted Caramel Mousseline Ingredients:

  • 9 Tbsp. granulated sugar
  • 1/8 tsp. cream of tartar
  • ¼ cup heavy cream
  • 2/3 of the Creme Pâtissière recipe above, chilled
  • 2 sticks (1 cup) butter, softened
  • ½ tsp. coarse salt
  • ½ tsp. pure vanilla extract

Caramel Ingredients:

  • ½ cup granulated sugar
  • ¼ cup cold water

Pastry Base Directions:

  1. Preheat oven to 375 degrees.
  2. Spray an unrimmed baking sheet with cooking spray.  Place a piece of parchment paper on the baking sheet, ensuring it adheres to the cooking spray.
  3. Unfold a puff pastry sheet on a floured work space.  Unfold the second pastry sheet and place directly on top of the first to create a double layer of pastry.  Using a rolling pin, lightly roll the pastry to enlarge the rectangular sheet by 2 inches in each direction.
  4. Using a 10-inch cake pan or a paper guide, cut the pastry using a sharp knife into a 10” circle.  Place the circle on the prepared baking sheet and bake until golden brown, about 30 minutes.  Allow to cool completely on a wire rack.  Can be made the day before if stored in a sealed container at room temperature.

Choux Directions:

  1. Preheat oven to 375 degree.
  2. Spray an unrimmed baking sheet with cooking spray.  Place a piece of parchment paper on the baking sheet, ensuring it adheres to the cooking spray.
  3. In a heavy, medium saucepan, bring the milk, butter, sugar and salt to a boil over medium-high heat.  Remove from heat and add the flour.  Stir with a wooden spoon to combine well.  Return the pan to the stove over medium heat and stir briskly until the dough pulls apart from the sides of the pan and forms a ball, about 2 minutes.
  4. Transfer the dough to a stand mixer fitted with a paddle attachment.  Turn the mixer to medium speed, add eggs, one at a time, until well incorporated.
  5. Add the dough to a pastry bag fitted with #2 tip.  Pipe 1” rounds on the parchment-lined baking sheet – should yield 25-30 rounds.  Dampen fingertips and smooth down the pointy tops of the rounds.
  6. Bake for 20 minutes.  Lower oven temperature to 325 degrees and bake for an additional 15-20, or until choux are golden brown.  Remove from the oven and let stand on baking sheet for 2 minutes.  Remove the choux from the sheet and poke a small hole on the bottom of each one to let steam escape.  Let cool completely with bottom sides up.  Can be made up to 2 months ahead of time if stored in a sealed container in the freezer.

Crème Pâtissière Directions:

  1. In a medium bowl, whisk together the eggs, sugar and flour until well combined.
  2. In a heavy, medium saucepan, scald the milk, cream and vanilla.  Add a couple of ladleful of the hot liquid to the egg mixture and whisk to fully incorporate.  Add the egg mixture to the remaining hot cream mixture in the pan and whisk vigorously for 3-4 minutes until thickened.
  3. Pour 1/3 of the crème in a small bowl and 2/3 of the crème in a medium bowl, press a sheet of plastic wrap on each of the crème’s surfaces and refrigerate until completely cool.

Salted Caramel Mousseline Directions:

  1. Stir 2 tablespoons of water, the sugar, and the cream of tartar in a heavy, medium saucepan over medium-low heat until sugar dissolves.  Increase heat to medium-high and boil without stirring, occasionally swirling pan and brushing down sides with a wet pastry brush, until a deep amber color forms, about 7 minutes.
  2. Remove the caramel from the heat and gradually add cream (mixture will bubble vigorously). Stir until any caramel bits dissolve and mixture is smooth.  Let cool.
  3. In a stand mixer fitted with a whisk attachment, beat the chilled 2/3 of Crème Pâtissière and the cooled caramel sauce at medium speed.  Gradually add butter, 1 tablespoon at a time, beating until fully incorporated between additions.  Add salt and vanilla then chill until ready to use.

Caramel Directions:

  1. Place the sugar and water in a heavy, small saucepan and stir with a wooden spoon over a medium-low heat until the sugar dissolves. Once dissolved, increase heat to medium-high and boil without stirring, occasionally swirling pan and brushing down sides with a wet pastry brush, until a light to medium golden color forms, about 5 minutes.  Remove from heat and use within 5 minutes.

To assemble:

For the choux:  Spoon the remaining 1/3 of the Crème Pâtissière into a pastry bag fitted with a #2 plain tip and pipe a small amount into 12 of the choux from the hole in the bottom of each.  Using tongs, carefully dip the tops of the 12 choux into the warm caramel to form a glaze.  Place caramel-coated puffs on a baking sheet coated with cooking spray and allow caramel to set.  Dip the tines of a small fork into any remaining caramel and drizzle 4-5 lattice-style shapes onto a baking sheet coated in cooking spray to use for decoration later.

For the base (to be done no more than 3-4 hours prior to serving):  Using a serrated knife, cut the puff pastry base horizontally into two circles.  Place one of the circles on a serving plate and spread 1/3 of the caramel Mousseline over it.  Top with the second pastry circle then another 1/3 of the Mousseline.

Final decorations:  Add the 12 caramel-coated choux to the top pastry circle in a circular pattern.  Add remaining Mousseline to a pastry bag fitted with a #2 plain tip and pipe small rosettes between each choux to fill any gaps on top of the cake.  Add hardened caramel decorations to the top of the cake.  Refrigerate cake until ready to serve.

Serves 8.

Notes:  Many components of the cake can be made in advance, so take advantage of that.  Final assembly should not be done prior to 3-4 hours before serving or the pastry will become soggy.  To save time and efforts, you could easily skip the Mousseline and just use Crème Pâtissière to make the cake (in the choux and to top pastry circles).  Remaining, unfilled choux can be used as profiteroles by cutting each choux tops, filling with ice cream and topping with chocolate sauce.

Fleur de Sel, Caramel and Chocolate Shortbread

Fleur de Sel, Caramel and Chocolate Shortbread

One of my favorite flavor combinations is salt and caramel.  These bars can be created in a snap, and can be made using store-bought caramel if time is of the essence (or if you simply cannot wait to sink your teeth into the salty, caramel, chocolaty treats).  Splurge with high-end sea salt for this recipe.

Shortbread ingredients:

  • 2 cups all-purpose flour
  • 1/4 tsp. salt
  • 2 sticks (1 cup) unsalted butter, softened
  • 1/2 cup confectioners’ sugar
  • 1 tsp. pure vanilla extract

Assembly ingredients:

  • 1 cup homemade or store-bought caramel
  • 12-ounce bag of milk chocolate chips
  • ½ tsp. fleur de sel, or other coarse sea salt

Shortbread directions:

  1. Preheat oven to 325 degrees.
  2. In a small bowl, whisk the flour and the salt.  Set aside for later use.
  3. In the bowl of an electric mixer, cream the butter with the paddle attachment for 1 minute.  Add the confectioners’ sugar and mix for 2 minutes, or until smooth.  Incorporate the vanilla extract.  Add the flour mixture on low speed and mix just until crumbly – do not over mix or tough shortbread will result.
  4. Line a 9×13 pan with aluminum foil, allowing for extra foil to overhang on each end of the pan for easy unmolding later.  Coat the foil with cooking spray, or butter the foil well.
  5. Press the dough into the pan and bake for 30-35 minutes, or until the shortbread is just lightly browned.  Cool for about 20 minutes.

Assembly directions:

  1. Spread the caramel over the cooled shortbread and refrigerate for 15 minutes.
  2. While the caramel shortbread is chilling, melt the chocolate chips in the microwave for about 90 seconds, stirring every 30 seconds to ensure every chips is melted.  Pour the chocolate over the caramel layer then spread evenly using an offset spatula.
  3. Put the pan back in the refrigerator to cool the chocolate slightly, about 5 minutes.  Chocolate should be cool enough so that the salt won’t “melt” into it, but soft enough that the salt is able to adhere to it. Sprinkle the fleur de sel evenly over the chocolate.
  4. Unmold the shortbread by pulling the foil out of the pan using the excess foil.  Cut into 18 bars using a sharp knife.

Make 18 bars.

Notes:  I have been using LaSalamandra Dulce de Leche for a few years as it is delicious and perhaps better than any caramel I have made.  Caramel found in the produce section of most grocery stores can also be used.

Inspiration for this recipe is based on Salted Chocolate and Caramel Shortbread Bars by Barbara Kiebel of Creative Culinary.

Hearty Beef Mushroom Barley Soup

Hearty Beef Mushroom Barley Soup

Today’s a rainy, gloomy day where I live and weather like this always causes me to crave a warm, hearty soup.  While at the grocery store, I found beautiful center cut beef shanks that screamed to be used to make beef mushroom barley soup.  Here’s the simple recipe for this comforting dish.

Ingredients:

  • 3 Tbsp. vegetable oil
  • 3/4 pound beef round/chuck, cubed
  • 1 pound beef bones (ideally with marrow)
  • 1 medium Spanish onion, chopped into small dice
  • 5 celery ribs, chopped into small dice
  • 1 pound Cremini mushrooms, sliced
  • 1 tsp. dried thyme
  • 1/2 tsp. each salt and pepper
  • 2 32-ounce cartons of beef broth
  • 1/4 cup dry Marsala wine or white wine (optional)
  • 3/4 cup barley, rinsed in cold water
  • 4-inch long piece of Parmesan rind

Beef Barley Soup FixingsDirections:

  1. Pour the oil in a large, heavy pot over high heat, and heat up for 30 seconds.  Add the beef and the bones and cook for 2 minutes, or until browned.
  2. Add the onion and celery to the beef in the pot, reduce heat to medium-high heat and cook the vegetables for 4 minutes.  Add the mushrooms and cook and additional 3 minutes.
  3. Add the spices, the broth and the wine, if using.  Bring the heat to low and simmer partially covered for 20 minutes.
  4. Add the barley and the Parmesan rind, if using, to the pot and simmer partially covered for another 30 minutes over low heat.
  5. Remove and discard the bones and serve.

Makes 6 servings.

Slow Cooker Chicken Portobello

Slow Cooker Chicken Portobello

Although I’m originally from Quebec, I grew up in South Florida where the weather can be interesting at times.  I’ve gone through hurricane preparedness more times than I care to remember, so when Hurricane Irene made its way to the northeast where I now live, it was business as usual at my home.

While chips, dips, nuts and candy can be great when you’re boarded up, ‘real’ food can be a nice treat.  The night before the hurricane was to visit us, I made a simple and fast-to-prepare chicken dish in my slow cooker that was easily reheated on my grill in a pot after we lost power the next day.

Ingredients:

  • 4 boneless, skinless chicken breast halves
  • 2 tsp. fresh sage, chopped
  • 1/2 of a 750 ml bottle dry Riesling
  • 2 cups chicken broth
  • 4 large Portobello mushrooms, sliced
  • 2 Tbs. Dijon mustard
  • 1 cup heavy cream
  • 1/2 tsp. each salt & pepper

Directions:

  1. Place all the ingredients in an 8-quart slow cooker (Crockpot).  Cook on high for 5 hours or on low for 8 hours.
  2. Serve over white rice.

4 Servings.

Notes: If you like a thicker sauce, simple combine a teaspoon of cornstarch and 3 tablespoons of water in a dish and add to the sauce.  Turn slow cooker to high and cook for 5-10 minutes until the sauce has thickened.

5-Minute Lobster Rolls

5-Minute Lobster Rolls

Every summer, I go to Maine for a long weekend.  I’ve done this since the year I was born, and my parents did this with their families growing up.  It’s what we Quebecois do in the summer – drive to the nearest beach, get some sun and eat seafood.

This summer when I drove up to Maine, I had three foodie goals in mind in the spirit of traditions: beach pizza, boardwalk fries and a lobster roll.  Unfortunately, I didn’t get a chance to make it to the lobster roll shack and have had this craving ever since.

While at the grocery store Saturday, I saw New England-style hot dog buns with the top split.  In Quebec, where I grew up, all the hot dogs are top split, but after moving to the USA in the late 80s, I quickly discovered that hot dogs are mostly side split with crust on all around.  When I saw the New England-style buns, I just knew I’d be taking advantage of them by filling them with decadent lobster salad.  Here’s how simple and quick it is to make lobster rolls.

Ingredients:

  • ¼ cup chopped celery
  • 4 Tbsps. good quality mayonnaise
  • 1 tsp. lemon juice
  • 1 heavy pinch each, salt and pepper
  • 2 small lobster tails, cooked and roughly chopped
  • 2 New England-style hot dog buns
  • 2 tsps. room-temperature butter

Directions:

  1. In a medium bowl, combine the celery, mayo, lemon juice and salt and pepper.  Add the lobster meat and gently coat the meat with the mayo mixture using a fork.
  2. Heat a non-stick skillet over medium-high heat.  While the skillet is heating up, butter the crustless sides of each hot dog bun.  Add the buns to the hot skillet and grill each buttered side to a deep golden brown.  Remove from the skillet and open up each bun.
  3. Divide the lobster salad into two portions.  Scoop each portion into a bun and pack in tightly using the back of the fork.

Makes two lobster rolls.

Notes:  Cooked lobster tails can be found in the seafood section of your local grocery store.  If you can’t find cooked lobster tails and don’t feel like cooking some, you could replace with canned lobster meat or even with lump crab meat.

Lobsterfest in the Comfort of My Home

Lobsterfest in the Comfort of My Home

I’m always looking for new themes for the dinner parties I host and this weekend, I decided to do a lobster party for some friends.

Although a perceived luxury item, lobster can be relatively affordable if purchased in season.  I made sure I held this party while lobsters were on sale at my grocery store and the cost per person was the same as when I buy nice steaks for everyone.  The difference – lobster’s fun and special!

Once of the downfalls of doing lobsters at home is the smell of the crustaceans cooking and the lingering smell in the house for the next week.  I resolved this issue by buying a turkey fryer at my local hardware store.  The turkey fryer comes with a huge metal pot, a strainer basket insert and a burner that can be connected to any standard propane tank.  I set the cooking station outside thus eliminating the mess in the house.

The trick to making a perfectly-cooked lobster is to carefully time how long you have it in the water.  This is the technique my dad’s passed on to me for solid results:

  1. Bring a large pot of salted water to a boil.
  2. Plunge the lobsters, head first, into the boiling water.
  3. Bring the water back to a boil (should take 3-5 minutes).
  4. Let the lobsters cook for exactly 15 minutes then immediately remove them from the water and serve.

This technique is for lobsters up to two pounds.  For lobsters over two pounds, cook for 20 minutes.

The beauty about doing this type of party is that the side items served with lobster can be very affordable and simple.  Boil some red-skinned potatoes, roast some corn, make a tomato salad or cole slaw and prepare a terrific lemon butter dipping sauce for the succulent, tender lobster and you’re set!

Here’s a simple yet delicious recipe for lemon butter sauce that my family’s adopted from Rolande, my step-mother:

Lemon-Butter Sauce

Ingredients:

  • ½ pound (2 sticks) salted butter
  • Juice of 3 lemons
  • ¼ cup heavy cream

Directions:

  1. Bring the butter to a simmer in a medium heavy pan over medium-low heat.  Cook for 3-4 minutes until the milky solids have mostly evaporated.
  2. Add the lemon juice and reduce heat to low.  Whisk in the cream and keep warm until ready to serve.

For best results, serve in a small dish over a candle burner to keep warm.

To finish the evening on a last Maine note, serve a blueberry cobbler like the one I prepared for my guests.  It’s an easy dessert to prepare and a real crowd pleaser.

There’s truly no need to go to a seafood place for lobster.  A fun and affordable dinner party can be prepared in a jiffy that your friends and family will enjoy and appreciate.

Cheers,

Veronique