Fleur de Sel, Caramel and Chocolate Shortbread

Fleur de Sel, Caramel and Chocolate Shortbread

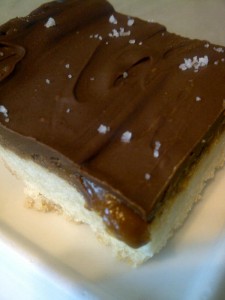
One of my favorite flavor combinations is salt and caramel.  These bars can be created in a snap, and can be made using store-bought caramel if time is of the essence (or if you simply cannot wait to sink your teeth into the salty, caramel, chocolaty treats).  Splurge with high-end sea salt for this recipe.

Shortbread ingredients:

  • 2 cups all-purpose flour
  • 1/4 tsp. salt
  • 2 sticks (1 cup) unsalted butter, softened
  • 1/2 cup confectioners’ sugar
  • 1 tsp. pure vanilla extract

Assembly ingredients:

  • 1 cup homemade or store-bought caramel
  • 12-ounce bag of milk chocolate chips
  • ½ tsp. fleur de sel, or other coarse sea salt

Shortbread directions:

  1. Preheat oven to 325 degrees.
  2. In a small bowl, whisk the flour and the salt.  Set aside for later use.
  3. In the bowl of an electric mixer, cream the butter with the paddle attachment for 1 minute.  Add the confectioners’ sugar and mix for 2 minutes, or until smooth.  Incorporate the vanilla extract.  Add the flour mixture on low speed and mix just until crumbly – do not over mix or tough shortbread will result.
  4. Line a 9×13 pan with aluminum foil, allowing for extra foil to overhang on each end of the pan for easy unmolding later.  Coat the foil with cooking spray, or butter the foil well.
  5. Press the dough into the pan and bake for 30-35 minutes, or until the shortbread is just lightly browned.  Cool for about 20 minutes.

Assembly directions:

  1. Spread the caramel over the cooled shortbread and refrigerate for 15 minutes.
  2. While the caramel shortbread is chilling, melt the chocolate chips in the microwave for about 90 seconds, stirring every 30 seconds to ensure every chips is melted.  Pour the chocolate over the caramel layer then spread evenly using an offset spatula.
  3. Put the pan back in the refrigerator to cool the chocolate slightly, about 5 minutes.  Chocolate should be cool enough so that the salt won’t “melt” into it, but soft enough that the salt is able to adhere to it. Sprinkle the fleur de sel evenly over the chocolate.
  4. Unmold the shortbread by pulling the foil out of the pan using the excess foil.  Cut into 18 bars using a sharp knife.

Make 18 bars.

Notes:  I have been using LaSalamandra Dulce de Leche for a few years as it is delicious and perhaps better than any caramel I have made.  Caramel found in the produce section of most grocery stores can also be used.

Inspiration for this recipe is based on Salted Chocolate and Caramel Shortbread Bars by Barbara Kiebel of Creative Culinary.

Strawberry and Nutella-Stuffed Crepes

Strawberry and Nutella-Stuffed Crepes

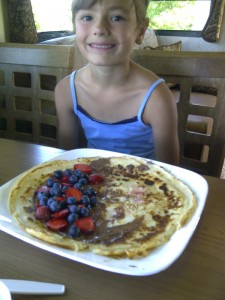
My Niece Maude

I recently spent the weekend in my native Quebec where I got a chance to breakfast with my two young nieces.  Like their mom, my sister Josée, they love the combination of strawberries and Nutella, the chocolate hazelnut spread.

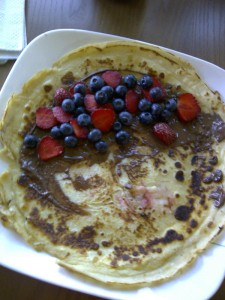
On the first morning of my weekend back home, the girls enjoyed Strawberry Nutella Treats.  On the second morning, I brought the Basic Crepe Batter I’d made the evening before and fixed Strawberry and Nutella-Stuffed Crepes.  The crepe batter is prepared in advance in a jiffy and the stuffed crepes are simple to fix for the whole family, even on busy mornings.  On this occasion, I added a few freshly-picked blueberries to the strawberries.

Ingredients:

  • Basic Crepe Batter
  • 4 Tbsps. butter
  • 8 Tbsps. Nutella
  • 1 pint of ripe strawberries, sliced
  • Whipped cream (optional)

Directions:

  1. In a large skillet (or crepe pan), melt 1 tablespoon of butter over medium-high heat until golden.
  2. Add ¼ of the crepe batter to the skillet and spread it evenly over the entire surface of the pan by tilting the skillet around.  Cook the crepe until the surface is mostly no longer wet, about 45 seconds.  Flip with a spatula and cook the second side for about 30 seconds.
  3. Strawberry Nutella Crepe

    Remove the crepe to a plate.  Spread 2 tablespoons of Nutella over the crepe then top with ¼ of the slices strawberries.  Roll the crepe, jellyroll-style and served with whipped cream, if using.

  4. Repeat steps 1-3 for the three remaining crepes.

Makes 4 crepes.

Notes:  The batter can easily be doubled or tripled if serving more guests.  The crepes can be stuffed with any berries, and another favorite of mine is stuffing them with a combination of raspberries and blueberries.

Strawberry Nutella Treats

Strawberry Nutella Treats

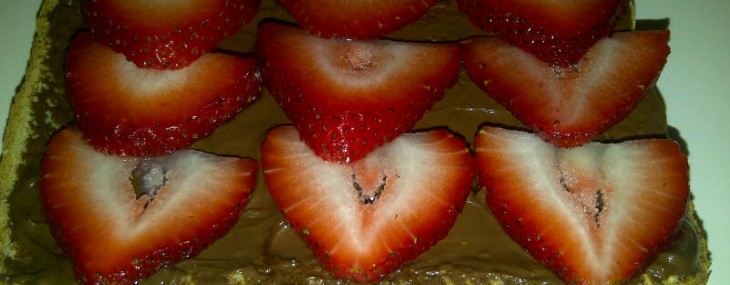
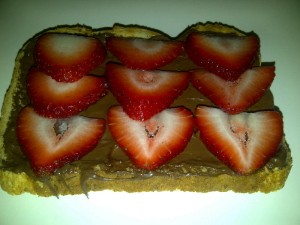
Strawberry season’s in full force and I can’t think of anyone who loves the little red gems more than my sister, Josée.  When her and her family visited me in New Jersey last, I, of course, had bought strawberries for her.  To my delight, my two nieces have inherited her love for strawberries and here’s a quick but special treat she fixed them one morning.

Ingredients:

  • 2 slices white bread (could use whole wheat)
  • 2 Tbsps. Nutella, hazelnut spread
  • 4 large strawberries, hulled and thinly sliced

Directions:

  1. Toast the bread.
  2. Spread 1 tablespoon of Nutella on each slice of toasted bread.
  3. Cover each Nutella-coated toast with the slices from 2 strawberries.

Makes 2 treats.

Pots de Crème au Chocolat Pour Deux

Pots de Crème au Chocolat Pour Deux

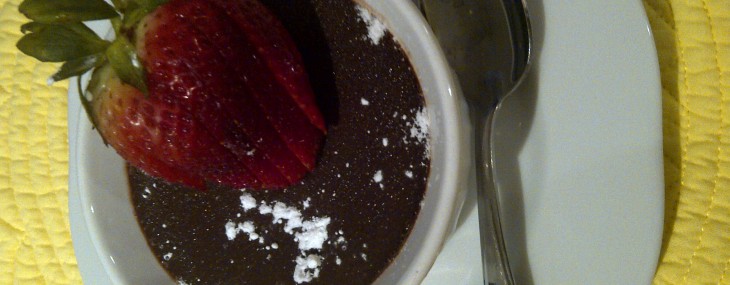
Lately, I’m on this quick to make desserts in ramekins.  Not sure why I’m in this frame of mind, but so far, it’s worked out pretty well for my guy and my friends.  Today, the mood is towards chocolate, so I decided to make Chocolate Pots de Crème.  What’s nice about this recipe is that it serves two people, so it can be made anytime, even when company’s not around.

Ingredients:

  • 2/3 cup heavy cream
  • 2/3 cup whole milk
    • 1 vanilla bean, split (could use 1 tsp pure vanilla extract)
    • 4 tbsp granulated sugar
    • 1/2 chocolate chips (milk or dark)
    • 4 egg yolks, lightly beaten

Directions:

  1. Preheat oven to 325 degrees.
  2. Warm the cream, milk, vanilla bean and sugar in a small sauce pan over medium heat until barely simmering, about 3 minutes.  Remove the vanilla bean, scrape its seeds then add them to the cream mixture. Discard the vanilla bean and stir the mixture well.
  3. Place the chocolate in a large heat-proof bowl.  Pour the hot cream mixture over the chocolate and stir until it’s melted.
  4. Slowly whisk the egg yolks into the chocolate and cream.  Make sure the ingredients are completely incorporated.
  5. Using a fine sieve, strain the mixture then pour into two 7-ounce ramekins.  Place the ramekins into a baking dish (I use a meatloaf pan) and pour hot water into the pan until it comes half way up the ramekins.  Be sure no hot water gets into the ramekins.
  6. Bake in the oven until the mixture sets, about 35 minutes.
  7. Transfer ramekins to a cookie sheet to cool for about 30 minutes.  Place a sheet of shrink wrap on the surface of each ramekin to prevent a skin from forming, then refrigerate, loosely covered with foil, until completely chilled, about an hour.
  8. Serve with a dollop of whipped cream or a dusting of powdered sugar..

Makes 2 servings.


Boiled Cookies by Chris

Boiled Cookies by Chris

Photo By Chris Absheer

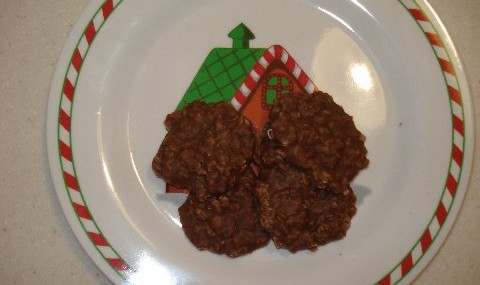
This simple yet delicious cookie recipe is the brainchild of St Louis Food & Wine Chickie friend Chris Absheer (here with adorable grandson Mikey).  What could be better than cookies you can enjoy WITHOUT baking!?

Ingredients:

  • 2 cups granulated sugar
  • 1/2 cup whole milk
  • 1/4 cup butter
  • 3 tbsp unsweetened cocoa powder
  • 1/2 cup creamy peanut butter
  • 2 cups old-fashioned oats
  • 1 teaspoon pure vanilla extract

Directions:

  1. Put sugar, milk, butter and cocoa powder in a heavy saucepan and bring to a boil over medium-high heat.  Boil for one minute.
  2. Remove from heat and quickly add peanut butter, oats and vanilla.  Stir well to combine the ingredients.
  3. Drop the cookie batter by teaspoonfuls onto wax paper.  Let stand 30 minutes before serving.

Yields 3 dozen cookies.

Chocolate and Raspberry Cake with Dark Chocolate Shell

Chocolate and Raspberry Cake with Dark Chocolate Shell

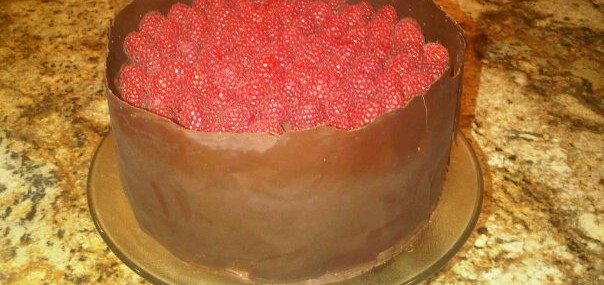
Chocolate Raspberry Cake

For New Year’s Eve, I was looking for a special chocolate dessert  to serve to my guests and found two recipes on the Bon Appétit website that I combined to give me the results I was looking for.

For the cake, I used this recipe as a base and for the shell I used the “bands” from this recipe.  I paced myself and made the cake over a 3-day period and it was both beautiful and tasty (see “notes” below for additional information on preparing the cake in advance).

Cake Ingredients

  • 2 cups all purpose flour
  • 1 3/4 cups granulated sugar
  • 3/4 cup unsweetened cocoa powder
  • 2 tsp baking soda
  • 1/4 tsp salt
  • 1 cup water
  • 3/4 cup buttermilk
  • 3/4 cup vegetable oil
  • 3 large eggs
  • 2 6-ounce containers fresh raspberries

Chocolate Ganache Ingredients

  • 18 ounces bittersweet chocolate (do not exceed 61% cacao), chopped
  • 2 1/4 cups heavy whipping cream
  • 6 tablespoons seedless raspberry jam, stirred to loosen, divided

Chocolate Shell Ingredients

  • 8 ounces bittersweet chocolate (do not exceed 61% cacao), chopped
  • 2 16×5-inch strips waxed paper

Chocolate Cake

  1. Position racks in top and bottom third of oven and preheat to 350°F. Coat two 9-inch round cake pans with 2-inch high sides with cooking spray. Line bottoms with parchment paper rounds then spray rounds with cooking spray.
  2. Sift flour, sugar, cocoa powder, baking soda, and salt into large bowl.  Whisk to blend and form well in center.
  3. Whisk the water, buttermilk, oil, and eggs in medium bowl to blend.
  4. Pour wet ingredients into the well of the dry ingredients and whisk just to blend.
  5. Divide cake batter between prepared pans (about 3 cups each).
  6. Bake cakes until tester inserted into center comes out clean, about 30 minutes. (If cakes form domes, place kitchen towel atop hot cakes, then press gently with palm of hand to level.) Cool completely in pans on cooling racks.

Chocolate Ganache Directions

  1. Place chopped chocolate in medium bowl. Bring cream just to boil in heavy medium saucepan. Pour over chocolate. Let stand 1 minute, then stir until ganache is melted and smooth.
  2. Transfer 1 1/4 cups ganache to small bowl. Cover and refrigerate until ganache is thick enough to spread, stirring occasionally, about 1 hour. Let remaining ganache stand at room temperature to cool until barely lukewarm.
  3. To assemble the cake:  a) Place rack inside rimmed baking sheet. b) Carefully run knife around pan edges to release cakes. c) Invert 1 cake layer onto cardboard round or bottom of 9-inch-diameter tart pan with removable bottom. Peel off parchment paper. Place cake layer on round on prepared rack. Spread 3 tablespoons jam over top. Spoon dollops of chilled ganache over, then spread evenly. d) Invert second cake layer onto another cardboard round or tart pan bottom. Peel off parchment paper. Carefully slide cake off round and onto frosted cake layer on rack. Spread remaining 3 tablespoons raspberry jam over top of second cake layer. e) Frost the entire cake with the remaining chilled ganache. f) Pour half of barely lukewarm ganache over cake, spreading over sides to cover (microwave for 15-20 seconds if mixture has completely cooled off).  g) Freeze until ganache sets, about 30 minutes. h) Pour remaining ganache over cake, allowing to drip down sides and spreading over sides if needed for even coverage and to smooth edges. i) Freeze to set ganache, about 30 minutes.
  4. Arrange raspberries in concentric circles atop cake.

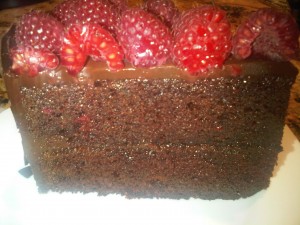
Chocolate Raspberry Cake Slice

Chocolate Shell Directions (watch video directions)

  1. Line large baking sheet with foil; set aside.
  2. Place another large sheet of foil on work surface; place waxed paper strips atop foil, spacing apart.
  3. Stir chocolate in medium bowl set over pan of simmering water until melted and smooth.
  4. Pour half of melted chocolate down center of each waxed paper strip. Using small offset spatula, spread chocolate to cover strips evenly, allowing some of chocolate to extend beyond edges of paper strips, making sure strips are completely covered. Using fingertips, lift strips and place on foil-lined sheet. Chill until chocolate just begins to set but is still completely flexible, about 2 minutes.
  5. Using fingertips, lift 1 chocolate sheet from foil. Wrap sheet around cake, waxed-paper side out, lining up 1 long edge with bottom of cake (sheet will be higher than cake).
  6. Repeat with second sheet, arranging so ends just meet, pressing sheet onto uncovered side of cake. If sheets overlap, trim any excess paper and chocolate.
  7. Using fingertips, press top edge of sheet in toward cake, forming slight ruffle.
  8. Chill until chocolate sets, 5 minutes. Gently peel off waxed paper. Chill cake.

Notes: The cakes can be baked 2 days before assembling and I recommend making them at least 1 day ahead.  Simply wrap the cakes in the pans with foil at room temperature.  The assembled cake can be made 1 day before serving if stored in the refrigerator.  Be sure to let the cake stand at room temperature for 2 hours before serving.

Decadent Chocolate Brownie Cookies

Decadent Chocolate Brownie Cookies

Chocolate Brownie Cookie

Can’t decide whether to make chocolate cookies or brownies?  Problem solved!  These cookies are chewy, nutty and completely decadent.

Ingredients:

  • 6 ounces semi-sweet chocolate chips
  • 4 ounces extra bittersweet chocolate (70% cacao)
  • 6 tbs. butter
  • 1 ¼ cups granulated sugar
  • 3 large eggs
  • 2 tsp. pure vanilla extract
  • 1 cup all-purpose flour
  • 1 tsp. baking powder
  • ¼ tsp. salt
  • 2 cups mixed nuts, chopped (macadamia, almonds and/or pecans are super)

Directions:

  1. Preheat oven to 325 degrees.
  2. Microwave chocolates and butter in a large bowl on high for 1½ – 2 minutes or until almost completely melted, stirring halfway through heating time.  Stir until smooth.
  3. Add sugar into the chocolate and stir to blend.  Add eggs one at-a-time, stirring well after each one. Add vanilla.
  4. In a small bowl, combine flour, baking powder and salt.  Add flour mixture to the chocolate and stir to combine completely.  Add nuts to the batter.
  5. Drop the cookie batter by the rounded tablespoonful, onto an ungreased cookie sheet, 1½-inches apart to allow room for cookies to expand.  You’ll need 4 cookie sheets for this.
  6. Bake the cookies 13 minutes or until set.  Do not over bake – cookie centers will still be slightly moist.

Makes 2 dozen large cookies.

Notes:  I like to start with whole nuts then rough chop them with a knife to allow for large, uniform pieces.  I recommend baking the cookies, 2 sheets at-a-time to prevent the oven from being over-crowded.

Ghirardelli Dark Fudgy Brownies

Ghirardelli Dark Fudgy Brownies

Dark Fudgy Brownies

Dark Fudgy Brownies

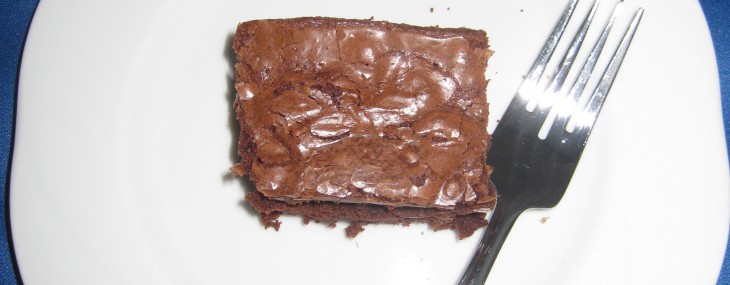
These are THE brownies for chocolate lovers. Almost too rich and chocolaty, but not quite by my standards. I often use these brownies to make brownie hot fudge sundaes. They are fan favorites every time.

Ingredients:
• 3/4 cups flour
• 1/4 tsp. baking soda
• 3/4 cup sugar
• 1/3 cup butter
• 2 tbs. water
• 6 ounces Ghirardelli 60% Cacao Bittersweet Chocolate Chips
• 6 ounces Ghirardelli Semi-Sweet Chocolate Chips
• 1 tsp. vanilla
• 2 large eggs
• 1/2 cup chopped pecans (optional)

Directions:
1. Preheat oven to 325 F. Grease a 9-inch square pan.
2. In a small bowl, combine the bittersweet and the semi-sweet chocolate chips, set aside.
3. In a small bowl, mix together flour and baking soda, set aside.
4. In a small saucepan, combine sugar, butter and water. Bring to a boil over medium heat; remove immediately from heat.
5. Add 1 cup of the mixed chocolate chips and the vanilla to the hot sugar mixture and stir until melted and smooth.
6. Transfer the hot sugar mixture to a medium bowl. Cool completely.
7. Add the eggs, 1 at a time, to the chocolate mixture, stirring well after each one. Gradually stir in flour mixture until smooth. Incorporate remaining chocolate chips and the nuts, if using, into the batter. Pour batter into the greased pan.
8. Bake 30-35 minutes. Cool completely and cut into squares.

Makes 9 large brownie squares.

NOTE: Get a tall glass of milk ready!

Chocolate Crackle-Top Cookies

Chocolate Crackle-Top Cookies

Crackle-Top Cookie Ingredients

Crackle-Top Cookie Ingredients

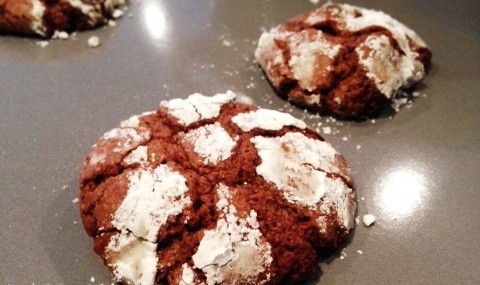
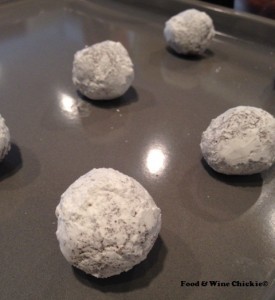
The name for these easy-to-make and succulent cookies comes from the fact that the baking of the cookies causes ‘crackles’ in the powdered sugar coating. Kids LOVE to help roll the unbaked cookies in the powdered sugar, so summon help!

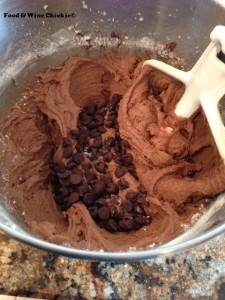
Crackle-Top Cookie Batter

Crackle-Top Cookie Batter

Ingredients:

  • 1 ½ cups semi-sweet chocolate chips
  • 1 ½ cups all-purpose flour
  • 1 ½ tsp. baking powder
  • ¼ tsp. salt
  • 1 cup sugar
  • 6 tbs. butter, at room temperature
  • 1 ½ tsp. vanilla extract
  • 2 large eggs
  • 1 cup powdered sugar
Crackle-Top Cookie Dough Balls

Crackle-Top Cookie Dough Balls

Directions:

  1. Preheat oven to 350 F.
  2. Microwave 1 cup chocolate for 1 minute. Stir. Microwave at 10 seconds intervals until completely melted.
  3. In a small bowl, combine flour, baking powder, and salt.
  4. In the bowl of an electric mixer, beat sugar, butter, and vanilla.  Add melted chocolate until well blended.  Incorporate eggs, one at a time. Gradually incorporate flour mixture in the chocolate mixture. Stir in remaining 1/2 cup chocolate chips. Chill until firm, about 30 minutes.
  5. Shape cooled dough into 1 ½” balls (about 1 teaspoon).  Place powdered sugar in a shallow dish and roll dough balls into it to cover completely.
  6. Place balls onto ungreased cookie sheets.  Bake for 13-15 minutes ( the cookies won’t be set in the center! ).
  7. Cool cookies for 5 minutes on the cookie sheets, then transfer to a rack to completely cool.

Makes 24 cookies.

Chocolate Shortbread Cookies

Chocolate Shortbread Cookies

Shortbread

Shortbread

These cookies are rich, buttery and simply perfect to satisfy a chocolate craving.

Ingredients:

  • 1 cup (2 sticks) butter, at room temperature
  • ½ cup sugar
  • 2-1 ounce squares semi-sweet chocolate, melted and cooled
  • 2 cups flour
  • ¼ tsp salt

Directions:

  1. Preheat oven to 300 F.
  2. Lightly butter a 13x9x2 baking pan.
  3. Using an electric mixer on medium speed, cream the butter with the sugar until light and fluffy.  Stir in the chocolate, mixing well.  Add flour and salt; stir until completely incorporated.  Spread the dough into prepared pan and bake in the center of oven about 40 minutes or until firm.  Cool slightly in the pan, cut into squares then cool completely in the pan overnight.

Makes 2 dozen squares.