Easy and Elegant 4-Course Valentine’s Day Dinner

Easy and Elegant 4-Course Valentine’s Day Dinner

Need some inspiration for a romantic meal this Valentine’s Day (or any old day)?  Here are four, simple-to-make dishes along with wine pairings that are sure to show your loved one(s) how much you care.

BONUS – breakfast:  Strawberry and Nutella-Stuffed Crepes

Whichever dish you decide to prepare for your loved one(s) this Valentine’s Day, I hope your meal is paired with love.

Cheers,

Veronique
 

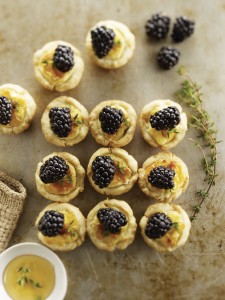
Savory Cheese Tartlets with Blackberries

Savory Cheese Tartlets with Blackberries

I got this recipe from the fine folks at Driscoll’s® and had to share it as it is perfect for holiday entertaining.

Filling Ingredients:

  • 5 oz. rindless goat cheese, at room temperature
  • 3 oz. cream cheese, at room temperature
  • 1 large egg
  • 1 large egg yolk
  • 1 tsp. minced fresh thyme
  • ¼ tsp. salt
  • ¼ tsp. freshly ground black pepper
  • 2 Tbsp. honey, preferably full flavored, such as chestnut or thyme, warmed

Cream Cheese Dough Ingredients:

  • 1 cup all-purpose flour
  • Pinch of salt
  • 7 Tbsp. unsalted butter, cut into tablespoons, at room temperature, plus more for pans, if needed
  • 3 oz. cream cheese, cut into tablespoons, at room temperature

 Directions:

  1. Combine flour and salt in a food processor fitted with metal chopping blade and pulse to combine. Add butter and cream cheese and pulse about 10 times, until mixture begins to clump together. Gather up dough and shape into a thick disk. Wrap in plastic wrap and refrigerate until chilled and easy to handle (about 2 hours).
  2. Position rack in the center of the oven and preheat to 350°F. Have ready two 12-cup miniature muffin pans (each cup measuring 1 7/8 inches across the top and 7/8 inches deep), preferably nonstick. If the pans are not nonstick, lightly butter them.
  3. Divide dough into 24 equal pieces. Place one piece in each muffin cup.  Using fingers, press dough firmly and evenly up sides to make a pastry shell.  (A wooden tart tamper can help the job go quickly.) Freeze 5 minutes.
  4. Mash goat cheese and cream cheese together in a medium bowl until smooth. Add egg, yolk, minced thyme, salt and pepper and whisk until combined. Spoon equal amounts of filling into chilled pastry shells.
  5. Bake tartlets until crust is golden brown and filling is puffed (about 25 minutes). Let cool for 10 minutes in pans. Remove tartlets from pans and transfer to a wire cake rack to cool completely.
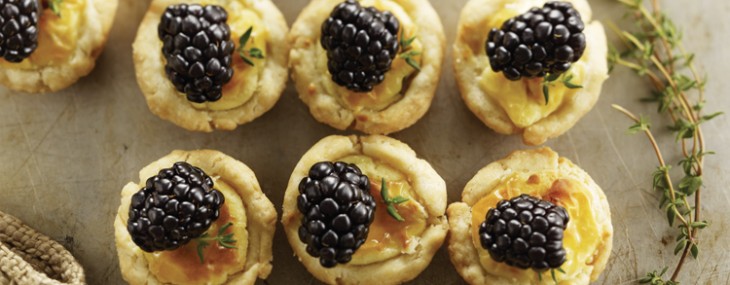
  6. Just before serving, lightly brush tops of tartlets with about 1 tablespoon of honey. Arrange berries on top as desired. Drizzle with the remaining honey. Sprinkle with the thyme leaves and serve.

Servings: 24 tartlets, 8 to 12 servings


Peanut Butter, Banana and Nutella Panini

Peanut Butter, Banana and Nutella Panini

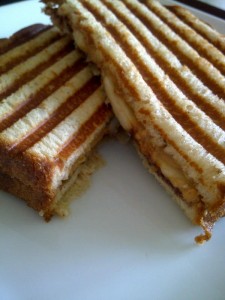
My grandma used to make my sister and me peanut butter and banana grilled sandwiches in a cast iron contraption when we were kids.  This contraption, an early version of a Panini press, had long handles that could be flipped on the stovetop until the bread was perfectly browned and gorgeous.  I miss those days and decided to sort of recreate the sandwich using my modern day Panini press and a little twist – Nutella!

Ingredients:

  • 2 tsp. softened butter
  • 2 slices whole wheat bread (I like oatmeal and whole wheat for this)
  • 2 Tbsp. chunky peanut butter
  • 1 Tbsp. Nutella
  • ½ ripe banana, sliced

Directions:

  1. Heat up Panini press or a grill pan over high heat.
  2. Spread 1 teaspoon of butter on one side of each bread slice.
  3. Spread the peanut butter on the unbuttered side of one bread slice.
  4. Spread Nutella on the unbuttered side of the second bread slice then arrange the banana slices over Nutella.
  5. Top the Nutella/banana slice with the peanut butter slice so that the buttered side of each bread slice is on the outside and the goodies are on the inside.
  6. Place the sandwich in the Panini press and grill for 3 minutes.  Alternatively, place the sandwich on the grill pan (still on high heat) and top with the weight of multiple pans or a pan with a 2-3 pound weight in it and cook 1 1/2 minutes per sides.
  7. Transfer sandwich to a cutting board and cut sandwich diagonally using a serrated knife.

1 serving.

Raspberry Croissant Bread Pudding

Raspberry Croissant Bread Pudding

I recently attended a berry virtual tasting hosted by Driscoll’s and WineTwits and created the following recipe to share with the group.  The results are just as tasty when blackberries are used.

Ingredients:

  • 1 cup heavy cream
  • 2 cup half and half
  • 6 large eggs
  • 1 cup granulated sugar
  • 1 tsp.  pure vanilla extract
  • 4 croissants, cut into1/2” cubes
  • 1 6-ounce container of fresh raspberries

Directions:

  1. Preheat the oven to 325°F.
  2. Heat cream and half and half in a saucepan over medium heat until just simmering.
  3. In a large bowl, whisk the eggs, ¾ cup sugar and vanilla until well combined.  Add a ladleful of hot cream to the egg mixture and whisk well to bring up the temperature of the eggs.  Add the rest of the cream to the egg custard and whisk well.
  4. Add the cubed croissants to the custard and gently push down the cubes into the liquid to ensure they absorb as much custard as possible.  Set aside for 20 minutes.
  5. Lightly coat four 10-ounce ramekins with cooking spray.  Add two raspberries to each ramekin then divide the bread and custard mixture between the four dishes.  Divide the remaining raspberries amount the dishes and sprinkle each with the rest of the sugar, about one teaspoon each.
  6. Place the ramekins on a cookie sheet and bake for about 35 minutes, until puddings are puffed and a toothpick inserted in the center comes out mostly clean.  Serve while still warm with a drizzle of Blackberry Balsamic Coulis and/or a scoop of vanilla ice cream.

Makes 4 servings.

Blackberry Balsamic Coulis

Blackberry Balsamic Coulis

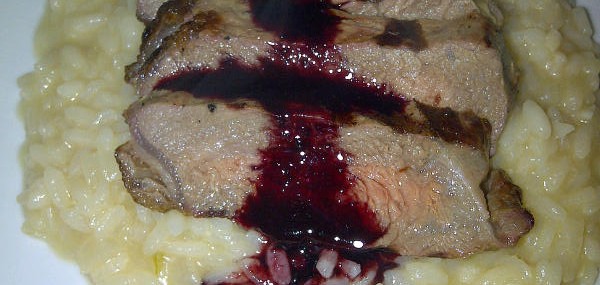
This simple reduction is perfect on both grilled steaks and drizzled over desserts.

Ingredients:

  • 1 pint of fresh blackberries
  • ¼ cup balsamic vinegar
  • 3 Tbsp. granulated sugar

Directions:

  1. In a small saucepan over medium heat, add the blackberries, the vinegar and the sugar.  Stir with a wooden spoon to combine.  Cook for 10 minutes, mashing the berries with the back of the wooden spoon as they cook and soften.
  2. Strain the berries and their juices into a small bowl.  Using the back of a soup spoon, press down the berries in the strainer to get as much of the juices and smooth flesh into the bowl as possible.  Discard the fruit that couldn’t be strained.

Makes between ½ – ¼ cup.

Notes:  Can easily be made with strawberries or raspberries.  Fresh berries out of season?  Use a 12-ounce bag of frozen, thawed berries.

Heavenly Cheesecake with Bruléed Figs

Heavenly Cheesecake with Bruléed Figs

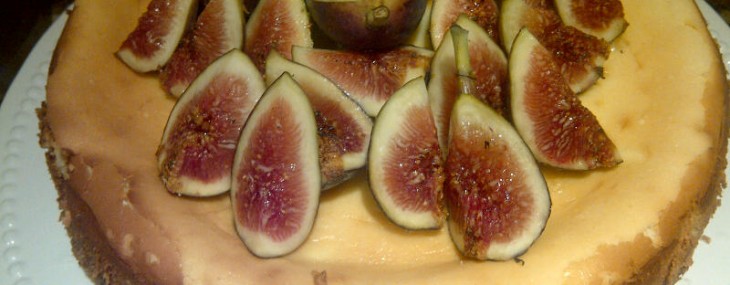
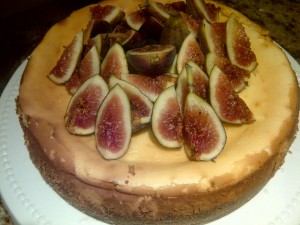
It felt very Fall-ish outside this weekend and while looking for inspiration for my dinner party dessert in the produce aisle of the grocery store, I found beautiful, ripe figs. 

This Heavenly Cheesecake with Bruléed Figs is delectable with its creamy/velvety consistency and the slight crunch from the crackly sugar coating on the figs.

Cheesecake Ingredients:

  • 1 ½ cups Graham cracker crumbs
  • ½ cup granulated sugar
  • ¼ cup butter, melted
  • 5 8-ounce cream cheese packages, softened
  • 5 eggs plus 2 egg yolks
  • ¼ cup heavy cream
  • 1 ¾ cups granulated sugar
  • Drop of almond extract
  • ¼ cup all-purpose flour

Fig Topping Ingredients:

  • 8 fresh figs
  • 4 Tbsp. granulated sugar

Cheesecake Directions:

  1. Preheat oven to 400 degrees.
  2. In a medium bowl, combine the cracker crumbs, ½ cup sugar and the melted butter.  Press the mixture into the bottom and ½” up the sides of a 9” springform pan.  Set aside for later use.
  3. In the bowl of an electric mixer fitted with the paddle attachment, whip the cream cheese until light and fluffy, about 2 minutes.  Add the eggs then the yolks, and beat until smooth, about 2 minutes.  Add the cream, remaining sugar, the almond extract and the flour.  Blend until just smooth – do not overbeat.  Pour cream cheese mixture over the cracker crust in the pan.
  4. Place the springform pan on a baking sheet and bake for 15 minutes.  Lower the oven to 250 degrees and bake for an additional 90 minutes or until center of the cake is set but still a bit jiggly.  Cool the cheesecake in the pan for 45 minutes.  Run a small knife between the ring and the cake to loosen any bits from the pan, then loosen the ring and cool another 15 minutes.  Remove the ring and refrigerate up to a day prior to decorating and serving.

Fig Topping Directions:

  1. Quarter each fig from stem to end.  Place fig quarters, skin side down, on a baking sheet lined with aluminum foil.
  2. Sprinkle sugar lightly over the fig flesh.  Using a kitchen torch, brulée the sugar onto each fig quarter.
  3. Place figs, bruléed side up onto the cheesecake.

Makes 10 servings.

Notes:  Don’t have a kitchen torch?  No sweat – simply broil the figs on high for 1-2 minutes, until the sugar begins to melt onto the figs.

Lemony Blueberry Cobbler

Lemony Blueberry Cobbler

Lemony Blueberry Cobbler

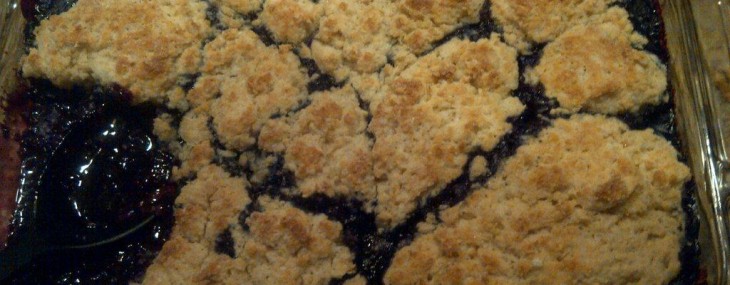
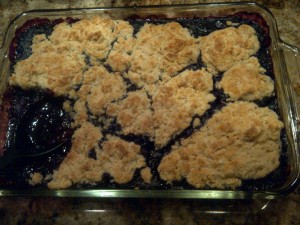
This weekend, I hosted a Maine-themed dinner party and for dessert, I couldn’t think of anything more representative of the beautiful northern New England state than blueberries.  To keep with the rustic feel of the party, I opted to create a comforting, biscuit-topped cobbler that I paired with Tahitian vanilla ice cream.  The result was outstanding.

Biscuit Batter Ingredients:

  • 2 cups all-purpose flour
  • ¼ cup plus 2 Tbsp. granulated sugar
  • 1 ½ tsp. baking powder
  • ½ tsp. baking soda
  • ¼ tsp. salt
  • 1 stick (1/2 cup) cold unsalted butter, cut into cubes
  • ¾ cup buttermilk
  • 1 tsp. vanilla extract

Blueberry Filling Ingredients:

  • ¾ cup granulated sugar
  • ¼ cup maple syrup
  • 1 tsp. grated lemon zest
  • 2 Tbsp. lemon juice
  • 2 Tbsp. water
  • 64-ounce bag of frozen blueberries, thawed (or 8 cups fresh blueberries)
  • 2 Tbsp. cornstarch diluted with 3 Tbsp. water

Biscuit Batter Directions:

  1. In a medium bowl, whisk together the flour, 1/4 cup sugar, baking powder, baking soda and salt.
  2. Cut in butter with a pastry blender until coarse crumbs form.
  3. Add the buttermilk and vanilla to the flour mixture and stir gently just until a biscuit-like batter forms – do not over-stir as tough dough will result.  Keep the batter in the refrigerator until ready to use, no more than 30 minutes.

Filling Directions:

  1. Preheat oven to 350 degrees and butter a 13×9 baking dish.
  2. In a medium saucepan over medium-high heat, combine the sugar, maple syrup, zest, lemon juice and water.
  3. Add half of the blueberries to the pan and cook, partially covered, for about 10 minutes until hot and bubbly, stirring occasionally.
  4. Stir the cornstarch mixture into the cooked blueberries, raise the heat to high, bring the mixture to a boil and cook 1 minute or until thickened.
  5. Gently stir in remaining blueberries and pour the mixture in the prepared baking dish.

Biscuit Topping Directions:

  1. Drop eight 1/4-cupfuls of the biscuit batter, evenly spaced, over hot filling. Sprinkle biscuits with remaining 2 tablespoons of sugar.
  2. Bake the cobbler for 20 minutes then turn the broiler on high and bake for 3 additional minutes to brown the tops of the biscuits.
  3. Cool the dish for 5 minutes and serve warm over vanilla ice cream.

Serves 8.

Notes:  Want to shake things up a bit?  Replace the blueberries with mixed berries or straight raspberries.  For the filling, if you don’t have maple syrup, simply use 1 cup of granulated sugar instead of ¾ cup.

Recipe inspired by Woman’s Day Blue and Blackberry Cobbler.

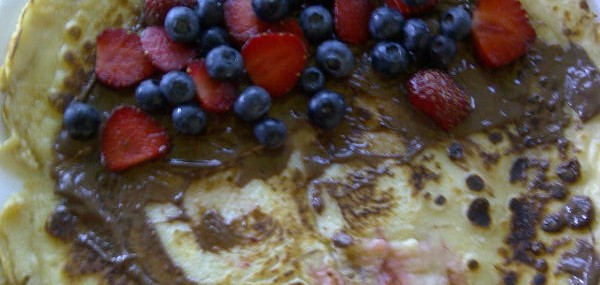
Strawberry and Nutella-Stuffed Crepes

Strawberry and Nutella-Stuffed Crepes

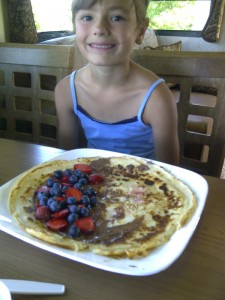
My Niece Maude

I recently spent the weekend in my native Quebec where I got a chance to breakfast with my two young nieces.  Like their mom, my sister Josée, they love the combination of strawberries and Nutella, the chocolate hazelnut spread.

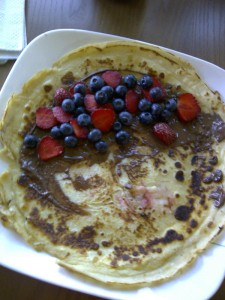
On the first morning of my weekend back home, the girls enjoyed Strawberry Nutella Treats.  On the second morning, I brought the Basic Crepe Batter I’d made the evening before and fixed Strawberry and Nutella-Stuffed Crepes.  The crepe batter is prepared in advance in a jiffy and the stuffed crepes are simple to fix for the whole family, even on busy mornings.  On this occasion, I added a few freshly-picked blueberries to the strawberries.

Ingredients:

  • Basic Crepe Batter
  • 4 Tbsps. butter
  • 8 Tbsps. Nutella
  • 1 pint of ripe strawberries, sliced
  • Whipped cream (optional)

Directions:

  1. In a large skillet (or crepe pan), melt 1 tablespoon of butter over medium-high heat until golden.
  2. Add ¼ of the crepe batter to the skillet and spread it evenly over the entire surface of the pan by tilting the skillet around.  Cook the crepe until the surface is mostly no longer wet, about 45 seconds.  Flip with a spatula and cook the second side for about 30 seconds.
  3. Strawberry Nutella Crepe

    Remove the crepe to a plate.  Spread 2 tablespoons of Nutella over the crepe then top with ¼ of the slices strawberries.  Roll the crepe, jellyroll-style and served with whipped cream, if using.

  4. Repeat steps 1-3 for the three remaining crepes.

Makes 4 crepes.

Notes:  The batter can easily be doubled or tripled if serving more guests.  The crepes can be stuffed with any berries, and another favorite of mine is stuffing them with a combination of raspberries and blueberries.

Strawberry Nutella Treats

Strawberry Nutella Treats

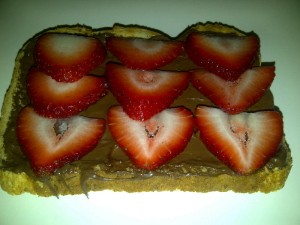
Strawberry season’s in full force and I can’t think of anyone who loves the little red gems more than my sister, Josée.  When her and her family visited me in New Jersey last, I, of course, had bought strawberries for her.  To my delight, my two nieces have inherited her love for strawberries and here’s a quick but special treat she fixed them one morning.

Ingredients:

  • 2 slices white bread (could use whole wheat)
  • 2 Tbsps. Nutella, hazelnut spread
  • 4 large strawberries, hulled and thinly sliced

Directions:

  1. Toast the bread.
  2. Spread 1 tablespoon of Nutella on each slice of toasted bread.
  3. Cover each Nutella-coated toast with the slices from 2 strawberries.

Makes 2 treats.

Simple Greek Yogurt and Berry Tart

Simple Greek Yogurt and Berry Tart

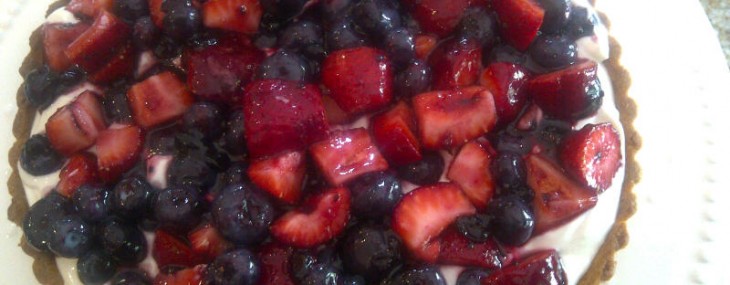
It’s strawberry season here in New Jersey and I was looking for a simple, refreshing dessert to serve on a warm summer day.  I came up with this tangy tart that features a crust which can be made a day in advance and a filling that’s a snap to prepare.  The addition of blueberries to the ripe strawberries makes it patriotic-looking enough to serve for your 4th of July party.

Ingredients:

  • 1 17.6-ounce container of plain Greek yogurt
  • 1 tbsp. honey
  • 3 tbsps. powdered sugar
  • Zest of ½ lemon
  • ¾ cup black currant jelly
  • 2 cups of blueberries
  • 2 cups chopped strawberries
  • Simple Tart Crust

Directions:

  1. In a medium bowl, combine the Greek yogurt, the honey, the powdered sugar and the lemon zest.  Set aside (can be made up to 4 hours prior to assembling the tart if kept refrigerated).
  2. About 30-60 minutes before serving the tart, in a heat-proof bowl or measuring cup, microwave the black currant jelly for 1 minute, until liquefied. Set aside.
  3. In a large bowl, combine the blueberries and strawberries.  Add the warm black currant jelly to the berries and gently stir to coat each fruit. Set aside.
  4. Spread the yogurt mixture over the tart crust forming an even layer.  Gently top the yogurt layer with the berries and spread evenly in an attempt to completely cover the yogurt.  Refrigerate until ready to serve.

Serves 8.

Notes: The tart crust can be made the day before if cooled then covered in aluminum foil and stored at room temperature.  Try not to assemble the tart more than an hour prior to serving to keep the crust from becoming soggy.