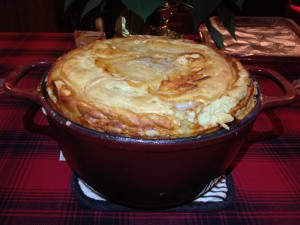
Tourtiere du Lac St Jean (Meat Pie from Quebec)

Tourtiere du Lac St Jean (Meat Pie from Quebec)

tourtiere

Photo by Eat with Dan

RECETTE EN FRANCAIS

A tourtiere is a traditional dish from Quebec. Although this giant meat pie isn’t from the region of Quebec I’m from, it’s actually from a place called Lac St Jean, it’s very popular around the holidays everywhere in Quebec.

Last weekend I hosted a small dinner party where I wanted to feature some traditional dishes from Quebec. Tourtiere just had to be on the menu! 

This dish is a labor of love with the time-consuming part being the small dicing of the meats and potatoes and the tricky part the rolling of a sheet of pastry big enough to cover the bottom of my huge cast iron Dutch oven. Don’t forget to start the process the day BEFORE you’re going to bake this dish. The result – homey deliciousness.

This dish could easily feed ten guests as a main entrée. I served it in a buffet for 15 people and we ate half of it. The good part is that the leftovers are super tasty.


Ingredients:

  • 1 ½ pounds beef top round, cut into ½ inch cubes
  • 1 ½ pounds veal shoulder, cut into ½ inch cubes
  • 1 ½ pounds pork shoulder (pork butt), cut into ½ inch cubes
  • 1 chicken breast, cut into ½ inch cubes
  • ½ pound salt pork, cut into ½ inch cubes
  • 3 large onions, diced
  • 3 bay leaves
  • 1 Tbsp. each dried Summer Savory and salt
  • 1 tsp. pepper
  • 4 pounds, Yukon Gold (or similar) potatoes
  • 2 batches of Fail Proof Pie Crust, enough for four 9” crusts
  • 1 large egg combined with 2 Tbsp. water
  • 28 ounces chicken broth

Directions:

24 hours before baking the Tourtiere:

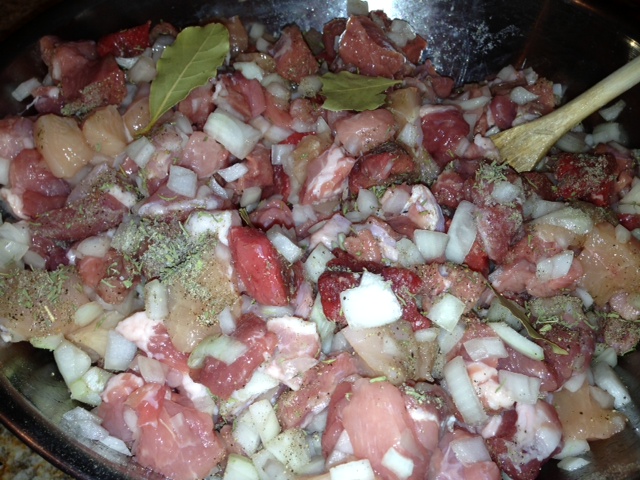
  1. Combine the meats, onions, bay leaves and spices in a large, non-reactive bowl. Stir the mixture and cover the bowl with plastic wrap. Refrigerate for 24 hours.

The day you’re baking the Tourtiere:

  1. Preheat oven to 425 degrees.
  2. Peel the potatoes and cut into ½ inch dice.
  3. From the 4 portions of pie dough, divide the dough into two balls – one that’s ¾ of the whole recipe and one that’s ¼ of the whole recipe. Roll out the bigger ball and cover the bottom of a 9-quart Dutch oven, ensuring there’s a 1” overhang.
  4. Add about 1/3 of the meat mixture to the Dutch oven then cover the meat with 1/3 of the potatoes. Repeat the process until all the meat and potatoes have been used.
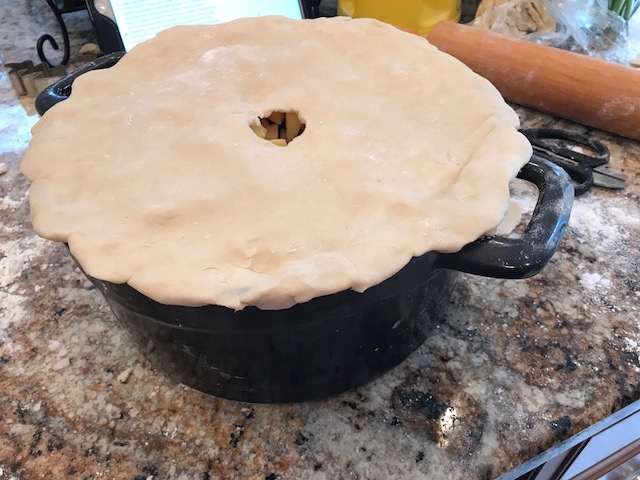
  5. Roll out the small pie dough ball and cover the meats/potatoes in the Dutch oven. Seal the bottom and top crusts by pinching them then rolling them over themselves to create a rope around the perimeter of the Dutch oven.
  6. Cut a 2’ round vent hole in the center of the Tourtiere. Decorate the surface of the Tourtiere with scraps of pie dough (optional) then brush the egg wash over the entire surface.
  7. Using a small funnel, add the broth to the Tourtiere by inserting the funnel into the vent hole. You may need to shake the pot in order for the broth to get distributed thoroughly throughout the Tourtiere. Don’t overfill the Tourtiere with broth to the point where broth overflows – use less if need be.
  8. Place the Tourtiere, uncovered, in the oven for 15 minutes. A baking sheet directly under the Tourtiere is a good idea to prevent spills.
  9. Turn the heat down to 250 degrees, cover the pot and bake for 6 hours.
  10. Turn the heat up to 400 degrees, uncover the pot and allow the Tourtiere to brown for about 30 minutes.

Makes 15 hearty portions.

Green Goddess Dip

Green Goddess Dip

Green Goddess Dressing’s been around since the 1920s and it seems has made a return on many restaurant menus. I made this thicker version of the dressing and served it with crudités at a recent dinner party to the delight of my guests. Sour cream could be a substitute for the crème fraiche and herbs can be changed based on what you have at home.

Ingredients:

  • 1/2 cup crème fraiche
  • 1/2 cup mayonnaise
  • 1/4 cup chopped scallions
  • 2 Tbsp. chopped fresh chives
  • 2 Tbsp. chopped Italian parsley
  • 3 anchovy filets (packed in oil)
  • 1 Tbsp. lemon juice
  • 1/4 tsp. each salt and pepper

Directions:

  1. Add all the ingredients to a food processor and blend for about 60 seconds, until the dip is creamy and green.

Makes just over a cup of dressing.

Butternut Squash and Wild Mushroom Bread Pudding

Butternut Squash and Wild Mushroom Bread Pudding

Just in time for Thanksgiving, a festive recipe by Chef Josh Thomsen of Agricola Community Eatery, opening January 2013.

Ingredients:

  • 1 loaf brioche
  • 4 tablespoons unsalted butter
  • 4 tablespoons olive oil
  • 2 cups diced yellow onions
  • 1-1/2 lbs chanterelle mushrooms, or any combination of domestic mushrooms,
  • shiitake, hedgehog, porcini and oyster
  • 3 cups diced butternut squash
  • 1 tablespoon chopped parsley
  • 2 cups milk
  • 1 cup creme fraiche
  • 6 whole eggs
  • 1 1/2 teaspoon kosher salt
  • 1 teaspoon freshly ground pepper
  • 1/2 cup grated asiago cheese

Directions:

  1. Roast butternut squash with olive oil, salt and pepper at 400 degrees, about 7 minutes, until tender.
  2. Roast mushrooms with thyme and garlic in a 475 degree oven for 7 minutes.
  3. Remove crust from the bread and cut into 1 inch cubes.
  4. Grease a large baking dish about 12″ by 18″ with some of the butter.
  5. In a large saute pan melt the remaining butter and saute the onions until soft.
  6. In a large bowl, toss together bread, mushrooms, squash and parsley.
  7. In another small bowl, whisk together the milk, creme fraiche, eggs, salt, pepper and cheese. Add the milk mixture to the bread mixture, pour into the baking dish and press down firmly.
  8. Allow pudding to set 30 minutes before baking.
  9. Reduce oven to 350 degrees and bake pudding about 1 hour. If pudding browns, cover with foil. Test for doneness by inserting a knife in the middle, it should come out clean

Serves 18.

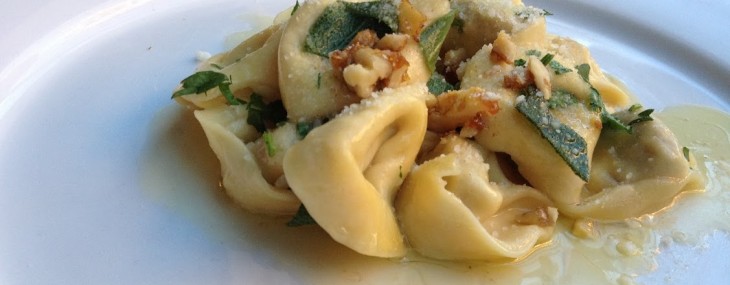
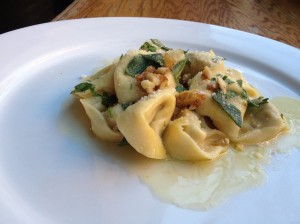
Pumpkin Tortellini with Brown Butter and Sage

Pumpkin Tortellini with Brown Butter and Sage

This recipe by Chef Anthony Pino of The Dining Room at Anthony David’s and Bin 14 is perfect as a side dish around the holidays.

Ingredients:

  • Pumpkin Tortellini, about 2 lbs
  • Butter, 4 ouces
  • William Sonoma Chicken stock, 8 ounces
  • 4 sage leaves
  • Salt and pepper to taste
  • Parsley, chopped to garnish
  • William Sonoma Pecorino Cheese 2 – 3 ounces
  • William Sonoma Granulated Honey, 1 – 2 teaspoons

Directions:

  1. Start by boiling water and add a generous pinch of salt. Once the water is boiling add the tortellini to the All Clad Perforated Pot and cover. This will take about 5-6 minutes.
  2. While the pasta is cooking, heat a large sauté pan. When pan is hot add the butter. When light smoke appears, add William Sonoma Chicken Stock to stop the browning of the butter then add sage, salt, pepper. Allow this to simmer for 2 minutes allowing the herbs and the butter to marry.
  3. By now your tortellini should be ready. Remove lid. Pull up on the handles and allow the water to drain right back into the pot. When completely drained, pour the tortellini into the butter sage sauce and simmer for 1 minute. Add the parsley, toss. Plate the pasta. With the William Sonoma Cheese Grater and William Sonoma Pecorino, grate the pecorino directly over each plate and then sprinkle with William Sonoma Granulated Honey.

Yields 4 servings.

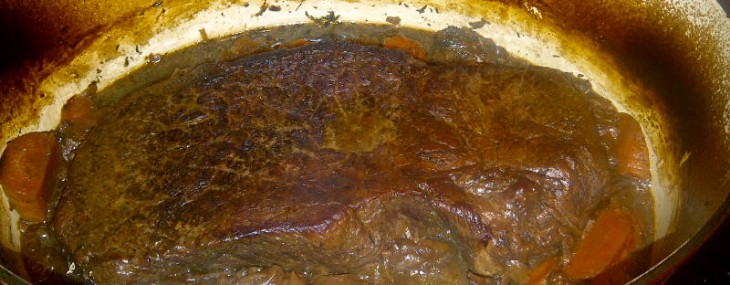
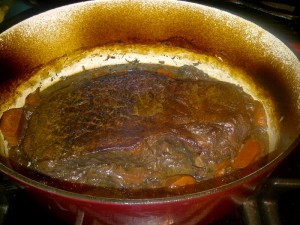
Pot Roast 101

Pot Roast 101

When cooler weather comes, the thought of a comforting dish, like a pot roast, sounds very appealing. Conversely, the thought of spending hours slaving over a hot stove does not sound in any way appealing. Here is a simple pot roast recipe that slow cooks in the oven, tastes rich and hearty and is a breeze to prepare.

Ingredients:

  • 3 Tbsp. vegetable oil
  • 1 (3-pound) boneless chuck roast (London broil)
  • 1 tsp. each salt and pepper
  • 1 large onion, sliced
  • 4 large carrots, cut on the diagonal in 1-inch pieces
  • 1 tsp. dried thyme
  • 2 bay leaves
  • 1 cup red wine (Merlot or Cabernet Sauvignon work best)
  • 2 (14-ounce) cans beef broth

Directions:

  1. Preheat oven to 300 degrees.
  2. In a heavy Dutch oven, heat oil over high heat. Sprinkle the roast with salt and pepper. Add the roast to pan and sear on both sides for 3 minutes per side.
  3. Remove the roast from pan, turn the heat to medium, add the remaining oil and sauté the onion and carrots for 10 minutes, stirring frequently.
  4. Add the thyme and bay leaves to the vegetables then place the roast over the vegetables in pan. Pour the wine and the broth in pan, cover, transfer the roast to the oven and simmer for 3 hours.
  5. Serve with mashed potatoes, wide egg noodles or white rice.

Serves 6.

Butternut Squash and Porcini Mushroom Lasagna

Butternut Squash and Porcini Mushroom Lasagna

In the fall, I get inspired to prepare dishes that reflect the season and the autumn harvest. An ingredient I love to use during this time of year is butternut squash. From Butternut Squash and White Asparagus Bisque to Gnocchi with Butternut Squash and Bacon in Sage and Danish Blue Cheese Sauce to the following recipe, Butternut Squash and Porcini Mushroom Lasagna, there are countless ways to prepare comforting dishes using this orange-fleshed fruit (yes, I said fruit).

Filling Ingredients:

  • 3-pound butternut squash, peeled, cut in half below the “neck”, seeds removed, cut into thin circles and half-moons using a mandoline or a sharp knife
  • ¼ cup olive oil
  • Salt and pepper
  • 1 Tbsp. butter
  • 1-pound package of fresh Porcini mushrooms, sliced (could use any wild mushrooms)
  • 1 pound whole-milk Ricotta cheese
  • ½ cup freshly-grated Parmesan cheese
  • 1 large egg
  • ¼ cup chopped fresh sage

Other Ingredients:

  • 2 Tbsp. butter, softened
  • ½ stick butter
  • 4 Tbsp. all-purpose flour
  • 2 cups heavy cream
  • 3 cups whole milk
  • Generous pinch of ground nutmeg
  • ½ tsp. each salt and pepper
  • 6-ounce package of fresh lasagna sheets (see refrigerated pasta section)
  • 2 cups grated Mozzarella cheese
  • 1 cup freshly-grated Parmesan cheese

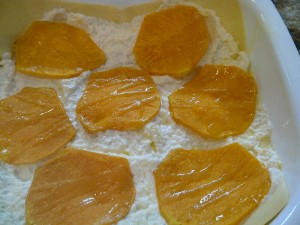
Butternut Squash Layer

Filling Directions:

  1. Preheat oven to 400°.
  2. Line two baking sheets with parchment paper or foil. Place squash slices in a single layer on the baking sheet and brush with olive oil. Sprinkle generously with salt and pepper and bake for 20 minutes. Allow to cool to room temperature.
  3. Melt butter in a large skillet over medium-high heat then sauté the mushrooms for about five minutes, stirring a few times. Allow to cool to room temperature.
  4. Mix the Ricotta, Parmesan, egg and sage in a large bowl. Set aside.

Assembly Directions:

  1. Preheat oven to 375°.
  2. Generously butter a 13x9x2-inch baking dish using two tablespoons of butter. Set aside.
  3. In a large heavy saucepan, melt butter over medium heat. Add flour and stir for three minutes, until bubbly but not browned. Add the cream and whole milk and whisk to fully incorporate the flour mixture into the liquids. Add the nutmeg and salt and pepper. Cook the sauce until thickened, about 10 minutes, over low heat, whisking frequently.
  4. Add a ladle-full of white sauce to the buttered dish making sure the bottom is covered.
  5. Place two fresh lasagna sheets over the sauce. If the pasta sheets are too long, run them up the sides of the dish for crunchy corners when the lasagna bakes.
  6. Scoop half of the Ricotta cheese mixture over the lasagna noodles, spreading evenly.
  7. Place half of the butternut squash over the Ricotta.
  8. Arrange two more fresh lasagna sheets over the squash.
  9. Add two ladle-full of white sauce over the lasagna noodles.
  10. Sprinkle the sautéed mushrooms over the sauce.
  11. Top the mushrooms with two more fresh lasagna sheets.
  12. Place the last of the butternut squash over the lasagna sheets.
  13. Top the squash with the remaining Ricotta mixture.
  14. Cap the lasagna with the Mozzarella cheese then the Parmesan cheese.
  15. Coat a piece of foil large enough to cover the lasagna with cooking spray. Cover the lasagna with the foil for 45 minutes. Remove the foil, turn the oven to broil and cook the lasagna for an additional 7-10 minutes, until browned. Allow the lasagna to cool for 20 minutes before serving.

Serves eight or six very generously.

Creamy Tomato and Basil Soup

Creamy Tomato and Basil Soup

Tomato soup and a grilled cheese sandwich. What could be more classic and comforting on a cool evening? In the below photo, I pair this simple-to-make soup with a sharp Provolone and Sopressata grilled cheese for a bit more upscale feel.

Since it uses canned tomatoes, this soup can be made in the middle of winter and its punch of fresh basil will give it a fresh, delicious, summery taste.

Ingredients:

  • 3 Tbsp. vegetable oil
  • 1 large onion, chopped
  • 6 celery ribs, chopped
  • 1 medium red bell pepper, chopped
  • 3 cans (14-1/2 ounces each) diced tomatoes, with their juices
  • 2 Tbsp. tomato paste
  • 1 cup basil leaves, coarsely chopped
  • 3 tsp. granulated sugar
  • 3 tsp. salt
  • 1/2 teaspoon pepper
  • ¼ cup water mixed with 1 tsp. corn starch
  • 1 ½ cups whole milk

Directions:

  1. In a large heavy saucepan, warm the oil over medium heat for a minute then sauté the onion, celery and red bell pepper for 5-6 minutes or until tender.
  2. Add the tomatoes and tomato paste to the vegetable mixture, cover and simmer over medium-low heat for 40 minutes.
  3. Remove the soup from the heat, stir in the basil, sugar, salt and pepper.
  4. Using an immersion blender, puree soup until very smooth, for about 3 minutes. Alternatively, puree the soup in two batches using a blender.
  5. Add the corn starch mixture and the milk to the pureed soup and continue to cook over low heat for 10 minutes (do not boil), until slightly thickened.

Makes 8 starter servings or 6 entrée servings.

Chicken Risotto Soup

Chicken Risotto Soup

Chicken soup might be one of the most comforting dishes. Add flavorful leftover risotto to the soup and you have the ultimate bowl of comfort food love.

Ingredients:

  • 1/4 cup vegetable oil
  • 1 medium onion, chopped into small dice
  • 4 celery ribs, chopped into small dice
  • 3 carrots, chopped into small dice
  • 1 tsp. each, salt, pepper, dry thyme
  • Meat from small plain deli chicken, chopped into bite-size pieces
  • 48-ounce can chicken broth
  • 1 cup leftover Porcini Mushroom Risotto

Direction:

  1. In a large, heavy saucepan over medium, sauté the onions, celery and carrots in oil for 10 minutes, until vegetables begin to soften, stirring occasionally.
  2. Add the seasonings and chicken pieces and cook for an additional 3 minutes, stirring occasionally.
  3. Add the broth and risotto, lower the heat to medium-low and simmer for 45 minutes.

Makes 6-8 servings.

Asian Chicken Lettuce Wraps with Noodles and Peanut Sauce

Asian Chicken Lettuce Wraps with Noodles and Peanut Sauce

Yum – lettuce wraps! It’s summer and a time when I try to use the kitchen oven as little as possible and the grill as much as possible. It’s also a time when I enjoy lighter fare that can be whipped up in a flash. These lettuce wraps are easy to prepare and lets the whole gang participate in the final dish – fun! Don’t forego fixing this dish because you don’t have time to grill the Asian Whole Grilled Chicken, simply pick up a grilled chicken at the supermarket.

Ingredients:

Directions:

  1. Heat the oil in a large sauté pan over medium-high heat. Add the onion and cook for 3 minutes, until slightly softened. Add the mushrooms and continue cooking for 5 minutes over medium heat. Set aside.
  2. In a large bowl, combine a cup of peanut sauce, the sesame oil and the Sriracha.
  3. Boil the noodles according to package directions, drain and add to the peanut sauce in the bowl. Toss the noodles well with the peanut sauce to fully coat.
  4. Add the onion and mushroom mixture to the noodles and toss to combine. Serve at room temperature. If the noodles cool down too much before serving, simply heat them up for 20 seconds in the microwave.
  5. Give each person 2-3 lettuce leaves to use as wraps to contain the noodles and chicken. Extra peanut sauce can be used as additional dressing in the wraps.

Serves 4 people.

Notes:  You can find fresh Chinese noodles in the bagged salads section of your supermarket or at Asian markets.


Grilled Mexican Corn on the Cob

Grilled Mexican Corn on the Cob

Being from eastern Quebec, I grew up eating some of the best corn-on-the-cob imaginable.  Each summer, we’d have a husk and boil corn party where we’d buy a whole bushel of corn, everyone husks an ear of corn then drops it in a pot of boiling water.  It’s a fun concept and easy on the cook since everyone partakes in the husking.  We’d then roll our cooked corn over a pound block of salty, farm-fresh butter and enjoy the sweet treat on a warm summer day.

While I love boiled sweet corn, something I’ve been enjoying for the last couple seasons is grilled corn on the cob. Grilling enhances the corny flavor and the sweetness of this vegetable.

Here’s how you do it:

  1. Peel the husks away.
  2. Drizzle cobs with vegetable oil, salt, pepper and a light sprinkling of chili powder.
  3. Grill on medium heat for eight minutes (rotate cobs for even grilling).

Slather the grilled corn with Mexican Spread:

  • In a bowl, combine sour cream, mayo, chopped fresh cilantro and crumbled Mexican Queso Fresco.
  • Coat the hot cob with the mixture.

The concept couldn’t be easier and you and your guests will enjoy this variation on a classic.

Enjoy!

Veronique