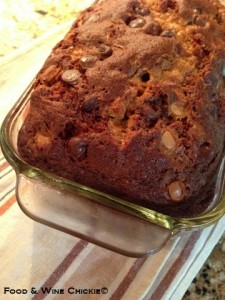
Chocolate Chip and Butterscotch Banana Bread

Chocolate Chip and Butterscotch Banana Bread

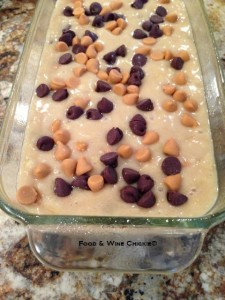
Baked BreadI’m not sure why, but seeing overripe bananas and having to toss them hurts me. I’m also not sure why, but spending $10 on ingredients required to make banana bread to save $0.50 worth of bananas doesn’t bother me at all.

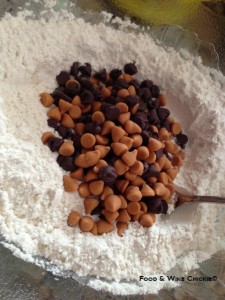
Chips and Flour

Chips and Flour

This banana bread is gilded with chocolate and butterscotch chips that give the plain version a major facelift. The resulting product is moist and chocolaty.

Ingredients:

  • ¾ cup butterscotch chips
  • ¾ cup miniature semisweet chocolate chips
  • 1 ¾ cups all-purpose flour
  • 1 ½ tsp. baking soda
  • ¾  tsp. Kosher salt
  • 3 large eggs, at room temperature and lightly beaten
  • ¾ cup firmly packed light brown sugar
  • 2/3 cup sugar
  • 3 overripe bananas, mashed
  • 2/3 cup vegetable oil
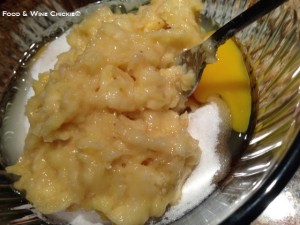
Banana Mixture

Banana Mixture

Directions:

  1. Preheat the oven to 350 degrees. Butter or coat a 9-by-5 loaf pan with nonstick spray.
  2. Combine the butterscotch and chocolate chips in a small bowl. Set 3 tablespoons of the mixture aside for later use.
  3. Bread Batter

    Bread Batter

    Sift the flour, baking soda and salt in a medium bowl. Leaving the 3 tablespoon of chips out, add the remaining chips to the flour and toss to coat.

  4. Using a wooden spoon, combine the eggs, brown sugar, sugar, banana and oil in a larger bowl. Add the dry ingredients to the banana mixture and combine gently making sure to not over-mix. Pour the batter into the prepared pan. Sprinkle the remaining chips on the surface of the batter.
  5. Bake 60 minutes or just until a toothpick comes out mostly crumb-free when inserted in the center of the loaf. Cool on a rack for 30 minutes, then unmold and cool completely.
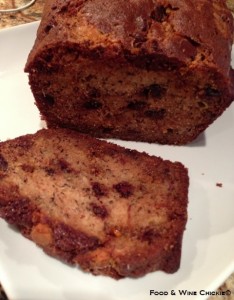
Sliced BreadNotes: Bread may be stored at room temperature up to 3 days wrapped airtight in plastic wrap. May be frozen, well-wrapped, up to 1 month. Defrost overnight in the refrigerator.

Servings: 8

Adapted from this The Daily Meal recipe.
Cremini and Spinach Crustless Mini Quiches

Cremini and Spinach Crustless Mini Quiches

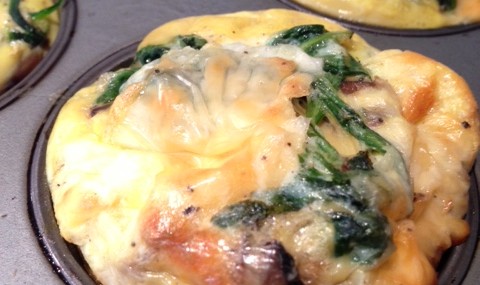
Crustless QuichesI’ve been doing the South Beach Diet for a few weeks and found that making breakfast from scratch each morning wasn’t very convenient so I started making crustless quiches for the whole week on Sunday afternoons and it’s been great.

While you can vary what vegetables and cheeses you add to the egg cups, this is one of the versions I enjoy the most. Feel free to serve with a little salsa – it’s delicious.

Ingredients:

  • 2 Tbsp. butter, divided
  • 1 8-ounce package Cremini mushrooms, sliced
  • 1 10-ounce bag fresh baby spinach
  • 12 large eggs (sounds like a lot, but it’s really one egg per quiche)
  • ¼ cup water
  • ½ tsp. each salt and pepper
  • 1 cup shredded sharp cheddar cheese

Directions:

  1. Preheat the oven to 350 degrees.
  2. Coat a 12 muffin pan with cooking spray, be generous.
  3. In a large skillet, melt 1 tablespoon of butter over medium-high heat. Add the mushrooms and cook for about 5 minutes, until lightly golden, stirring frequently. Set aside.
  4. In the same skillet, melt the remaining butter and cook the spinach for 3 minutes, or until fully wilted. Set aside.
  5. In a large mixing bowl (I use an 8-cup measuring cup for easy pouring), whisk the eggs with the water, salt and pepper until fully blended, about 1 minute.
  6. Divide the mushrooms among the 12 muffin cups. Divide the spinach between the 12 muffin cups. Pour an equal amount of the egg mixture into the muffin cups over the vegetables. Sprinkle the cheese equally over the egg mixture.
  7. Place the muffin pan on a sheet tray to catch any drips and bake for about 25 minutes, or until the egg is no longer runny.
  8. Allow the quiches to cool in the pan for about 5 minutes then unmold and let cool completely.
  9. Store in an airtight container. To reheat, place two quiches on a plate, cover with a paper towel and microwave for 60-90 seconds.

Makes 6 servings (2 quiches each).

Waffles with Raspberries and Nutella

Waffles with Raspberries and Nutella

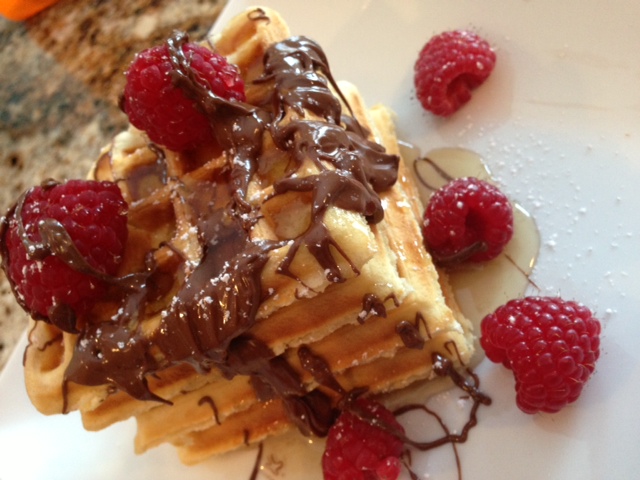
WafflesThis waffle batter is super easy and makes four huge waffles. This nice part, it’ll keep in the refrigerator for up to a week if you only need to make two on Sunday morning.

Ingredients:

  • 2 eggs
  • 2 cups all-purpose flour
  • 4 tsp. baking powder
  • 2 Tbsp. granulated sugar
  • ¼ tsp. salt
  • 1½ cups milk
  • ¼ cup heavy cream
  • ½ cup vegetable oil
  • 1 tsp. pure vanilla extract
  • ¼ cup Nutella
  • ¼ cup pure maple syrup
  • ½ cup fresh raspberries (or other berries)
  • Powdered sugar for dusting (optional)

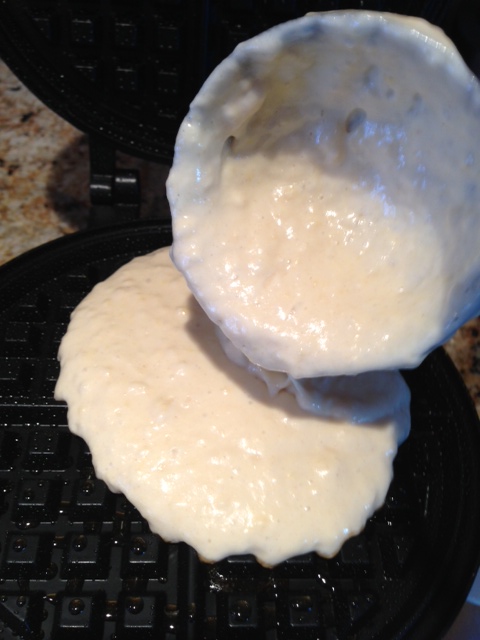
Waffle BatterDirections:

  1. Preheat waffle maker.
  2. In the bowl of an electric mixer, beat the eggs until light and fluffy, about 1 minute. Add the flour, baking powder, sugar, salt, milk, vegetable oil and vanilla to the eggs and mix until just combined, about 20 seconds. No worries, there will be some lumps.
  3. Coat the waffle maker with cooking spray. Pour a ladle of batter onto the hot waffle maker and cook until golden brown. Repeat with more waffles.
  4. Microwave the Nutella and drizzle over the waffles. Drizzle maple syrup and top with raspberries and a dusting of powdered sugar, if using.

Makes 4 waffles

World’s Best Hollandaise Sauce

World’s Best Hollandaise Sauce

They are decadent and indeed not a dish to be consumed every day, but Eggs Benedict rank at the top of my list of special occasion breakfast dishes.

To me, the best part is the Hollandaise Sauce with its eggy, lemony perfectness. This recipe for the rich sauce couldn’t be easier and is also great on fish or asparagus.

Hollandaise Sauce Ingredients:

  • 7 egg yolks, at room temperature
  • 1 cup butter
  • Pinch of cayenne pepper
  • ½ tsp. sea salt
  • 2 Tbsp. freshly-squeezed lemon juice

Hollandaise Sauce Directions:

  1. Melt the butter in a small saucepan over medium-low heat. Cool for 3 minutes.
  2. In a tall container, like a pitcher, add the egg yolks. Using an immersion blender, add the butter to the yolks in a slow, steady stream until the sauce thickens, about 30 seconds.
  3. Add the cayenne pepper, the salt and the lemon juice.  Keep sauce at room temperature until ready to use.

Makes about ¾ cup.

Slow Cooker Quebec Baked Beans

Slow Cooker Quebec Baked Beans

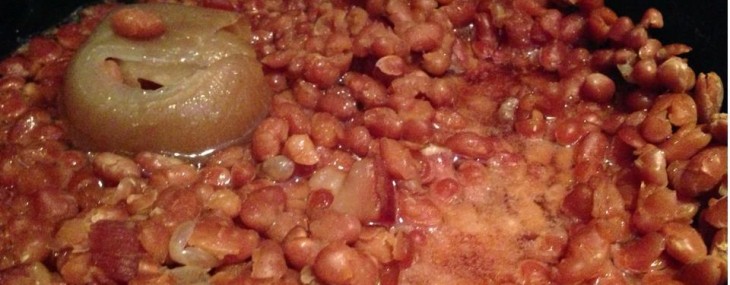
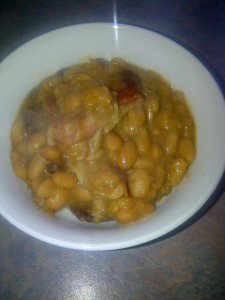
I have written about Quebec Baked Beans in the past and about how my maternal Grand-Mother fixed this traditional breakfast dish for the family. Last night, I decided to try to make the beans in the slow cooker and they turned out amazing!

Ingredients:

  • 2 cups dried white beans
  • 1/2 pound salt pork, cut into  1″ cubes
  • 1 medium onion, peeled
  • 1/4 cup molasses
  • 1 tsp. dry mustard
  • 1 tsp. each salt and pepper

Directions:

  1. Place the beans in a medium saucepan and cover with cold water then cover with foil.  Place the saucepan in the refrigerator at least 12 hours.
  2. Rinse the beans in a colander under cold water.
  3. Place the cubed salt pork in the bottom of a 3-5 quart slow cooker (Crockpot). Top the pork with the rinsed beans. Tuck the onion into the beans. Combine the rest of the ingredients and pour over the beans and pork.
  4. Add water to the slow cooker to cover the beans by an inch. Simmer on LOW for 8-10 hours.

Makes 6-8 servings.

Easy and Elegant 4-Course Valentine’s Day Dinner

Easy and Elegant 4-Course Valentine’s Day Dinner

Need some inspiration for a romantic meal this Valentine’s Day (or any old day)?  Here are four, simple-to-make dishes along with wine pairings that are sure to show your loved one(s) how much you care.

BONUS – breakfast:  Strawberry and Nutella-Stuffed Crepes

Whichever dish you decide to prepare for your loved one(s) this Valentine’s Day, I hope your meal is paired with love.

Cheers,

Veronique


Baked Beans – It’s What’s for Breakfast

Baked Beans – It’s What’s for Breakfast

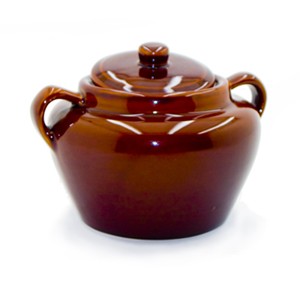
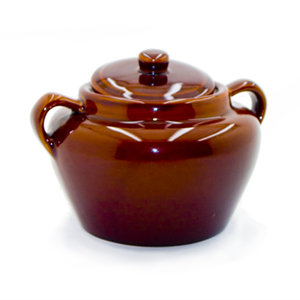
Traditional Bean Pot

When I was growing up in Quebec, the family would gather at Grandma’s house for baked beans breakfast several times a year.  She’d bake fresh loaves of bread and the aromas would be divine.

Grandma would soak her dry beans overnight then cook them slow and low overnight, with Grandpa adding a little water throughout the night.  The beans were prepared simply: salt pork, a whole onion (that uncle Dan would always get to have) and some molasses.  Grandma would serve the beans on mismatched plates, no two alike, and I’d pour Quebec maple syrup on them and scarf then down – bliss.  I’ve eaten my way around a bunch of cities and this meal is still my favorite breakfast.


This year, with Grandma’s passing, my mom, Diane, decided to fix this dish for us as a sort of an ode to Grandma.  She’d even bought a handsome bean pot for them to simmer in!  I’m providing the recipe below, but it’s not really about making this dish, it’s about the story behind it.  Way to go mom for keeping this tradition alive and the family well-fed!

Ingredients:

  • 2 cups dried white beans
  • 1/2 pound salt pork, cut into 1″ cubes
  • 1 medium onion, peeled
  • 1/4 cup molasses
  • 1 tsp. dry mustard
  • 1 tsp. each salt and pepper

Directions:

  1. Place the beans in a medium saucepan and cover with cold water then cover with foil.  Place the saucepan in the refrigerator at least 12 hours.

  2. Preheat oven to 250 degrees.  Take the beans out of the refrigerator and put on the stovetop on high heat.  Boil the beans for 30 minutes, then, using a colander, drain the water.
  3. Place half of the cubed salt pork in the bottom of a heavy, oven-proof pot or Dutch oven (if you have a traditional bean pot, even better).  Add the beans and top with the remaining salt pork.  Tuck the onion in.  Combine the rest of the ingredients and pour over the beans and pork.
  4. Cover the beans with hot water, place in the oven, covered, and cook for 7-8 hours.  Halfway through the cooking process, add more hot water to once again cover the beans.

Makes 6-8 servings.


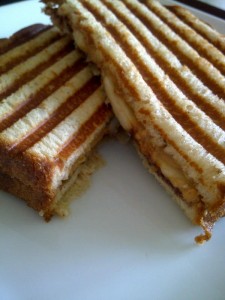
Peanut Butter, Banana and Nutella Panini

Peanut Butter, Banana and Nutella Panini

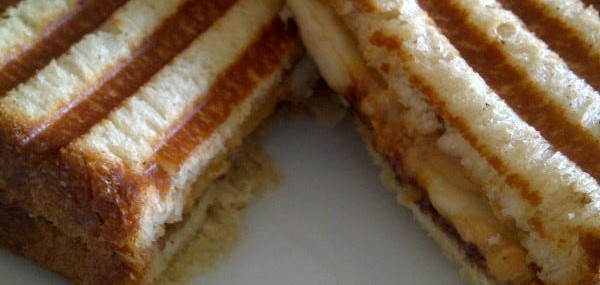
My grandma used to make my sister and me peanut butter and banana grilled sandwiches in a cast iron contraption when we were kids.  This contraption, an early version of a Panini press, had long handles that could be flipped on the stovetop until the bread was perfectly browned and gorgeous.  I miss those days and decided to sort of recreate the sandwich using my modern day Panini press and a little twist – Nutella!

Ingredients:

  • 2 tsp. softened butter
  • 2 slices whole wheat bread (I like oatmeal and whole wheat for this)
  • 2 Tbsp. chunky peanut butter
  • 1 Tbsp. Nutella
  • ½ ripe banana, sliced

Directions:

  1. Heat up Panini press or a grill pan over high heat.
  2. Spread 1 teaspoon of butter on one side of each bread slice.
  3. Spread the peanut butter on the unbuttered side of one bread slice.
  4. Spread Nutella on the unbuttered side of the second bread slice then arrange the banana slices over Nutella.
  5. Top the Nutella/banana slice with the peanut butter slice so that the buttered side of each bread slice is on the outside and the goodies are on the inside.
  6. Place the sandwich in the Panini press and grill for 3 minutes.  Alternatively, place the sandwich on the grill pan (still on high heat) and top with the weight of multiple pans or a pan with a 2-3 pound weight in it and cook 1 1/2 minutes per sides.
  7. Transfer sandwich to a cutting board and cut sandwich diagonally using a serrated knife.

1 serving.

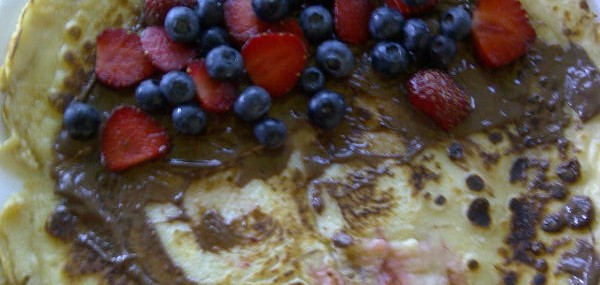
Strawberry and Nutella-Stuffed Crepes

Strawberry and Nutella-Stuffed Crepes

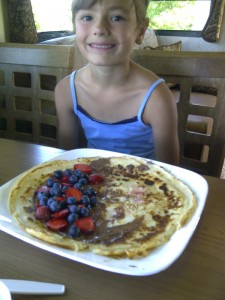
My Niece Maude

I recently spent the weekend in my native Quebec where I got a chance to breakfast with my two young nieces.  Like their mom, my sister Josée, they love the combination of strawberries and Nutella, the chocolate hazelnut spread.

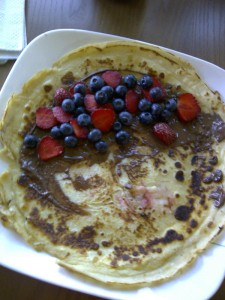
On the first morning of my weekend back home, the girls enjoyed Strawberry Nutella Treats.  On the second morning, I brought the Basic Crepe Batter I’d made the evening before and fixed Strawberry and Nutella-Stuffed Crepes.  The crepe batter is prepared in advance in a jiffy and the stuffed crepes are simple to fix for the whole family, even on busy mornings.  On this occasion, I added a few freshly-picked blueberries to the strawberries.

Ingredients:

  • Basic Crepe Batter
  • 4 Tbsps. butter
  • 8 Tbsps. Nutella
  • 1 pint of ripe strawberries, sliced
  • Whipped cream (optional)

Directions:

  1. In a large skillet (or crepe pan), melt 1 tablespoon of butter over medium-high heat until golden.
  2. Add ¼ of the crepe batter to the skillet and spread it evenly over the entire surface of the pan by tilting the skillet around.  Cook the crepe until the surface is mostly no longer wet, about 45 seconds.  Flip with a spatula and cook the second side for about 30 seconds.
  3. Strawberry Nutella Crepe

    Remove the crepe to a plate.  Spread 2 tablespoons of Nutella over the crepe then top with ¼ of the slices strawberries.  Roll the crepe, jellyroll-style and served with whipped cream, if using.

  4. Repeat steps 1-3 for the three remaining crepes.

Makes 4 crepes.

Notes:  The batter can easily be doubled or tripled if serving more guests.  The crepes can be stuffed with any berries, and another favorite of mine is stuffing them with a combination of raspberries and blueberries.

Strawberry Nutella Treats

Strawberry Nutella Treats

Strawberry season’s in full force and I can’t think of anyone who loves the little red gems more than my sister, Josée.  When her and her family visited me in New Jersey last, I, of course, had bought strawberries for her.  To my delight, my two nieces have inherited her love for strawberries and here’s a quick but special treat she fixed them one morning.

Ingredients:

  • 2 slices white bread (could use whole wheat)
  • 2 Tbsps. Nutella, hazelnut spread
  • 4 large strawberries, hulled and thinly sliced

Directions:

  1. Toast the bread.
  2. Spread 1 tablespoon of Nutella on each slice of toasted bread.
  3. Cover each Nutella-coated toast with the slices from 2 strawberries.

Makes 2 treats.