Gooey Caramel Squares

Gooey Caramel Squares

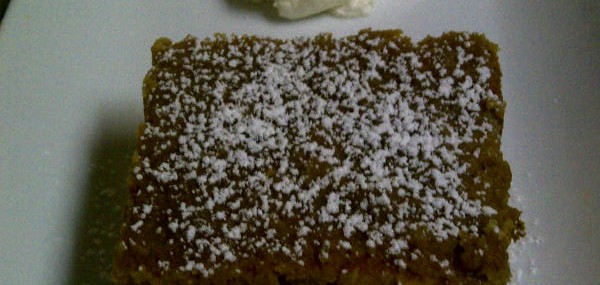
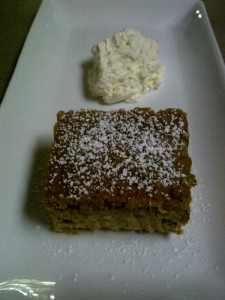
This is a variation on one of the first recipes I baked as a young teen.  It makes for a soft, gooey, caramel dessert that spoons out of the pan easier then it cuts into neat squares and is delicious and easy to bring to a friendly summer party.

Ingredients:

  • 2 cups whipping cream
  • 2 Tbsps. powdered sugar
  • Homemade Caramel Pudding recipe
  • 15 Graham crackers
  • ¾ cup brown sugar
  • 1 5-ounce can evaporated milk
  • Powdered sugar for final dusting (optional)

Directions:

  1. In the bowl of an electric mixer, whip the cream with 2 tablespoons of powdered sugar until stiff peaks form, about 4 minutes.
  2. Saving 1 cup for final serving, combine the remaining whipped cream with the pudding in a large bowl, ensuring the mixture is mostly homogenous, while avoiding over-mixing.
  3. Cover the bottom of an 8×8 pan with 5 Graham crackers, breaking pieces as needed to completely cover the surface.
  4. Spread ½ of the pudding mixture over the cracker layer.  Cover the pudding layer with 5 more Graham crackers, the second ½ of the pudding mixture then finally with the remaining 5 Graham crackers.  Set aside.
  5. In a small saucepan, combine the brown sugar and the evaporated milk.  Simmer the mixture over medium-high heat, stirring frequently, for about 4 minutes.  Remove from heat, whisk vigorously (mixture will not be completely smooth) then pour over the top Graham cracker layer covering the dessert.  Tilt pan around to ensure the entire surface of the dessert is covered with the hot mixture.
  6. Let the dessert stand for 20 minutes at room temperature, cover with shrink wrap and refrigerate at least 12 hours.
  7. Serve with whipped cream and a dusting of powdered sugar.

Makes 9 servings.

Notes: Don’t have time to make your own caramel pudding?  Take a short cut by using 6 single-serving cups of butterscotch pudding.  Waiting at least 12 hours before digging into this tasty treat will be difficult but you must in order for the flavors to meld and for the crackers to soften enough to create gooey results.

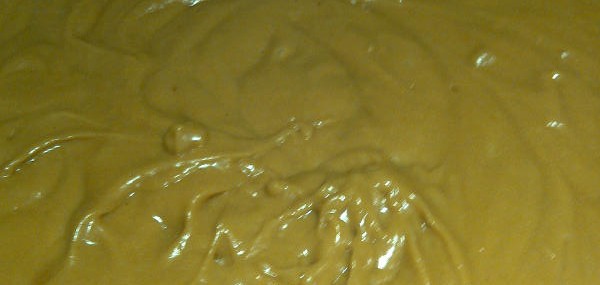
Homemade Caramel Pudding

Homemade Caramel Pudding

I know making homemade pudding is pretty old school with all the available, decent-quality commercial puddings on the market, but there truly is a tremendous taste difference that warrants rolling up one’s sleeves every once in a while.  Here’s a version with a deep caramel flavor you can enjoy on its own or you can use in various recipes.

Ingredients:

  • 2 cups whole milk
  • 1 ½ cups heavy cream
  • 4 Tbsps. (1/2 stick) butter
  • 1 cup brown sugar
  • 3 egg yolks
  • ¼ cup cornstarch
  • ¼ tsps. sea salt
  • 1 ½ tsps. pure vanilla extract

Directions:

  1. Add the milk and cream to a large saucepan and cook over medium heat until small bubbles start to form on the surface, about 4 minutes.  Remove from heat and set aside for later use.
  2. Melt the butter in a large, heavy skillet over medium-high heat. Raise the heat to medium-high and add the brown sugar.  Simmer, stirring frequently, until the mixture caramelizes and begins to have a nutty aroma, about 5 minutes.
  3. Gradually pour the hot caramel mixture into the reserved cream mixture, whisking vigorously to fully combine. If the mixture is lumpy, pass it through a fine sieve.
  4. In a medium bowl, whisk the egg yolks. Add about a cup of the hot liquid to the eggs and whisk vigorously to prevent curdling.  Add the cornstarch and salt to the egg mixture and whisk to fully combine.
  5. Add the egg/cornstarch mixture to the pan with the hot liquid and cook over medium heat until the mixture is thick and just begins to boil, about 3 minutes.  Take the pan off the heat and add the vanilla extract.
  6. Ladle the pudding into decorative cups, cover with shrink wrap and refrigerate several hours or overnight.

Makes about six 4-ounce servings.

Strawberries and Cream Sandwiches Anyone?

Strawberries and Cream Sandwiches Anyone?

I sometimes post whimsical recipes that remind me of my early childhood, and this is definitely one of those recipes.

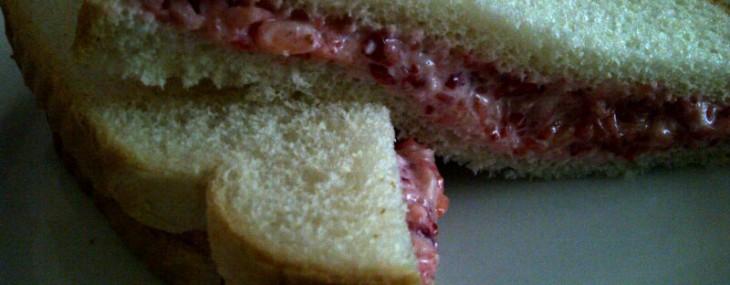
Growing up in Quebec, Canada, my grand-parents owned a lake house the family spent much of its summers.  The place was straight out of the late 50s, totally kitschy and I loved it.  One of the things I loved most about it was spending time with my grandma in the kitchen, and watching her turn the most basic and affordable of ingredients into something prize-worthy.  One of these treats was her strawberries and cream sandwiches, and I’m sharing the concept with you so you can enjoy it with your families.

Ingredients:

  • 4 ripe strawberries
  • ¼ cup heavy cream
  • 1 tsp granulated sugar
  • 4 slices of fresh, white bread

Directions:

  1. In a small, shallow bowl, mash the strawberries with a fork (in this day and age, we might call this muddling).
  2. Add the cream and sugar to the strawberries and continue mashing with the fork until fully blended into a thick mixture.
  3. Spoon the strawberry mixture onto a slice of bread then top with the second slice.  Repeat this process with the two remaining slices of bread.
  4. Cut each sandwich into two triangles (wouldn’t taste the same if you cut across) and enjoy!

Makes two sandwiches.

Notes: Only use the freshest bread and the ripest strawberries for this recipe.  Would be amazing with raspberries, but would need to double the sugar amount.

Easy Like Sunday Morning Key Lime Pie

Easy Like Sunday Morning Key Lime Pie

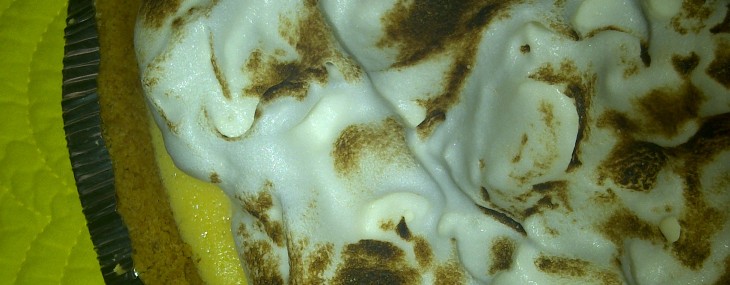
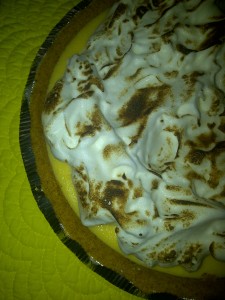
It’s unusual for me to post a recipe that skips most of the work and goes for semi-homemade but this is one of these instances.  This super easy to make key lime pie skimps on prep time but not on flavor.  Don’t like the meringue top?  Simply replace it with whipped cream and enjoy!

Ingredients:

  • 4 eggs, separated
  • 1-14 ounce can condensed milk
  • ½ cup Key Lime juice
  • ½ tsp cream of tartar
  • 1 frozen, 9-inch graham cracker crust
  • 4 tbsp granulated sugar

Pie Directions:

  • In the bowl of an electric mixer, beat the egg yolks on high speed until thick and light in color, about 4 minutes.  Turn off mixer and add condensed milk.  Mix on slow speed.  While still on slow, add half the lime juice, then the cream of tartar, then the remaining lime juice.  Mix until the filling is just blended.
  • Ladle the filling into frozen crust and bake at 325 degrees until set, about 10-15 minutes, or until center is dry to touch.
  • Let pie set in freezer for 3 hours before topping with meringue.

Meringue Directions:

  • Preheat oven to 500 degrees (or use a kitchen torch).
  • In the bowl of an electric mixer, beat the egg whites with the sugar until medium-stiff peaks, about 4 minutes.
  • Form peaks on surface of the pie with the meringue.  Brown in oven, or with the kitchen torch, and return to freezer until ready to serve.

8 servings.


Sweet Treat for the Non Baker

Sweet Treat for the Non Baker

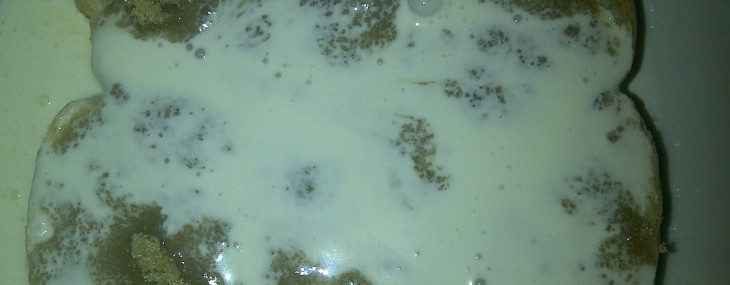
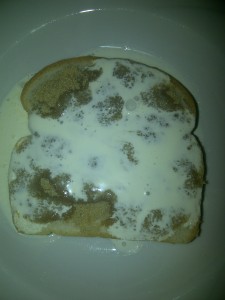
By now, you’ve seen me post recipes that might appear odd by normal standards (Oeufs Dans le Sirop D’Erable anyone?) but that I enjoyed eating growing up.  I’ve mentioned in previous posts that my mom is a great savory foods cook but isn’t passionate about baking, so when my sister and me asked for dessert, mom would occasionally fix us an “Open Faced Brown Sugar Sandwich”.  Yes, it only took a minute to prepare this special treat, but boy did we love it.  Here’s how it goes:

  1. Take a slice of fresh white bread and butter it very lightly.
  2. Sprinkle about a tablespoon of brown sugar over the buttered slice of bread.
  3. Pour ¼ heavy cream over the sugared bread.  Let the cream saturate the bread for about a minute, then eat the treat with a knife and fork.

Crazy, ehn?  Thoughts?

Bruléed Old-Fashioned Tapioca Pudding

Bruléed Old-Fashioned Tapioca Pudding

As a small kid, I loved watching my grandma cook and bake in her tiny kitchen where the pantry was jam packed with goodies.  I’d make my way through this pantry, being careful to open the door slowly in case anything went flying out, to see what neat condiments she had stored away for future baking sessions.  One of those pantry items was a small red box of instant tapioca pearls that I was always fascinated by.  This memory came back to me this week so I decided to make tapioca pudding, but to go the long route.  Hope you try and enjoy it as much as I did.

Ingredients:

  • 1/2 cup large pearl tapioca (I use Reese brand)
  • 1 cup heavy cream
  • 1 1/2 cups whole milk
  • 1/4 tsp salt
  • 1/2 cup light brown sugar
  • 2 large eggs, separated
  • 1 tsp pure vanilla extract
  • 6 tsp granulated sugar

Directions:

  1. In a medium bowl, soak tapioca pearls in 3 cups of water overnight.  Drain water.
  2. In a double boiler, heat cream and milk until just warmed (I use a metal bowl over a pan of simmering water).  Add salt and drained tapioca.  Continue to heat until small bubbles appear at sides of pan. Cover, turn heat to low and cook for one hour.  Make sure the milk mixture does not simmer or boil.
  3. Separate egg whites from yolks.  Beat egg yolks and sugar together until light yellow.  Add a little of the hot mixture to the egg yolks and blend thoroughly. Then add the egg yolk mixture to the hot milk mixture, stirring constantly.  Raise heat to medium under the double boiler and cook until tapioca mixture is very thick, about 20 minutes.
  4. In the bowl of an electric mixer, beat egg whites until they form stiff peaks.  Slowly fold the hot tapioca mixture into the egg whites.  Stir in vanilla.
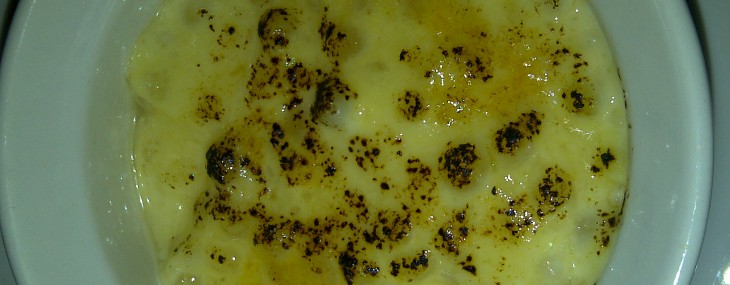
  5. Spoon the tapioca pudding into six 7-ounce ramekins.  Sprinkle about a teaspoon of sugar over the surface of each pudding-filled ramekins.  Brulée the pudding tops using a kitchen torch (or under the broiler), serve at room temperature or chilled.
    Makes 6 servings.

Notes: As an alternative, omit the brulée top and pour 1 teaspoon of pure maple syrup on the tapioca pudding.  Based on a recipe by Reese Tapioca.

Easy Banana Bread

Easy Banana Bread

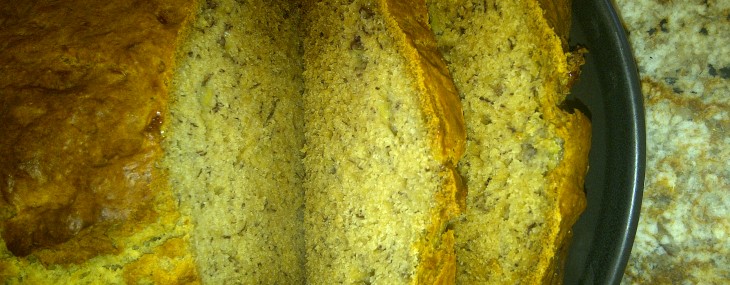
Not sure why, but the thought of throwing away over-ripe bananas drives me nuts.  Instead, I’ll spend a few bucks to save four $0.35 bananas – not logical, but makes for a treat everyone enjoys.

Ingredients

  • 2 cups all-purpose flour
  • 1/2 tsp sea salt
  • 1 tsp baking soda
  • 1/2 cup (1stick) unsalted butter, softened
  • 1 cup light brown sugar
  • 2 large eggs
  • 4 over-ripe bananas, mashed
  • 1/2 cup chopped walnuts (optional)

Directions

  1. Preheat oven to 350 degrees.
  2. Sift the flour, baking soda and salt in a large bowl – set aside.
  3. In the bowl of an electric mixer, cream the butter and brown sugar on medium speed for about 2 minutes.  Add the eggs, beating well after each one, add the bananas and beat for 1 minute.
  4. Pour the banana / butter mixture into flour mixture and stir with a wooden spoon until just combined – do not overmix.  Pour batter into a lightly grease 9×5 inch loaf pan and sprinkle walnuts over the top (if using walnuts).
  5. Bake for 60 minutes, or until a toothpick inserted into center of the loaf comes out with just a few moist crumbs.  Remove the banana bread from the oven and let  cool in pan for 15 minutes, then unmold and cool completely on a wire rack.

Notes: I like chunks of banana in my banana bread so I typically squeeze and knead the bananas while they’re still in the peel.  By the time I’m done with this fun task, all I need to do is remove the peels and add the ‘mashed’ bananas to the batter.

Feeling Sappy? My Top 5 Maple Syrup Desserts

Feeling Sappy? My Top 5 Maple Syrup Desserts

Maple Water Bucket

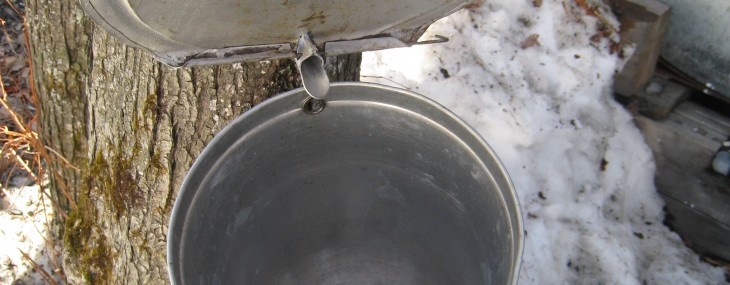
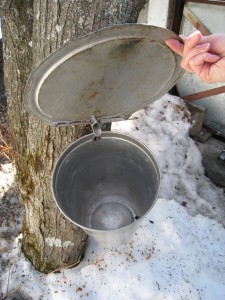
Maple season’s here and every year that I don’t make it home to Quebec for the sweetest season of all, I get a bit homesick. I grew up in a small town in southeast Quebec where my family and four other families of friends owned a sugar shack. I have very fond memories of harnessing horses to a sled hauling a maple sap collection barrel and then bring this sap to the shack for the boiling process that would result in amber elixir our moms then cooked and baked with.

This year, since I won’t be making the pilgrimage north, I decided to bake and cook with maple syrup for a two-week stretch to get my fix in. I even requested the help of my family to expand my maple recipe collection. Here are my top 5 maple dessert recipes from my archives and from newly-shared family recipes:

  1. Eggs in Maple Syrup
  2. Maple Delights
  3. Maple Syrup Dumplings
  4. Maple Syrup Pie
  5. Maple Taffee on the Snow

BONUS 6: Maple Whipped Cream

If you decide to try any of them, please leave a comment on this post so I can let my mom, aunt and grandma who contributed know that our traditional family recipes are being enjoyed.

Cheers!

Veronique

Eggs in Maple Syrup (Oeufs Dans le Sirop D’Erable)

Eggs in Maple Syrup (Oeufs Dans le Sirop D’Erable)

My mom, Diane, isn’t the sweet tooth in the family, her love of food is more savory, so I’m excited to be able to share a dessert she craves often and can’t live without – scrambled eggs cooked in maple syrup.  Yea, I know, it sounds odd, but it’s a very traditional dish in Quebec, especially during sugar shack season in the spring.  Think egg drop soup, but with maple syrup instead of broth.  Give it a try a let me (and my mom) know what you think!

Ingredients:

  • 1 cup maple syrup (see ‘notes’ below)
  • 2 large eggs
  • 1/4 tsp salt
  • Vanilla ice cream (optional, sort of)

Directions:

  1. Bring the syrup to a boil in a small, heavy saucepan, over medium-high heat.  Once the syrup has begun to boil, turn heat to medium-low.
  2. In a medium bowl, break the eggs, then scramble them well using either a fork or a whisk.  Add salt to the eggs and stir to incorporate.
  3. Pour the egg mixture into the simmering syrup and stir with a wooden spoon to incorporate the egg into the hot syrup.  Cook for 3-4 minutes, then remove the saucepan from the heat and let sit to cool for about 15 minutes.
  4. Scoop ice cream in two bowls, divide eggs between the two bowls then spoon some cooking liquid onto the eggs and ice cream.

Makes 2 servings.

Notes: Don’t waste top notch maple syrup to bake or cook with, less fancy grade will do just fine and often offers stronger maple flavors.  This recipe can easily be doubled.  Letting the mixture cool off a bit before serving allows the syrup to thicken slightly, so don’t omit this step, no matter how difficult it will be!

Maple Delights (Délices à l’Erable)

Maple Delights (Délices à l’Erable)

My aunt, Francoise, from Quebec shared her simple recipe for simple maple treats that’s a breeze to prepare.

Ingredients:

  • 3/4 cup light brown sugar
  • 1/4 cup maple syrup (see ‘notes’ below)
  • 1 cup heavy whipping cream
  • 1 8-ounce can of Pillsbury crescent rolls

Directions:

  1. Heat oven to 375 degrees.
  2. In a 9-inch pie plate, combine the brown sugar, maple syrup and heavy cream using a fork to create a homogenous mixture.  Set aside.
  3. Take the crescent rolls out of the packaging, but do not unroll.  Using a sharp knife, cut the rolls into 8 slices of the same width.  Place all the dough slices on their sides on top of the maple cream mixture.
  4. Place the pie plate unto a cookie sheets (who wants to risk spillovers?) then into the oven and bake for 25-30 minutes, until the treats are golden brown.
  5. Remove the pie plate from the oven, and let the treats cool for about 15 minutes before serving with either Maple Whipped Cream or vanilla ice cream.

Makes 8 servings.

Notes: Don’t waste top notch maple syrup to bake or cook with, less fancy grade will do just fine and often offers stronger maple flavors.