5 Recipes to Treat Your Valentine To

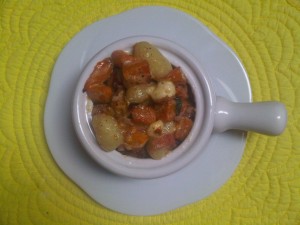
Gnocchi with Butternut Squash

Need some inspiration for a romantic meal this Valentine’s Day (or any old day)?  Thought I’d share some of the recipes I’ve made recently that have earned me rave reviews.

5 recipes to treat your Valentine to:

  1. Gnocchi with Butternut Squash and Bacon in Sage and Danish Blue Cheese Sauce
  2. Porcini Mushroom and Lobster Macaroni and Cheese
  3. Ragu alla Bolognese (Bolognese Sauce)
  4. Grilled Salmon in Grape Leaves
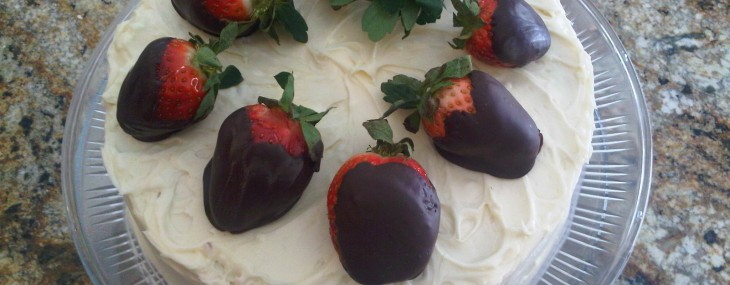
  5. Red Velvet Cake with Chocolate-Covered Strawberries

Whichever dish you decide to prepare for your loved one(s) this Valentine’s Day, I hope your meal is paired with love.

Veronique

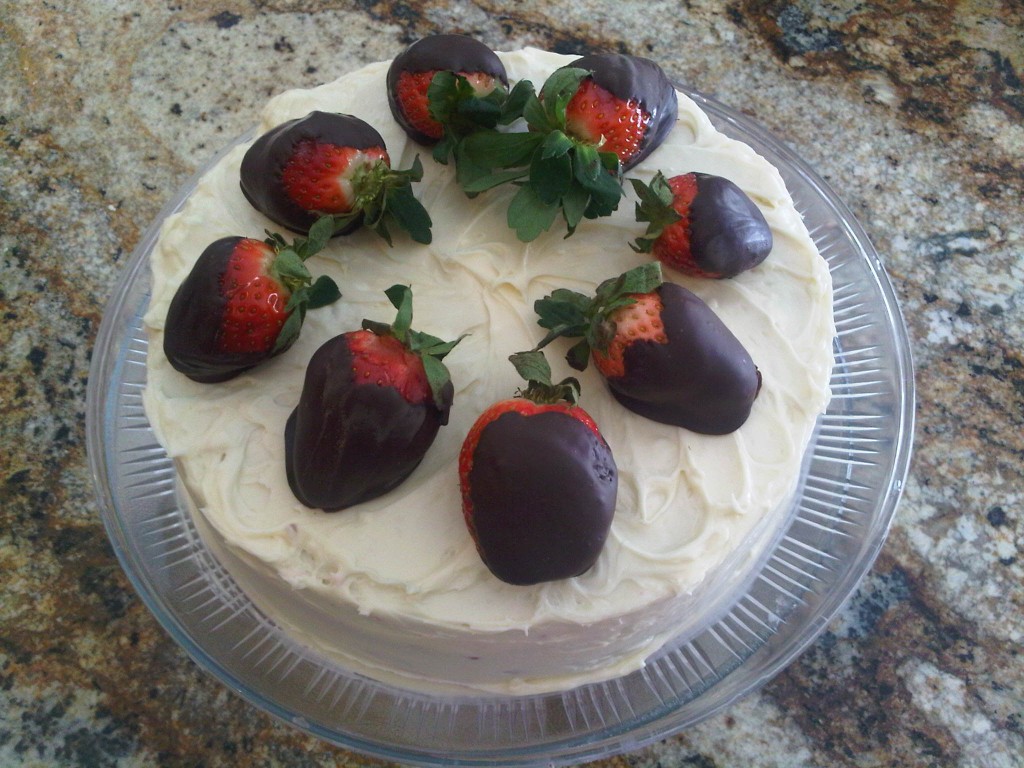
Red Velvet Cake with Chocolate-Covered Strawberries

Red Velvet Cake with Chocolate-Covered Strawberries

Red Velvet Cake with Chocolate-Covered Strawberries

There are many theories as to the true origin of the Red Velvet Cake.  Whether you believe it to be a southern traditional devil’s food cake tinted red with beet juice, a northern one dating back to the 1950s when Pillsbury Bake-Off contests were held at the Waldorf-Astoria and where the cake was possibly introduced or one first served at Eaton’s department store, and named Lady Eaton, in Canada, one thing is certain, this cake is loved by all.

My first try at this cake dates back to the early 1990s when I realized someone had switched the tiny bottle of red food coloring with a green one in a kit of four mini bottles.  This left me with only one small red bottle that resulted in my cake being Pepto-Bismol pink.  These days, one can find red food coloring in 1-ounce bottles that simplify the process.

Red Velvet Cake Ingredients

Ingredients:

  • 2 1/2 cups cake flour
  • 1 tsp salt
  • 1 tsp baking powder
  • 2 tbsp unsweetened cocoa powder
  • 2 ounces red food coloring
  • 1 1/2 cups granulated sugar
  • 1/2 cup (1 stick) butter, at room temperature
  • 2 large eggs, at room temperature
  • 1 tsp pure vanilla extract
  • 1 cup buttermilk
  • 1 tsp white vinegar
  • 1 tsp baking soda

Directions:

  1. Preheat oven to 350 degrees. Using cooking spray or a bit of softened butter, coat two 9-inch round cake pans.
  2. In a medium bowl, combine the flour, salt and baking powder.
  3. In a small bowl, blend the food coloring and cocoa powder with a teaspoon to create a smooth mixture.
  4. In the bowl of an electric mixer, cream the sugar and the butter until light and fluffy, about three minutes, scraping down the sides of the bowl with a rubber spatula every minute.
  5. Add the eggs to the butter mixture, one at a time, mixing well after each one.
  6. Add the food coloring mixture and mix well, about 1 minute, scraping down the sides of the bowl with a rubber spatula.
  7. Add half of the flour mixture to the creamed butter mixture, then add half of the buttermilk. Add the rest of flour mixture, then the rest of the buttermilk.  Be sure to scrape down the sides of the bowl with a rubber spatula to ensure the batter in completely blended without white streaks of batter.
  8. In a small bowl, combine the vinegar and the baking soda with a teaspoon to form a bubbly mixture.   Add the mixture to the cake batter and stir gently until just combined.
  9. Pour half of the batter evenly in each cake pans and place them in the preheated oven. Bake for 25-30 minutes.
  10. Cool the cakes in their pans for 10 minutes then remove the cakes from the pans and allow to cool completely on wire racks.
  11. Using a serrated knife, slice each cake in half horizontally.  Place one of the 4 cake slices on a large platter or cake stand, and cover with a thin layer (about 1/2 cup) of Cream Cheese Frosting using an offset spatula or butter knife.  Repeat process with the remaining 3 slices, ensuring that the top layer is the flattest slice – this will ensure a smooth surface for the finished cake.
  12. Crumb coat the entire cake with a thin layer of frosting (about a cup) then refrigerate for 30-60 minutes.  Finish frosting the cake with the rest of the frosting then refrigerate.  Serve within a day at room temperature.

Notes: To be extra festive, I dipped large strawberries into 3 ounces of dark chocolate that I microwaved in a small bowl for 90 seconds, stirring every 30 seconds.

Super Simple Cream Cheese Frosting

Super Simple Cream Cheese Frosting

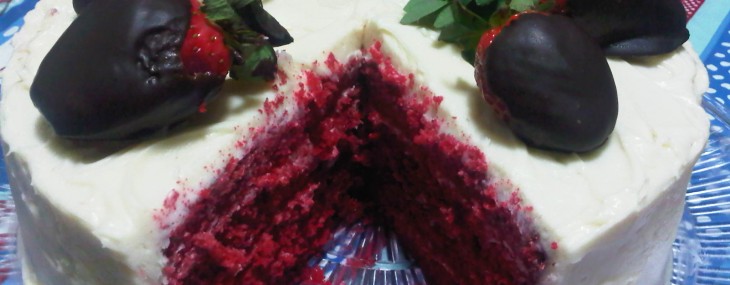
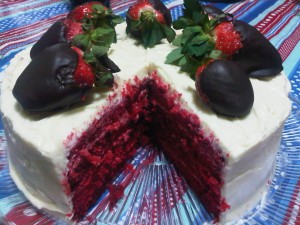
Red Velvet Cake Inside

This cream cheese frosting is simple to make and is perfect on a carrot cake or a red velvet cake.

Ingredients:

  • 1/2 cup (1 stick) butter, at room temperature
  • 16 ounces (2 8-ounce packages) cream cheese, at room temperature
  • 1 tsp pure vanilla extract
  • 3 cups powdered sugar, sifted

Directions:

  1. In the bowl of an electric mixer, cream the butter and cream cheese until light and fluffy, about 3 minutes, scraping down the sides of the bowl with a rubber spatula every minute.  Incorporate the vanilla.
  2. Turn off the mixer and add the powdered sugar.  Turn mixer on low and blend until the powdered sugar has been incorporated, about 2 minutes, again scraping down the sides of the bowl with a rubber spatula.
  3. Use the frosting right away or refrigerate, covered, until ready to use.  To use refrigerated frosting, bring to room temperature then stir thoroughly using a wooden spoon.

Yield: This frosting can cover a 2-tier, 9-inch cake or 24 cupcakes.

12 Cookies of Christmas Contest – And the Winner is…

12 Cookies of Christmas Contest – And the Winner is…

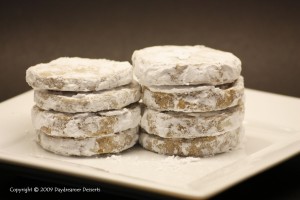
Spiced Espresso Meltaways

It’s official, the winner of the Food & Wine Chickie 12 Cookies of Christmas Contest has been selected!  All the cookie recipes looked amazing and it was hard for the voting committee to select just one on 12/31/10, but here it is!

The winner of a $50 Sur la Table Gift Card is: Spiced Espresso Meltaways by Daydreamer Desserts

Following is the complete list for you to feast your eyes and hopefully your stomachs on:

Please let me know if you try any of these and what you thought of them.

Happy baking,

Veronique

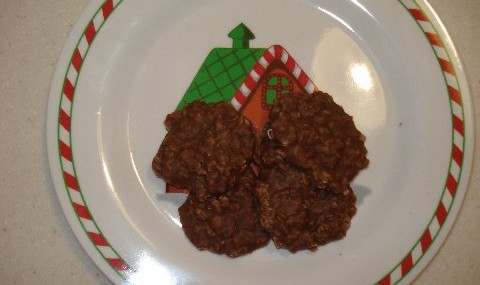
Boiled Cookies by Chris

Boiled Cookies by Chris

Photo By Chris Absheer

This simple yet delicious cookie recipe is the brainchild of St Louis Food & Wine Chickie friend Chris Absheer (here with adorable grandson Mikey).  What could be better than cookies you can enjoy WITHOUT baking!?

Ingredients:

  • 2 cups granulated sugar
  • 1/2 cup whole milk
  • 1/4 cup butter
  • 3 tbsp unsweetened cocoa powder
  • 1/2 cup creamy peanut butter
  • 2 cups old-fashioned oats
  • 1 teaspoon pure vanilla extract

Directions:

  1. Put sugar, milk, butter and cocoa powder in a heavy saucepan and bring to a boil over medium-high heat.  Boil for one minute.
  2. Remove from heat and quickly add peanut butter, oats and vanilla.  Stir well to combine the ingredients.
  3. Drop the cookie batter by teaspoonfuls onto wax paper.  Let stand 30 minutes before serving.

Yields 3 dozen cookies.

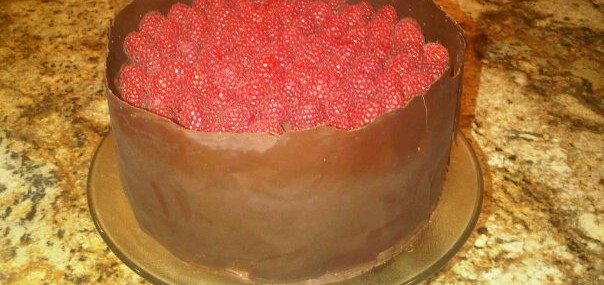
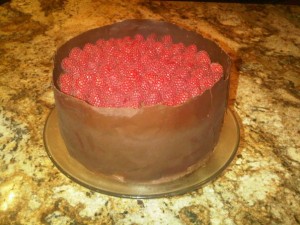
Chocolate and Raspberry Cake with Dark Chocolate Shell

Chocolate and Raspberry Cake with Dark Chocolate Shell

Chocolate Raspberry Cake

For New Year’s Eve, I was looking for a special chocolate dessert  to serve to my guests and found two recipes on the Bon Appétit website that I combined to give me the results I was looking for.

For the cake, I used this recipe as a base and for the shell I used the “bands” from this recipe.  I paced myself and made the cake over a 3-day period and it was both beautiful and tasty (see “notes” below for additional information on preparing the cake in advance).

Cake Ingredients

  • 2 cups all purpose flour
  • 1 3/4 cups granulated sugar
  • 3/4 cup unsweetened cocoa powder
  • 2 tsp baking soda
  • 1/4 tsp salt
  • 1 cup water
  • 3/4 cup buttermilk
  • 3/4 cup vegetable oil
  • 3 large eggs
  • 2 6-ounce containers fresh raspberries

Chocolate Ganache Ingredients

  • 18 ounces bittersweet chocolate (do not exceed 61% cacao), chopped
  • 2 1/4 cups heavy whipping cream
  • 6 tablespoons seedless raspberry jam, stirred to loosen, divided

Chocolate Shell Ingredients

  • 8 ounces bittersweet chocolate (do not exceed 61% cacao), chopped
  • 2 16×5-inch strips waxed paper

Chocolate Cake

  1. Position racks in top and bottom third of oven and preheat to 350°F. Coat two 9-inch round cake pans with 2-inch high sides with cooking spray. Line bottoms with parchment paper rounds then spray rounds with cooking spray.
  2. Sift flour, sugar, cocoa powder, baking soda, and salt into large bowl.  Whisk to blend and form well in center.
  3. Whisk the water, buttermilk, oil, and eggs in medium bowl to blend.
  4. Pour wet ingredients into the well of the dry ingredients and whisk just to blend.
  5. Divide cake batter between prepared pans (about 3 cups each).
  6. Bake cakes until tester inserted into center comes out clean, about 30 minutes. (If cakes form domes, place kitchen towel atop hot cakes, then press gently with palm of hand to level.) Cool completely in pans on cooling racks.

Chocolate Ganache Directions

  1. Place chopped chocolate in medium bowl. Bring cream just to boil in heavy medium saucepan. Pour over chocolate. Let stand 1 minute, then stir until ganache is melted and smooth.
  2. Transfer 1 1/4 cups ganache to small bowl. Cover and refrigerate until ganache is thick enough to spread, stirring occasionally, about 1 hour. Let remaining ganache stand at room temperature to cool until barely lukewarm.
  3. To assemble the cake:  a) Place rack inside rimmed baking sheet. b) Carefully run knife around pan edges to release cakes. c) Invert 1 cake layer onto cardboard round or bottom of 9-inch-diameter tart pan with removable bottom. Peel off parchment paper. Place cake layer on round on prepared rack. Spread 3 tablespoons jam over top. Spoon dollops of chilled ganache over, then spread evenly. d) Invert second cake layer onto another cardboard round or tart pan bottom. Peel off parchment paper. Carefully slide cake off round and onto frosted cake layer on rack. Spread remaining 3 tablespoons raspberry jam over top of second cake layer. e) Frost the entire cake with the remaining chilled ganache. f) Pour half of barely lukewarm ganache over cake, spreading over sides to cover (microwave for 15-20 seconds if mixture has completely cooled off).  g) Freeze until ganache sets, about 30 minutes. h) Pour remaining ganache over cake, allowing to drip down sides and spreading over sides if needed for even coverage and to smooth edges. i) Freeze to set ganache, about 30 minutes.
  4. Arrange raspberries in concentric circles atop cake.

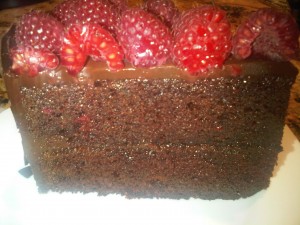
Chocolate Raspberry Cake Slice

Chocolate Shell Directions (watch video directions)

  1. Line large baking sheet with foil; set aside.
  2. Place another large sheet of foil on work surface; place waxed paper strips atop foil, spacing apart.
  3. Stir chocolate in medium bowl set over pan of simmering water until melted and smooth.
  4. Pour half of melted chocolate down center of each waxed paper strip. Using small offset spatula, spread chocolate to cover strips evenly, allowing some of chocolate to extend beyond edges of paper strips, making sure strips are completely covered. Using fingertips, lift strips and place on foil-lined sheet. Chill until chocolate just begins to set but is still completely flexible, about 2 minutes.
  5. Using fingertips, lift 1 chocolate sheet from foil. Wrap sheet around cake, waxed-paper side out, lining up 1 long edge with bottom of cake (sheet will be higher than cake).
  6. Repeat with second sheet, arranging so ends just meet, pressing sheet onto uncovered side of cake. If sheets overlap, trim any excess paper and chocolate.
  7. Using fingertips, press top edge of sheet in toward cake, forming slight ruffle.
  8. Chill until chocolate sets, 5 minutes. Gently peel off waxed paper. Chill cake.

Notes: The cakes can be baked 2 days before assembling and I recommend making them at least 1 day ahead.  Simply wrap the cakes in the pans with foil at room temperature.  The assembled cake can be made 1 day before serving if stored in the refrigerator.  Be sure to let the cake stand at room temperature for 2 hours before serving.

Québec Sucre à la Crème

Québec Sucre à la Crème

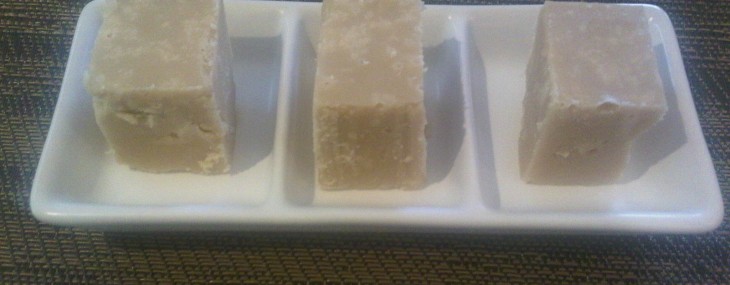
Sucre a la Creme

Sucre a la creme (butterscotch fudge) is a French-Canadian tradition. Growing up in Quebec, my grandma, who was an amazing baker, made sucre à la crème for us and froze batches of it so we’d have this sweet treat year-around.

Conceptually, sucre à la crème is similar to fudge, but with a sugary-grainy consistency and caramel flavor that’s decadent and delicious. Back in the day, mom or grandma would hand-mix the hot butterscotch mixture to its desired texture. For me, the hand-mixer works just as well and saves me 30 minutes of arm wrestling with my wooden spoon.

Although several of my family members have great recipes for sucre à la crème, my grandma’s sister, Marie-Laure, was the queen of the sweet treats and here is her interpretation.

Ingredients:

  • 3 cups brown sugar
  • 3 cups granulated sugar
  • 3 cups heavy cream
  • 2 tsp. pure vanilla extract

Directions:

  1. Place the sugars and cream in a large, heavy saucepan over medium-high heat. Stirring constantly, bring the sugar mixture to a boil, and then cook for 12 minutes.  Don’t stop stirring as the mixture will quickly stick to the bottom of the pan or worse, boil over causing a HUGE mess.
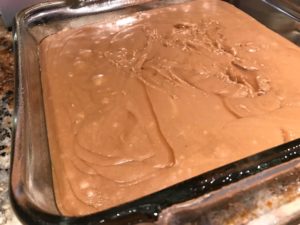
  2. Place 2 cups of ice cubes in a large bowl, then add 4 cups of cold water. Place a slightly smaller bowl over the ice bath then pour the hot sugar mixture in the medium bowl over the ice bath, making sure no water touches the hot mixture. Add the vanilla to the sugar mixture then beat with an electric hand-mixer for 8 minutes, or until the mixture lightens in color and has thickened.
  3. Pour the thickened sugar mixture in a greased 8×8 pan, cover with aluminum foil and refrigerate for several hours to harden. Cut into small squares.

Yields about 30 candy pieces.

Notes: You could add a cup of chopped walnuts to the mixture before pouring into the 8×8 pan.  The candies can be frozen for up to a month, wrapped in plastic wrap and stored in an air-tight container.

Decadent Chocolate Brownie Cookies

Decadent Chocolate Brownie Cookies

Chocolate Brownie Cookie

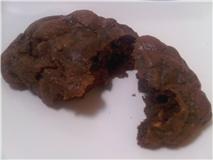
Can’t decide whether to make chocolate cookies or brownies?  Problem solved!  These cookies are chewy, nutty and completely decadent.

Ingredients:

  • 6 ounces semi-sweet chocolate chips
  • 4 ounces extra bittersweet chocolate (70% cacao)
  • 6 tbs. butter
  • 1 ¼ cups granulated sugar
  • 3 large eggs
  • 2 tsp. pure vanilla extract
  • 1 cup all-purpose flour
  • 1 tsp. baking powder
  • ¼ tsp. salt
  • 2 cups mixed nuts, chopped (macadamia, almonds and/or pecans are super)

Directions:

  1. Preheat oven to 325 degrees.
  2. Microwave chocolates and butter in a large bowl on high for 1½ – 2 minutes or until almost completely melted, stirring halfway through heating time.  Stir until smooth.
  3. Add sugar into the chocolate and stir to blend.  Add eggs one at-a-time, stirring well after each one. Add vanilla.
  4. In a small bowl, combine flour, baking powder and salt.  Add flour mixture to the chocolate and stir to combine completely.  Add nuts to the batter.
  5. Drop the cookie batter by the rounded tablespoonful, onto an ungreased cookie sheet, 1½-inches apart to allow room for cookies to expand.  You’ll need 4 cookie sheets for this.
  6. Bake the cookies 13 minutes or until set.  Do not over bake – cookie centers will still be slightly moist.

Makes 2 dozen large cookies.

Notes:  I like to start with whole nuts then rough chop them with a knife to allow for large, uniform pieces.  I recommend baking the cookies, 2 sheets at-a-time to prevent the oven from being over-crowded.

12 Cookies of Christmas Contest

Get your cookie recipe featured AND have a chance to win a $50 Sur La Table Gift Card!

Simply share the cookie recipe on your website/blog that you consider to be your favorite and get a chance to win a$50 Sur La Table Gift Card*!

I’ll select one cookie every day from 12/1/10 through 12/12/10, so leave a comment on this post letting me know which recipe on your site you’d like considered, and you could win!

Top 12 cookies will be featured in a special post just in time for the holidays.

* Open to legal US & Canada residents only. If a Canadian resident is selected, the prize will be in the form of a Visa Gift Card. Contest ends 12/12/10 and entries must be received by then.  Winner will be selected at my discretion by 12/15/10.  Open to FOOD & WINE CHICKIE Twitter followers and Facebook fans only.

Maple Bourbon Pecan Pie

Maple Bourbon Pecan Pie

Maple Bourbon Pecan Pie

Maple Bourbon Pecan Pie

For my French speakers: RECETTE EN FRANCAIS.

No need to look for a better pecan pie recipe, there isn’t one – this one’s the one folks!  Get used to accolades from your guests when you serve this nutty maple dessert at your next holiday gathering.  Even this photo of the unbaked pie looks yummy, doesn’t it?

I grew up with my grandma making pecan pie in Quebec and it was ultra sweet and delicious. My favorite part was the lightly caramelized pecans and the flaky, buttery crust. My sister left all the pecans and ate the jellied sugary filling. We’re weird like that!

You could use a store-bought crust for this, but it’s also simple to make your own using the recipe I like to in the ingredients list.

Ingredients

  • All-purpose flour, for dusting
  • Store-bought or homemade pie crust
  • 1 cup granulated sugar
  • 4 Tbsp. unsalted butter, melted
  • 4 large eggs
  • 1 cup plus 2 Tbsp. dark corn syrup
  • 1/2 cup pure maple syrup
  • 2 Tbsp. bourbon, or dark rum
  • 1 tsp. pure vanilla extract
  • 1 1/2 cups (5 1/4 ounces) pecan halves
  • 2 Tbsp. heavy cream
  • 1 large egg yolk

Maple Bourbon Pecan Pie

Directions

  1. On a lightly floured surface, roll dough to 1/8 inch thick. Transfer to a 9-inch tin, leaving a 1/2-inch overhang. Fold overhang under evenly. Chill for at least 30 minutes.
  2. Heat oven to 400 degrees.
  3. In a medium bowl, whisk together sugar, butter, 4 whole eggs, corn syrup, maple syrup, bourbon and vanilla. Fold in the pecan halves and pour filling into the crust. Chill for 30 minutes.
  4. Mix 2 tablespoons heavy cream with the egg yolk. Brush the egg glaze over the crust overhang, and transfer pie to the oven (I place the pie on a baking sheet in case of spills).
  5. Bake 15 minutes, and then reduce heat to 350 degrees. Bake until a knife tip comes out clean, about 1 hour 15 minutes. Serve warm or at room temperature.

Yields 8 servings.

(Adapted from Martha Stewart Living, November 1999).