There’s Nothing to Eat in this House – Maple Sugar Candy

There’s Nothing to Eat in this House – Maple Sugar Candy

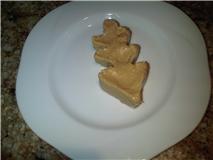
Maple Sugar Candy

Maple Sugar Candy

This ‘recipe’ goes into my ‘There’s Nothing to Eat in this House’ sweet treats archive since my guy was in the mood for a sweet treat last night and I didn’t have some of the ingredients required for proper baking on hand.  Don’t shy away from trying this candy if you don’t have a cookie cutter to use as most of the time, when I make it, the softened candy doesn’t make it out of the saucepan!

Ingredient:

  • 1/2 cup maple syrup

Directions:

  1. Pour syrup into a small saucepan over high heat.  Bring to a boil and cook until the syrup forms small bubbles and appears foamy, about 4 minutes.
  2. Remove from the heat and let cool for 2 minutes over a trivet or potholder.  Using a wooden spoon, stir constantly until the syrup thickens to a pale tan, but spreadable consistency (think Nutella consistency) – about 15 minutes.  Don’t stir past this consistency or you’ll not be able to mold the candy (which is okay if you’re not trying to make the candy look cute – what I do 90% of the time).
  3. Coat any medium-sized cookie cutter with cooking spray, then spoon the maple mixture into it.  Use spoon and fingertips to get the mixture completely into the mold, then smooth the top.
  4. Let cool for 30 minutes and unmold.  Enjoy by breaking small pieces.

Makes one candy.

Notes:  I know that when you’re stirring the syrup, before it begins to cool, it seems like the mixture will never turn to the buttery, creamy mixture from the photos, but it absolutely will.  If you cook the syrup too long for the type of saucepan you have, the mixture will harden quickly and you’ll have to enjoy the candy by breaking into small bites – which is completely okay!

Biscuits Frigidaire (Icebox Cookies)

Biscuits Frigidaire (Icebox Cookies)

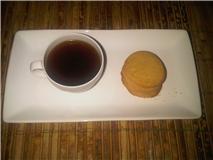
Growing up, my mom made the most succulent food one could ever want, but she wasn’t a baker.  In her short baked goods repertoire, is what we French Canadians call “Biscuits Frigidaire”.  Each time I make these icebox cookies, it brings back memories of getting the wax paper-wrapped cookie dough log out of the freezer so we could enjoy fresh baked treats within minutes.  This is truly one of the easiest cookie recipes, but one that yields crisps-chewy golden cookies on a moment’s notice.  Perfect for when unexpected guests stop by for coffee and you need a quick treat to serve.

Icebox Cookies

Icebox Cookies

Ingredients:

  • 1 cup (2 sticks) butter, softened
  • 1/2 cup light brown sugar
  • 1/2 cup granulated sugar
  • 1 egg, lightly beaten
  • 1 tsp pure vanilla extract
  • 2 cups all-purpose flour
  • 1/2 tsp baking soda
  • 1/4 tsp salt

Cookie Dough Directions:

  1. In the bowl of an electric mixer, cream the butter and the two sugars until light and fluffy – 4 minutes.
  2. Add the egg and the vanilla extract and beat to incorporate.
  3. In a medium bowl, sift the flour, the baking soda and the salt.
  4. Add the flour mixture to the butter-sugar mixture in half cup additions, beating to just incorporate between additions, then finally beat until dough begins to come together – no more than 2 minutes total.
  5. Divide the dough in half and place each half on a large sheet of wax paper (dough should be at the top of the sheet – think top of a sheet of paper).  Shape the dough into a log using the wax paper to help smooth the dough (think sushi roll), then wrap each dough log completely with the wax paper and twist each end to seal the logs.  Place logs in the refrigerator for several hours and up to three days (logs can be frozen for up to a month).

Baking Directions:

  1. Preheat oven to 400 degrees.  Line two cookie sheets with parchment paper or lightly spray with cooking spray.
  2. Cut the logs into 1/4 inch thick slices using a sharp, thin-blade knife.  Place the cookies on the cookie sheets approximately two inches apart.
  3. Bake 10-11 minutes or until lightly golden brown. Remove from oven and cool completely on a wire rack (waiting for the cookies to cool completely will be extremely difficult).

Makes about three dozen cookies.

Notes:  Cooled, baked cookies can be stored in an air-tight container at room temperature for a week (you’ll never have these cookies on hand for a week – trust me).  Thaw frozen cookie dough in the refrigerator before slicing.  Want to vary the recipe a bit?  Add mini chocolate chips to one of the dough logs!

Greek Phyllo and Custard Pie (Galaktoboureko)

Greek Phyllo and Custard Pie (Galaktoboureko)

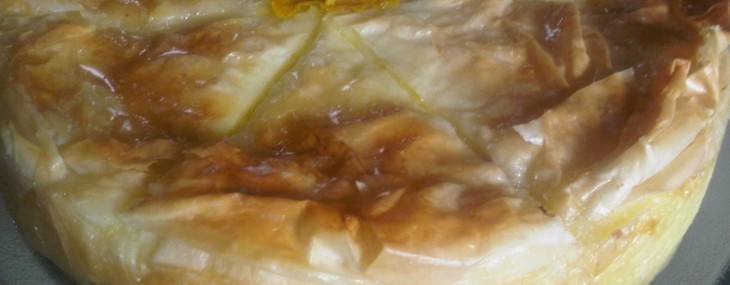
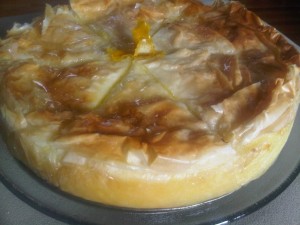
Galaktoboureko Pie

Galaktoboureko Pie

I was shown how to make this traditional recipe by a friend’s Yia Yia (Greek grand-mother) many years ago and below is her recipe (with a few variations).

Glaze Ingredients:

  • 1 1/3 cups granulated sugar
  • 1 cup water
  • 2-inch piece lemon peel
  • 1 1/2 tbsp lemon juice

Pie Filling Ingredients:

  • 6 eggs
  • 1 cup granulated sugar
  • 1 cup semolina, finely ground
  • 1 tsp pure vanilla extract
  • 2 tbsp lemon juice
  • 1/2 tsp grated lemon zest
  • 6 cups of milk (not low fat)
  • 2 tbsp butter, melted

Phyllo Ingredients:

  • 1/2 pound (2 sticks) butter, melted
  • 1 pound phyllo dough sheets, thawed

Glaze Directions:

  1. In a medium saucepan, bring the sugar and water to a boil over medium heat. Add the lemon peel, reduce heat to low, and cook for 8 minutes.
  2. Remove saucepan from heat, add the lemon juice and set aside to cool without stirring (can cool for up to an hour).  Discard lemon peel.

Pie Filling Directions:

  1. In the bowl of an electric mixer, beat on high speed, 2 eggs with 1/3 the sugar until light and frothy, about 3 minutes.  Add 2 additional eggs and another 1/3 of the sugar, and beat for 2 minutes.   Add last 2 eggs and the rest of the sugar and beat for 2 minutes.
  2. Add the semolina, vanilla, lemon juice, and grated lemon zest.  Beat for 2 minutes.
  3. Add the milk and the melted butter. Beat for 5 minutes on medium speed, until the mixture is light and fluffy (mixer bowl will be very full).
  4. Pour the filling into a large saucepan and cook over medium-high heat, stirring continuously with a whisk until the mixture thickens, about 7 minutes. Remove from heat and cool while assembling the phyllo in the pan, about 15 minutes.

Pie Assembling Directions:

  1. Preheat the oven to 350 degrees.
  2. Brush the bottom and the sides of a 9-inch springform pan with some melted butter.
  3. Using 1/2 of the phyllo sheets in the 1 pound package, lay one sheet of phyllo in the pan so that the sheet goes up to the rim on one side of the pan and overhangs on the other side.  Brush the first phyllo sheet with butter.  Continue layering the sheets until there are phyllo sheets overhanging on all sides of the pan – not forgetting to brush butter between layers.
  4. Stir the cooled custard and pour into the pan over the phyllo sheets.  Using a spoon, spread the custard in an even layer over the bottom of the pan.
  5. Fold in the overhanging phyllo over the custard, brushing butter between phyllo sheets until about 1/2 of the custard surface is covered with phyllo.  Brush top of phyllo with butter.
  6. Using the second 1/2 of the phyllo package, lay each sheet over the top of the pie, brushing each with butter as you layer, to cover the whole pie.  Brush the top of the pie with butter.
  7. Using a very sharp knife or a serrated knife, cut the pie in 16 slices, ensuring to cut all the way through the bottom phyllo layer.  You will break some pieces of the phyllo top layer, but this step would be impossible after baking.
  8. Place the pan on a cookie sheet and bake for 40 minutes, until golden.
  9. Remove the pie from the oven and pour the cooled glaze over the entire pie surface.  Cool pie completely, at least 3 hours before serving.

16 servings.

Notes: Rule of thumb when using phyllo, ALWAYS brush each layer with melted butter.  This ensures flaky pastry layers.  Also, ALWAYS keep a damp kitchen towel over the phyllo sheets you’re not using to keep the sheets from becoming brittle and dry.  Make certain to keep the pie on the cookie sheet through the cooling process as some of the glaze will seep out of the springform pan. Eat the pie within a day of making it as it’ll become soggy. I use the candied lemon peel as a garnish for the pie.

No-Share Blueberry Buckle

No-Share Blueberry Buckle

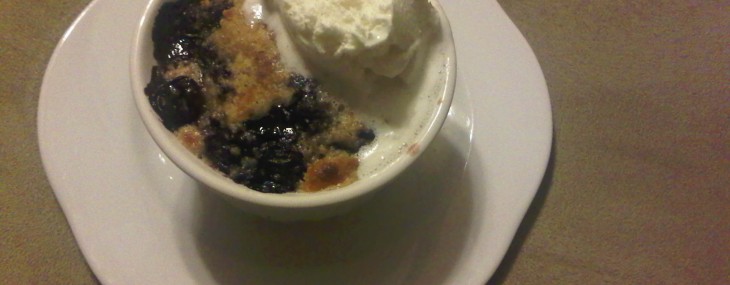
Blueberry Buckle

The origin of the name ‘buckle’ in a dessert is thought to be from the ‘buckling’ of the cake as it bakes under the fruit from the addition of baking soda to the batter.  Whatever the provenance of the word, this dessert is a perfect ending to a Summer dinner.  Think steamed, soft cake, gooey blueberry and crusty, buttery topping.

Blueberry Filling Ingredients:

  • 3 cups blueberries (if frozen, thawed)
  • 2 tbsp lemon juice
  • 1 tbsp flour
  • 2 tbsp granulated sugar

Streusel Topping Ingredients:

  • 1/4 cup granulated sugar
  • 1/4 cup brown sugar
  • 1/2 cup flour
  • 1/2 tsp ground cinnamon
  • 1/4 cup (1/2 stick) butter, chilled then cut into small dice

Cake Ingredients:

  • 1 cup flour
  • 1/2 tsp salt
  • 1 tsp baking powder
  • 1/4 cup (4 tbsp) butter, softened
  • 1/3 cup granulated sugar
  • 1 large egg
  • 1/2 tsp vanilla extract
  • 1/2 cup whole milk

Preheat oven to 350 degrees.  Butter six – 6 ounce ramekins or oven-proof dishes.  Set aside.

Blueberry Filling Directions:

  1. Mix the blueberries, lemon juice, flour, and sugar in a large bowl.  Allow to macerate for 30 minutes.

Streusel Topping Directions:

  1. Combine the granulated sugar, brown sugar, flour and cinnamon in a medium bowl.
  2. Cut in the butter with two knives or a pastry blender until the mixture is the consistency of coarse meal.  Refrigerate until ready to assemble.

Cake Directions:

  1. Combine the flour, salt and baking powder in a small bowl.
  2. Cream the butter in the bowl of an electric mixer for 1 minute.  Add the sugar and beat for 2 minutes.  Add the egg and vanilla to the mixture to combine.
  3. Add 1/3 of the flour mixture, beat for 10 seconds.  Add 1/4 cup of milk, beat for 10 seconds.  Continue alternating flour and milk until just combined.

Final Assembly:

  1. Add 1/4 cup of cake batter to each ramekin, smoothing the surface.
  2. Spoon the blueberry mixture over the cake batter.
  3. Top the blueberry layer with an even amount of streusel mixture.  Place ramekins on a baking sheet and bake until streusel is browned, about 25 minutes.
  4. Allow buckles to cool for 15 minutes.  Serve with vanilla bean ice cream.

Makes 6 servings.

St Louis Gooey Butter Cookies

St Louis Gooey Butter Cookies

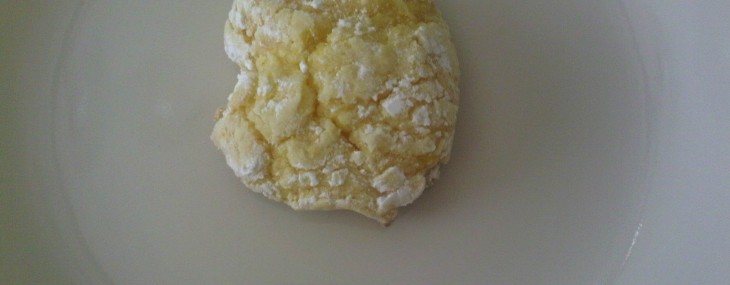
I recently spent the weekend with dear friends in St Louis and was fortunate that I was introduced to tons of St Louis local favorites.  Gooey Butter Cake is a true dessert staple to locals and here’s a cookie version kindly provided by St Louis cooking maven, Chris Absheer (here with cutie grandson, Mikey).  Seriously, with that name, who can resist these cookies – plus, they’re super simple to prepare!

Ingredients:

  • 1 -8 ounce package cream cheese, softened
  • 1/2 cup butter, softened
  • 1 large egg
  • 1/4 tsp vanilla extract
  • 1 -18.5 ounce package yellow cake mix
  • 1/4 cup confectioners’ sugar

Directions:

  1. Preheat oven to 350 degrees.
  2. In a medium bowl cream together the cream cheese and the butter. Stir in the egg and vanilla. Add cake mix, stir until well blended.
  3. Form dough into 1-inch balls (should yield 24 balls).  Place the confectioners’ sugar in a shallow dish then roll the balls to coat them in sugar.
  4. Place balls 1-inch apart on ungreased cookie sheets and bake for 10-13 minutes, until lightly golden. Remove cookies from the oven and let cool for 5 minutes, then cool completely on wire rack.

Makes 24 cookies.

Zesty Key Lime Tart

Zesty Key Lime Tart

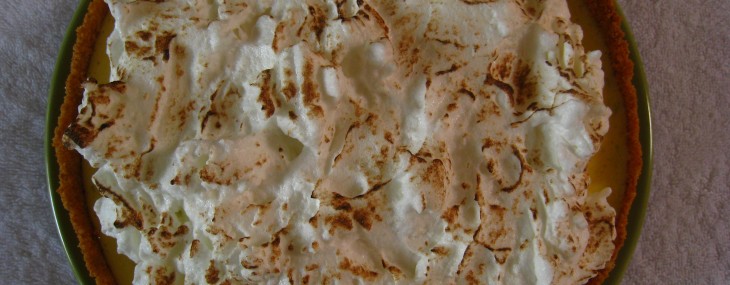
Torched Meringue

My guy, Pat, adores key lime pie.  For our first date, over 10 years ago, he cooked a fabulous meal and baked a key lime pie for me.  He was so proud of his foodie achievements, and we laugh to this day, about the overuse of green food coloring which turned the pie nearly fluorescent green.  The following recipe is a light and fresh version of the typical key lime pie.

Crust Ingredients:

  • 1 3/4 cups graham cracker crumbs
  • 1/4 cup sugar
  • 1/2 tsp salt
  • 1/2 cup (1 stick) unsalted butter, melted
Egg Yolks & Lime Zest

Egg Yolks & Lime Zest

Filling Ingredients:

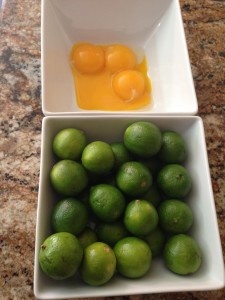
  • 4 egg yolks (save egg whites for meringue)
  • 1-14 ounce can condensed milk
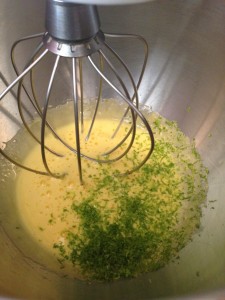
  • 1 tbsp grated lime zest
  • 1/2 cup key lime juice
  • 1/2 tsp cream of tartar

Meringue Ingredients:

  • 4 egg whites
  • 6 tbsp sugar
  • 1/2 tsp cornstarch
  • Pinch salt

Crust Instructions:

  1. Heat oven to 325 degrees.
  2. Combine graham cracker crumbs, sugar, salt and melted butter in a medium bowl.
  3. Press crumb mixture into bottom and partially up sides of 9-inch springform pan using a spoon or a small measuring cup.
  4. Freeze crust for 30 minutes.
Yolks and Limes

Yolks and Limes

Filling Instructions:

  1. In the bowl of an electric mixer, beat egg yolks on high speed until thick and light in color, about 5 minutes.
  2. Turn off mixer and add lime zest and condensed milk.  Combine on slow speed for 1 minute.
  3. While still on slow speed, add half the lime juice, then the cream of tartar, then the remaining lime juice.  Mix until blended, about 1 minute.
  4. Pour the filling into the frozen crumb crust and bake 15 minutes, until mostly set.
  5. Freeze tart for 3 hours.

Meringue Instructions:

  1. Heat oven to 500 degrees (if using the oven to brown the meringue).
  2. In the bowl of an electric mixer, beat the egg whites until soft peaks form, about 4 minutes.
  3. In a small bowl, stir together the sugar, cornstarch, and salt.
  4. Incorporate the sugar mixture, 1 tablespoon at a time, to the egg whites, beating well after each sugar addition.  Continue to beat until the sugar dissolves, about 2 minutes.
  5. Spoon or pipe using a pastry bag, the meringue over the tart filling.
  6. Bake for 10 to 12 minutes, until meringue top is browned.  Conversely, brown the meringue with a kitchen torch.

Notes:  If key lime juice is unavailable, you may substitute with lime juice. Not a fan of meringue?  Use whipped cream as an alternative topping for the tart!

5 No-Fuss Casual Summer Dishes

Berry Cobbler

Berry Cobbler

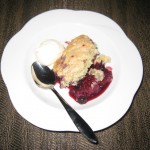
It’s nearly Summertime and all of us are looking for simple dishes to make while entertaining friends and family.  Here are five dishes to try throughout the Summer that won’t keep you away from the party.

Beef Chili for a Crowd: http://bit.ly/96QARr

Quick and Easy Pan Fried Smashed Potatoes: http://bit.ly/cQRipt

Whole Grilled Chicken for the Non-Cook: http://bit.ly/bNYU1z

Zesty Guacamole: http://bit.ly/b0PYgj

Very Berry Cobbler: http://bit.ly/bP2yIL

Ghirardelli Dark Fudgy Brownies

Ghirardelli Dark Fudgy Brownies

Dark Fudgy Brownies

Dark Fudgy Brownies

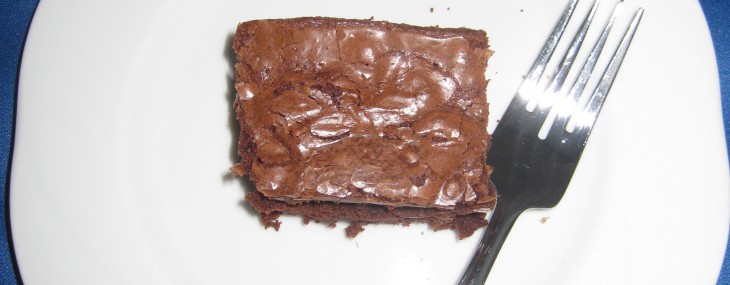
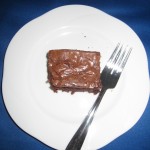
These are THE brownies for chocolate lovers. Almost too rich and chocolaty, but not quite by my standards. I often use these brownies to make brownie hot fudge sundaes. They are fan favorites every time.

Ingredients:
• 3/4 cups flour
• 1/4 tsp. baking soda
• 3/4 cup sugar
• 1/3 cup butter
• 2 tbs. water
• 6 ounces Ghirardelli 60% Cacao Bittersweet Chocolate Chips
• 6 ounces Ghirardelli Semi-Sweet Chocolate Chips
• 1 tsp. vanilla
• 2 large eggs
• 1/2 cup chopped pecans (optional)

Directions:
1. Preheat oven to 325 F. Grease a 9-inch square pan.
2. In a small bowl, combine the bittersweet and the semi-sweet chocolate chips, set aside.
3. In a small bowl, mix together flour and baking soda, set aside.
4. In a small saucepan, combine sugar, butter and water. Bring to a boil over medium heat; remove immediately from heat.
5. Add 1 cup of the mixed chocolate chips and the vanilla to the hot sugar mixture and stir until melted and smooth.
6. Transfer the hot sugar mixture to a medium bowl. Cool completely.
7. Add the eggs, 1 at a time, to the chocolate mixture, stirring well after each one. Gradually stir in flour mixture until smooth. Incorporate remaining chocolate chips and the nuts, if using, into the batter. Pour batter into the greased pan.
8. Bake 30-35 minutes. Cool completely and cut into squares.

Makes 9 large brownie squares.

NOTE: Get a tall glass of milk ready!

Maple Syrup Dumplings

Maple Syrup Dumplings

Maple Dumplings

Maple Dumplings

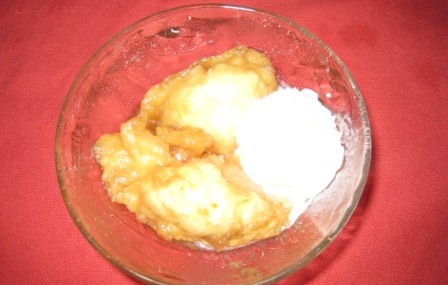
My Grandma’s sister, Eva Rose, was a fabulous dumpling maker and here is her simple recipe that I’ve used with maple syrup to celebrate Spring.

Dumpling ingredients:

  • 1 cup all-purpose flour
  • 1 tsp baking powder
  • 1 pinch of salt
  • 1 large egg
  • 2 tsp melted butter, cooled
  • ¼ cup whole milk

Maple syrup poaching liquid ingredients:

  • 2 cups maple syrup
  • 1/2 cup water

Dumpling directions:

  1. In a medium bowl, combine flour, baking powder and salt.
  2. Add egg, butter and milk to the flour mixture and mix to incorporate. Do not overmix. Dumpling batter will be lumpy.
  3. Refrigerate for 30 minutes.

Maple syrup dumpling directions:

  1. In a medium saucepan, bring the maple syrup and water to a boil over high heat. Turn heat down to low.
  2. Drop dumpling batter by the tablespoonful into the hot liquid. Cover pan with a lid and simmer on low heat for 10 minutes.
  3. Serve hot with vanilla ice cream.

Makes 4 servings.

Note: These dumplings are delicious with berries instead of the maple syrup poaching liquid.

Maple Taffee Goodness

Maple Taffee Goodness

Sugary Treat

Sugary Treat

So, who’s ever experienced maple taffee on snow? And who’s ever had that sweet smirk my niece has on her face after a taste?