Hot Chocolate Cookies

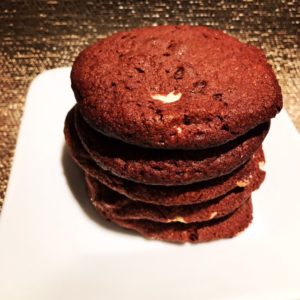
hot-chocolate-cookiesDay 3 of my 12 Days of Christmas Baking compilation!
We had our first snow of the season this week and as I was sipping a cup of hot cocoa, I thought of how great a cookie with these flavors would be. Who doesn’t like mini marshmallows anyways – nobody!

Ingredients:

  • 1¼ cups/2 ½ sticks butter, softened
  • ⅔ cup brown sugar
  • 1 cup granulated sugar
  • 2 large eggs
  • 1 tsp. pure vanilla extract
  • 3 cups all-purpose flour
  • ¼ cup Dutch-processed cocoa
  • 4 – 0.73 ounce packets of milk chocolate hot cocoa mix, I used Swiss Miss Classics Milk Chocolate Hot Cocoa Mix
  • 1 ¼ tsp. baking soda
  • 1 tsp. baking powder
  • 1 cup semi-sweet chocolate chips
  • ½ cup mini marshmallows

Directions:

  1. In the bowl of an electric mixer, beat the butter, brown and granulated sugars together until light and fluffy, about 2 minutes.
  2. Add eggs and vanilla and beat an additional minute.
  3. In a medium bowl, sift together the flour, Dutch-processed cocoa, the hot cocoa mixes, the baking soda and the baking powder. Gradually add the flour mixture to the butter mixture and beat just to combine.
  4. Fold in the chocolate chips and the mini marshmallows. Chill the dough for about 30 minutes.
  5. Preheat oven to 350 degrees.
  6. Drop the dough by the tablespoonful onto greased cookie sheets, 2 inches apart.
  7. Bake for 9-10 minutes until the edges of the cookies are set. Cool on the cookie sheets for 5 minutes then place the cookies on cooling racks.

Yields 2 dozens.

Reese’s Pieces Cookies

Reese’s Pieces Cookies

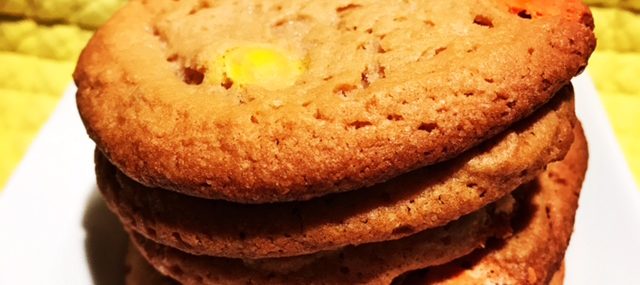
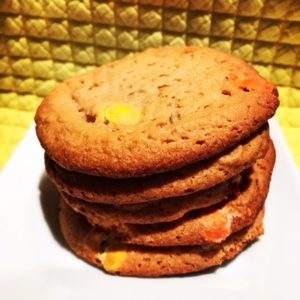
reeses-pieces-cookiesDay 2 of my 12 Days of Christmas Baking.
I must admit, I’m not a huge fan of peanut butter cookies. Why did I create this recipe, you might ask? Because I’m doing a 12 days of cookies compilation and don’t want to devour dozens upon dozens of cookies…..with this recipe, I, of course, tasted my final product – but, didn’t feel like having 2 dozens…genius!  

These would be even more PB-tasting by replacing ½ cup of the chocolate chips with peanut butter chips. Up to you how PB-fanatic your entourage is.

Ingredients:

  • ½ cup/1 stick butter, softened
  • 1 cup granulated sugar
  • 1 cup brown sugar
  • ½ cup vegetable oil
  • 2 large eggs
  • 1 tsp. pure vanilla extract
  • 1 tsp. baking powder
  • 1 tsp. baking soda
  • 1 tsp. salt
  • 3 cups all-purpose flour
  • 1 ½ cups Reese’s Pieces
  • 1 cup semi-sweet chocolate chips

Directions:

  1. Add the butter to the bowl of an electric mixer and beat until light and fluffy, about 2 minutes.
  2. Add the granulated and brown sugar and beat an additional minute.
  3. Add the oil, the eggs and the vanilla and beat for another minute.
  4. In a medium bowl, sift the baking powder, the soda, the salt and the flour. Add the flour mixture to the batter and beat just enough to incorporate.
  5. Fold in the Reese’s Pieces and the chocolate chips. Refrigerate for 15 minutes.
  6. Preheat oven to 350 degrees.
  7. Drop the dough by the tablespoonful onto greased cookie sheets.
  8. Bake for 7­-8 minutes, until lightly golden brown. Cool on the cookie sheets for 5 minutes then place the cookies on cooling racks.

Yields about 2 dozen cookies.

Mom’s Icebox Cookies

Mom’s Icebox Cookies

icebox-cookies-bakedDay 1 of My 12 Days of Christmas Baking compilation. 
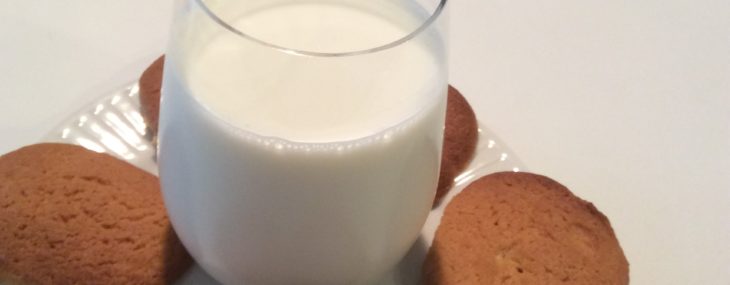
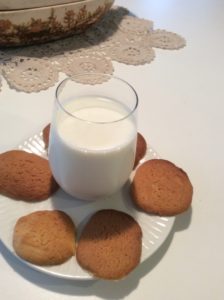
Every year, I do this 12 days of cookies compilation on this blog and this year, I asked my mom to send in her icebox cookies recipe. Typically, she agrees, but then I don’t actually get the recipe, or pictures. To my surprise, mom came through with the recipe AND three photos she took while making/baking the cookies! How about that cool shot of the cookies with the well-positioned glass of milk – yeah mom!!

When I was growing up, I loved eating the raw dough from this recipe. Of course, nowadays that would likely be considered child endangerment but I’m so glad I have that memory seared in my brain.

The best thing about these cookies is that you can freeze one (or more) or the logs for about a month and just slide off what you’re ready to bake and eat – perfect for those holidays unannounced visitors or for the kids and their friends after school!

Ingredients:

  • 1 cup of butter (2 sticks), softened
  • ½ cup brown sugar
  • ½ cup granulated sugar
  • 1 large egg
  • 2 ¼ cups all-purpose flour
  • ½ tsp. baking soda
  • ¼ tsp. salt
  • ½ tsp. pure vanilla extract

Directions:

  1. In the bowl of an electric mixer, cream the butter, brown sugar, granulated sugar and the egg until light and fluffy, about 2 minutes.
  2. In a separate bowl, sift the flour, baking soda and the salt.
  3. Add the flour mixture to the butter mixture in three additions just until incorporated – don’t overbeat or you’ll end up with tough cookies.
  4. Add the vanilla.
  5. Lay two long pieces of cling wrap on your counter and divide the dough onto them. Using the cling wrap, form long, uniform logs about 2 inches in diameter. Tie the ends or make a knot with the cling wrap. At this point, the logs can be refrigerated for an hour before baking or frozen for up to a month.
  6. When ready to bake, preheat oven to 400 degrees. Slice the cookies and bake on greased cookie sheets for 8 – 10 minutes.

Yields 2 dozen cookies.

Going Formal for the Holidays

Going Formal for the Holidays

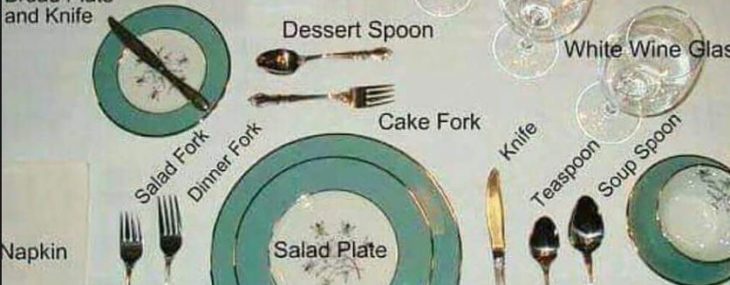
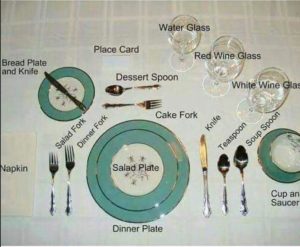
I love really dressing up my table around the holidays. If you’re thinking of pulling out grandma’s silver or unpacking those formal dishes you received at your wedding, here’s how the table should be set for a formal meal:

place-setting

Want a very VIP dinner menu for that special meal? Here’s one I love for the holidays:

Sweet Potato Gnocchi in Sage Brown Butter.

Simple & Festive Prime Rib.

Make-Ahead Twice Baked Potatoes.

Fail-Proof Yorkshire Puddings.

Elegant Key Lime Tart.

Enjoy!

Veronique

Pouding Chomeur in a Mug

Pouding Chomeur in a Mug

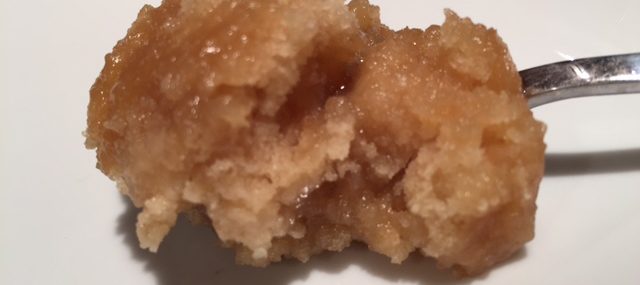
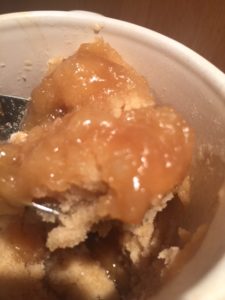
in-the-mugFor those of you not familiar with pouding chomeur (unemployed man’s pudding in French), it’s a majorly sweet, decadent, comforting and easy-to-make dessert that originated from Quebec.
Pouding chomeur is cakey on the surface and gooey, carameley on the bottom. It became popular in Quebec during the Great Depression and was typically made in a large baking dish to feed a ton of people using stale bread.

I was craving this delish dessert last night but didn’t want to make my usual large-format recipe, so I searched for a single-serve recipe and found one for a version made in a mug (what’s not to love about that). It came out perfect! I need to reiterate that it’s beyond sweet and really should be served with vanilla ice cream.

Ingredients:

  • 3 Tbsp. all-purpose flour
  • 1 Tbsp. brown sugar
  • ¼ tsp. baking powder
  • 1 pinch of salt
  • 1 Tbsp. butter, softened
  • 2 Tbsp. whole milk
  • 3 Tbsp. maple syrup
  • 1 Tbsp. water
Flour & Butter

Flour & Butter

Directions:

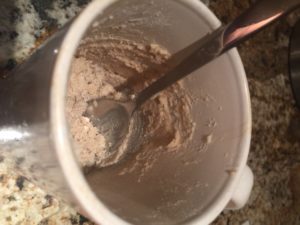
  1. In a 1 ½ cup mug, add the flour, brown sugar, baking powder and salt. Stir to combine with a fork. Add the butter and stir until the batter is crumbly. Add the milk and stir until mostly smooth.
  2. In a separate small bowl, combine the syrup and water. Pour over the batter in the mug.
  3. Place the mug on a plate, in case of spills, and microwave for 1 ½ minutes. Allow to cool 5 minutes before topping with a scoop of vanilla ice cream and eating.

Makes 1 servings.

Cheers,

Veronique

Adapted from this recipe.

Sugarpova Chocolate Mousse

Sugarpova Chocolate Mousse

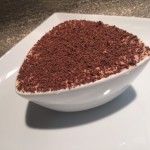
Chocolate Mousse CupA few weeks ago, I was approached by a new chocolate line to create an exclusive recipe using its product. I don’t typically do product reviews, but I was intrigued since the new brand, Sugarpova Premium Chocolates, is by Maria Sharapova, the international tennis sensation, who is the company’s founder.
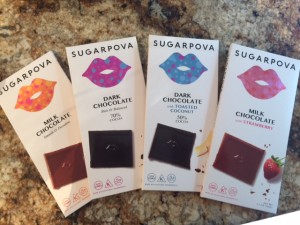

Sugarpova offers a decadent collection of 100g chocolate bars in Dark, Milk, Dark with Toasted Coconut and Milk with Strawberry. The unique product is non-GMO, Certified Kosher, Halal and made with natural ingredients. The bars have a suggested retail price of $3.99 to $4.99 and are available at www.sugarpova.com.

The samples I received were:

Sugarpova Bars

DARK CHOCOLATE COCONUT – “50% cocoa dark chocolate is made all the richer with the delightful addition of toasted coconut. A match made in heaven, you’re sure to fall in love with this tempting combination”.

MILK CHOCOLATE STRAWBERRY – “Is there anything better than chocolate dipped strawberries? Treat yourself to a taste of luxury anytime with the only bar that combines creamy milk chocolate with the flavor of fresh strawberries”.

70% COCOA DARK CHOCOLATE – “Kick back, relax, and indulge in the full-bodied flavor of 70% premium dark chocolate. Not too sweet, it engages all your senses with every perfect bite”.

MILK CHOCOLATE – “Take a break from the hustle and bustle with a smooth, creamy bite of premium milk chocolate. We won’t tell if it ends up being more than just one bite”.

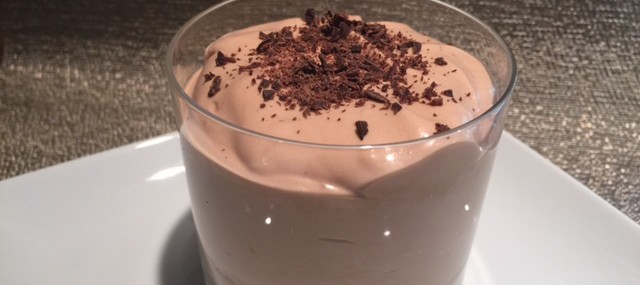
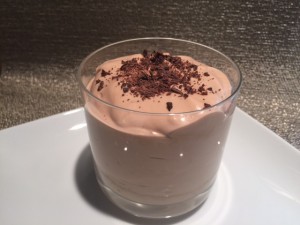
I wanted to use as many of the bars as I could in my recipe, but since I’m not a coconut fan, I skipped using that one. I thought of doing a mousse as soon as I saw the chocolate/strawberry bar – what a great compliment in flavors! I combined the strawberry bar with the milk chocolate one in the mousse and topped each serving with a healthy grating of the dark chocolate. I plated a couple different ways to showcase the mousse in various portion sizes and appearance.

Ingredients:

  • 1 100g Sugarpova Milk Chocolate bar and 1 100g Sugarpova Milk Chocolate Strawberry bar, chopped into small pieces (could also use 200g semisweet chocolate chips)
  • 1/3 cup plus 1 Tbsp. granulated sugar, divided
  • 2 cups heavy cream
  • 4 large egg yolks
  • 1-ounce piece of Sugarpova Dark Chocolate, optional

Directions:

  1. Place the chopped chocolate in a microwave-safe bowl and microwave on medium power for 30 seconds. Stir and continue to cook for another 30 seconds. Allow to cool while proceeding with the following steps.
  2. In the bowl of an electric mixer, add the tablespoon of sugar to the cream. Beat for 2-3 minutes or until soft peaks form. Set aside.
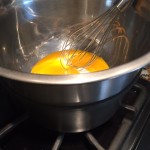
  3. In a metal or heat-resistant glass bowl placed over a saucepan of barely simmering water, combine the remaining sugar and the egg yolks. Whisk the mixture for 3 minutes until smooth, fluffy and doubled in volume.
  4. Using a rubber spatula, combine the melted and cooled chocolate with the yolk mixture until no eggy streaks are left.
  5. Gently fold half the whipped cream into the chocolate mixture. Once fully combined, add the remaining whipped cream and again, gently fold in. Don’t overmix, you want this light and fluffy – a few darker chocolate streaks are okay.
  6. Pipe or spoon the mousse into single-serving size dishes or glasses and refrigerate until set, at least 2 hours. The mixture will feel a bit runny but that’s okay, the mousse will stiffen after chilling.
  7. Grate the dark chocolate over the individual mousse cups and serve.

About Sugarpova: Sugarpova continues to have double-digit growth year after year since its launch. Currently, the brand has retail penetration in 22 countries all over the world and is sold in a variety of retail partners and online. The founder and international tennis sensation is Maria Sharapova, whose sweet tooth and love for little indulgences, motivated her to create a candy company specializing in gummies and sweets of quality and craftsmanship. For more information, visit http://www.sugarpova.com.

Cheers,

Veronique

Streusel Top Blueberry Custard Pie

Streusel Top Blueberry Custard Pie

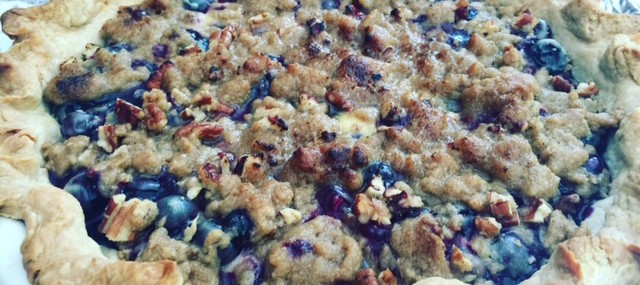
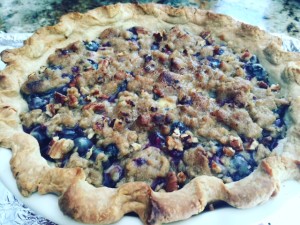
Blueberry Streudel PieEvery summer, I host at least a couple lobster parties and what could scream “Maine” more than a blueberry pie?! I live in New Jersey where blueberries abound and are sweet and delicious, so double whammy.
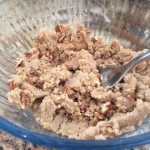
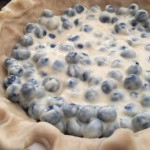
I typically make my Crumb Top Blueberry Pie, but this weekend, I decided to change the crumble top to a nutty streusel top and it was a nice change with the extra crunchiness from the pecans. I also did a custard-like bottom which was well-received by my guests.

As always, don’t fret if you’re not into making your own pie dough, just use a store-bought one. I make my own Fail Proof Pie Crust using my VERY simple food processor technique.  

Filling Ingredients

  • 8 ounces sour cream (I used reduced-fat but don’t recommend non-fat)
  • 1 large egg
  • ¾ cup granulated sugar
  • 2 Tbsp. all-purpose flour
  • ¼ tsp. salt
  • 2 tsp. pure vanilla extract
  • 3 cups fresh blueberries
  • 1 9-inch pie crust, unbaked

Streusel Topping:

  • ⅓ cup flour
  • ½ cup brown sugar
  • ¼ cup butter, softened
  • ½ cup chopped pecans

Filling Instructions

  1. Preheat oven to 400 degrees.
  2. In a large bowl, combine the sour cream, egg, ¾ cup sugar, 2 tablespoons flour, salt and vanilla extract until smooth. Using a rubber spatula, gently add the blueberries to the sour cream mixture then pour into the unbaked pie crust. Bake for 25 minutes.

Streusel Instructions:

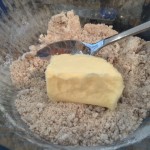
  1. Combine the flour and brown sugar in a medium bowl. Using your fingertips, incorporate the butter into the dry ingredients until the mixture is the texture of course sand. Add the pecans. Sprinkle the streusel topping over the surface of the pie after it has baked 25 minutes. Bake an additional 20 minutes, until the topping has browned – after 10 minutes of baking, if the crust or the streusel gets too dark, cover loosely with foil.
  2. Serve the pie warm with vanilla ice cream.

The addition of pecans and the custard bottom were inspired by this recipe.

Nut Goodie Bars

Nut Goodie Bars

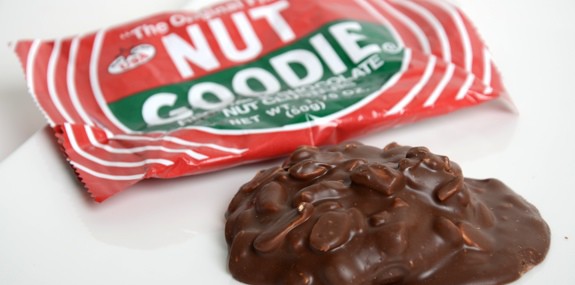
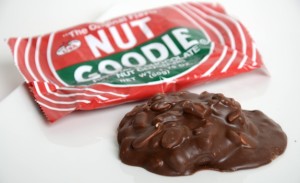
Nut GoodieNut Goodie is a candy bar that has been manufactured by Saint Paul, Minnesota’s Pearson’s Candy Company for over 100 years. The popular Midwest candy bar is a blend of chocolate, maple and peanuts and is decadent and purely delicious.
I’d never heard of this candy bar until my friend and colleague, Pam, brought bags of them to a conference our company exhibited at a couple years ago. Our midwest-based clients went nuts (pun intended) over the treats and we heard many stories of how they loved the bars as kids.

I was able to get the recipe for the tasty, chewy bites from Pam and sharing it with you.

Ingredients:

  • 12 ounces chocolate chips
  • 12 ounces butterscotch chips
  • 2 cups peanut butter (smooth or chunky)
  • 1 cup butter, softened
  • ½ cup evaporated milk
  • ¼ cup powdered vanilla pudding (not instant)
  • 2 pounds confectioners’ sugar
  • 1 tsp. maple extract
  • 16-ounce jar of dry-roasted peanuts

Directions:

  1. Butter or coat in cooking spray a 12×16 pan.
  2. In a metal bowl over a pan of simmering water (don’t let the bowl touch the water), melt the chocolate and butterscotch chips and peanut butter, mix well to combine. Pour half the mixture into the buttered pan and refrigerate.
  3. In a large saucepan over medium-high heat, combine the butter, evaporated milk and vanilla pudding mix. Bring to a boil, cook for a minute and remove the pan from the heat.
  4. Add the confectioners’ sugar to the bowl of an electric mixer. Add the hot butter mixture to the confectioners’ sugar and mix until well-combined. Add the maple extract and mix for another 30 seconds, until mixture is smooth.
  5. Pour/spread the butter/confectioners’ sugar mixture over the refrigerated chocolate base in the pan. Put the pan back in the refrigerator for 30 minutes.
  6. Add the peanuts to remaining melted chocolate mixture and spread over the chilled butter/confectioners’ sugar filling in the pan. Refrigerate for an hour then cut into squares.

Yields 24-32 squares.

Pumpkin Bread

Pumpkin Bread

Day 12 of my “12 Days of Baked Goods” series!

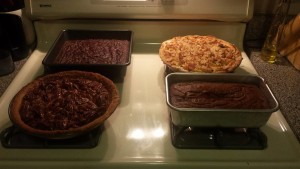
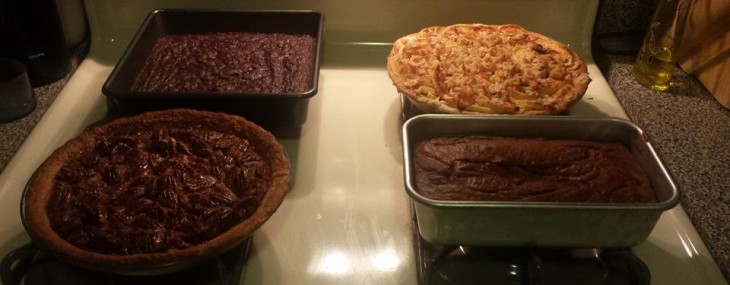
Pumpkin Bread on Bottom Right

Pumpkin Bread on Bottom Right

Right before Thanksgiving, my friend, Alli Meyer, posted a photo (included here) of all the desserts she made for her parents’ Thanksgiving dinner. She was willing to share the recipe she uses for her pumpkin bread that I thought you’d enjoy.

Ingredients:

  • 1 cup pumpkin pie filling (not pure pumpkin pie, the filling)
  • ½ cup canola oil, plus more for the pan
  • ¾ cup granulated sugar
  • ½ cup molasses
  • 1 tsp. pure vanilla extract
  • 2 cups all-purpose flour
  • 1 ½ tsp. baking powder
  • ½ tsp. baking soda
  • ¾ tsp. kosher salt
  • 1 tsp. ground cinnamon
  • ¼ tsp. ground nutmeg
  • ¼ tsp. ground cloves
  • ½ tsp. ground ginger

Directions:

  1. Preheat oven to 350 degrees F.
  2. Oil a 9 x 5 inch loaf pan.
  3. In a large bowl, combine pumpkin pie filling, oil, sugar, molasses, and vanilla.
  4. In a separate bowl, combine the flour, baking powder, baking soda, salt, cinnamon, nutmeg, cloves, and ginger.
  5. Slowly stir the flour mixture into the pumpkin mixture.
  6. Pour into the prepared loaf pan.
  7. Bake for 60 – 65 minutes.
  8. Transfer pan to a wire rack for 10 minutes to cool.
  9. Using a knife, loosen the bread from the pan.
  10. Inver the bread onto a cutting board or serving plate and serve warm.

Inspired by a recipe by Real Simple Alli found about eight years ago.

Cheers,

Veronique


Four Ingredient Fudge

Four Ingredient Fudge

Day 11 of my “12 Days of Baked Goods” series!

fudgeSeeing that I was doing a holiday baking compilation, my mom sent me her easy fudge recipe that you can make with just four ingredients (three if you don’t want to use nuts). If you like marshmallows, you could easily add ½ cup by reducing the nuts by ½ cup.

Ingredients:

  • 1 14-ounce can sweetened condensed milk
  • 2 cups semi-sweet chocolate chips
  • 1 cup chopped walnuts (or other nuts like almonds, hazelnuts, Macadamia)
  • 1 tsp. pure vanilla extract

Directions:

  1. Butter or coat with cooking spray a 9-inch baking pan.
  2. In a heavy medium saucepan over low heat, add the condensed milk and the chocolate chips. Cook, stirring frequently, until fully melted – do not allow the mixture to boil or scorch. Remove the pan from the heat, add the walnuts and the vanilla and stir well to fully combine into the chocolate.
  3. Pour the chocolate mixture into the greased baking pan and allow to fully cool. Cover with aluminum foil and refrigerate until firm, at least 2 hours. Cut the fudge into 24-28 squares, depending how large you want your pieces to be – a little goes a long way!

Yields 24-28 squares.

Cheers,

Veronique