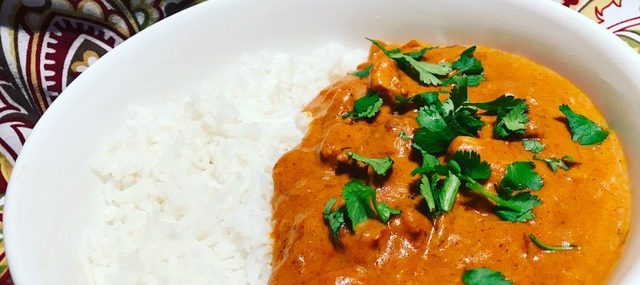
The Absolute Best Texas Style Beef Chili

The Absolute Best Texas Style Beef Chili

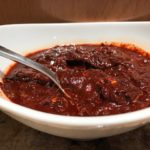
Texas Style Beef ChiliI’ve been using my “Beef Chili for a Crowd” recipe for as long as I can remember. It’s flavorful, a bit spicy and feeds an army. I never saw a reason to use a different recipe until I judged a chili competition when this elderly gentleman made the absolutely best Texas-style chili I’ve ever had. For those not familiar with Texas-style chili – it contains no beans (blasphemy) and it typically featured hand-chopped beef instead of the common ground beef style that’s so popular here in the northeast.

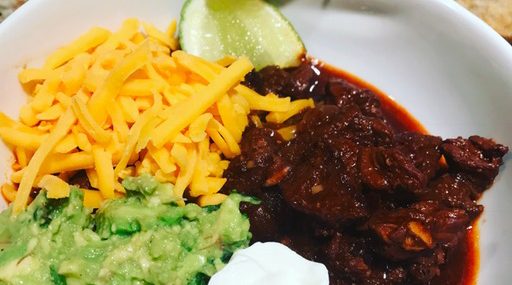
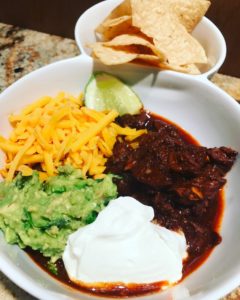
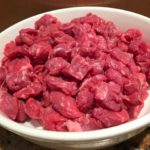
This chili is hearty, rich, and earthy with just the right level of spice. I won’t lie – cubing the beef into small pieces pretty much sucks, but the final product is so worth it.

While many grocery stores now carry dried chiles, I visited my local Mexican grocer to find the requisite guajillo chiles.

I know it’s a multi-step recipe, but it freezes beautifully for a month, so make it, have a bowl and freeze the rest!   

I serve this chili with tortilla chips for dipping, guacamole, cheddar and sour cream. Use whatever garnishes you enjoy.

Ingredients:

  • 8 dried chiles, either New Mexico or guajillo
  • 2 tsp. ground cumin
  • 1 tsp. kosher salt
  • 1 tsp. ground black pepper
  • 6 Tbsp. vegetable oil, divided
  • 2 – 2½ pounds boneless beef chuck roast, cut into ½-inch cubes
  • ½ yellow onion, diced
  • 2 cloves garlic, minced
  • 2 cups beef stock
  • 1 cup dark beer
  • 3 Tbsp. yellow cornmeal
  • 1 Tbsp. white vinegar
  • 1 Tbsp. brown sugar
  • Sour cream, for garnish (optional)
  • Sharp Cheddar cheese, grated, for garnish (optional)
  • Diced avocado, for garnish (optional)
  • Lime wedges, for garnish (optional)

Directions:

  1. Preheat oven to 325 degrees.
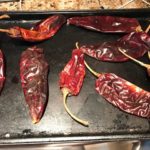
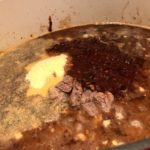
  2. Lay out dried chiles on a baking sheet lined with foil and roast in the oven for 8 minutes, until fragrant. Add the roasted chiles to a bowl, cover them with hot water and allow to soak for 30 minutes. I use a bowl to weight down the chiles in the water – SEE IMAGE OF THIS TRICK.
  3. Drain the chiles (reserve the soaking water), cut off stems, remove seeds and roughly chop them. Add the chopped chiles to a blender along with the cumin, the salt, the pepper, 1/2 cup of the reserved chile soaking liquid and blend until the mixture is very smooth, about 2 minutes. Set aside.
  4. Place a large Dutch oven over medium-high heat. Season beef cubes with big pinches of salt and pepper. Add 3 tablespoons vegetable oil and brown beef in 2 batches until browned on all sides, 8-10 minutes per batch. Remove beef and set aside.
  5. Lower the heat to medium, add the remaining 3 tablespoons vegetable oil to the pot and add onions – cook for 4 minutes, stirring frequently then add the garlic and cook for another minute.
  6. Add the beef stock, 1 cup of the reserved chile soaking liquid and the beer to the onions and garlic and scrape up any bits on the bottom of the pan. Add the beef back to pot with any cooking juices along with the pureed chile paste and the cornmeal. Turn the heat to low and simmer the chili, covered, for 90 minutes. Uncover the chili and cook for 15 more minutes.
  7. Add the vinegar and the brown sugar to the pot, remove from heat, and let sit for 30 minutes for the chili to thicken. The chili can be made a day ahead of serving, up until this point. Simply cool, cover and refrigerate.
  8. When ready to eat, gently reheat chili over low heat, adding more beef stock if the chili is too thick. Give a final seasoning of salt or pepper, if needed.
  9. Serve chili with any/all preferred garnishes.

Yields 4 hearty portions.


Adapted from this recipe.

Linguine with Clams and Confit Garlic Sauce

Linguine with Clams and Confit Garlic Sauce

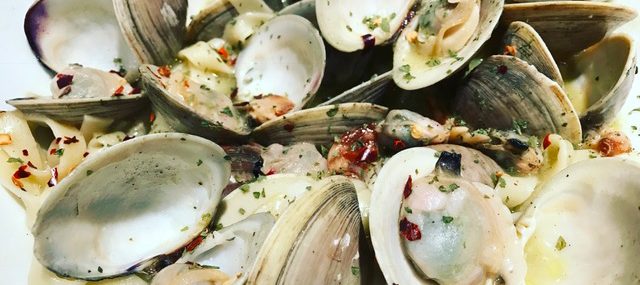
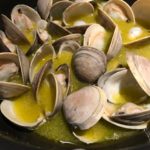
I was watching an old episode of The Best Thing I Ever Ate – SAUCED last weekend where Chef Michael Psilakis talked about the linguine and clam sauce at Don Peppe in Queens, NY (watch the mouth-watering episode here). That’s basically all I could think of this whole past week so I decided to try to recreate the simple yet delish dish.
First, please use good quality pasta – my favorite is Delverde. Next, buy your clams from a reputable source. Last, take the time to really confit (slow cook for a long time) the garlic – it’s key in this recipe.

If you want a slightly thicker sauce, you could create a slurry of ¼ cup water and 1 teaspoon of cornstarch and add right before step 4. I don’t think it’s necessary and some, I’m sure, would find this sacrilegious.

Ingredients:

  • 1 pound of linguine or fettucine, cooked 1 minute less than package direction, with ½ cup pasta cooking water reserved
  • 1 cup olive oil
  • 10 whole garlic cloves, peeled
  • 1 cup dry white wine
  • Juice of ½ lemon
  • 1 tsp. red pepper flakes
  • ½ tsp. each salt and pepper
  • 2 dozens little neck clams
  • 3 Tbsp. butter
  • Chopped Italian parsley, optional

Directions:

  1. In a small heavy saucepan over medium-low heat, warm the olive oil. Add the garlic cloves and allow to cook for 20 minutes. If the cloves are smaller and they begin to brown early in the cooking process, lower the heat to low – make sure the cloves don’t burn!
  2. Add the garlic cloves and the cooking oil to a large sauté pan that has a lid. Turn the heat to medium and add the ½ cup pasta cooking water, wine, lemon juice, red pepper, salt and pepper to the oil. Bring to a simmer and whisk to combine.
  3. Add the clams to the sauté pan, cover with the lid and cook for 3-4 minutes until the clams have opened. Discard any clams that didn’t open (unopened clams = bad clams). Remove the clams to a large serving bowl, leaving the sauce in the sauté pan.
  4. Lower the heat to low and add the butter, swirling until fully melted.
  5. Add the pasta and gently stir to coat in the sauce. Add the parsley, if using, then add the sauce and pasta to the serving bowl with the clams, tossing gently to combine.
  6. Serve with crusty bread.

Makes two VERY generous portions.


Vegetarian Black Bean and Butternut Squash Chili

Vegetarian Black Bean and Butternut Squash Chili

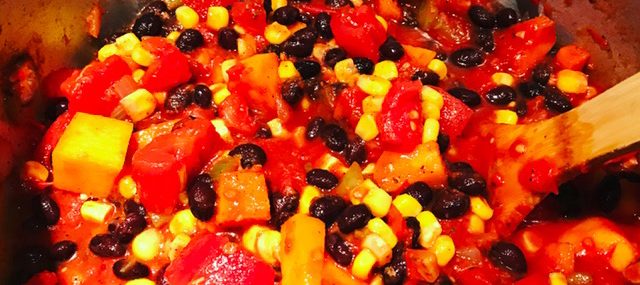
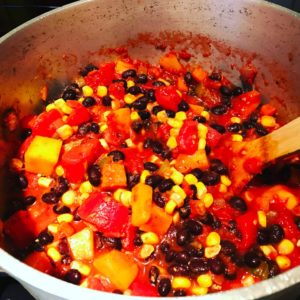
Chili CookingWhile winter’s been mild here so far in New Jersey, I’m still craving hearty, comforting food. In my continued effort to ‘prep Sunday – eat throughout the week’, this week, I’ve made a meatless chili that was uber satisfying and can be used in various ways during the week. I used it as dip for chips during the football game and topped a baked sweet potato with it for lunch (see photos).
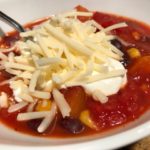
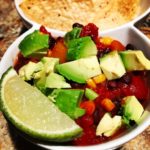
This chili can be made in the slow cooker too – just throw all the ingredients in the crockpot (except for the toppings) and cook on low for 4-5 hours.

Ingredients:

  • 2 Tbsp. olive oil
  • 1 medium Spanish onion, chopped
  • 1 red bell pepper, cored and diced
  • 4 cloves garlic, minced
  • 1 butternut squash, peeled and cut into small cubes
  • ½ tsp. each salt and pepper
  • 2 Tbsp. chili powder
  • 1 tsp. ground cumin
  • ½ tsp. cayenne pepper
  • 1 cup vegetable broth, then more if the chili gets too thick
  • 1 28-ounce can of diced tomatoes
  • 1 28-ounce can of crushed totatoes
  • 1 cup corn kernels
  • 1 28-ounce can black beans, drained and rinsed
  • Toppings (optional) – fresh cilantro, lime wedges, diced avocado, sour cream and cheddar/jack cheese

Directions:

  1. In a large heavy Dutch oven, heat olive oil over medium-high heat.
  2. Add onion and bell pepper and cook for 4 minutes, stirring frequently.
  3. Add garlic and sauté 1 additional minute.
  4. Add the butternut squash, the salt and pepper, the chili powder, cumin and cayenne pepper. Cook for 5 minutes, stirring frequently.
  5. Add the vegetable broth, tomatoes, corn and black beans.
  6. Bring to a light boil then reduce heat to low, cover and allow to simmer for 45 minutes, or until the butternut squash is completely tender.
  7. Thin with an additional broth if needed.
  8. Serve with desired toppings, if using.

Serves 8.

Hash Browns Vegetable Frittata

Hash Browns Vegetable Frittata

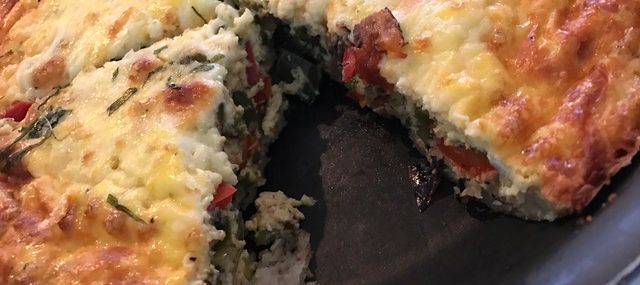
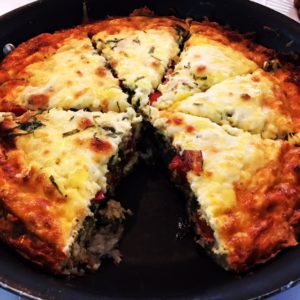
frittata-cutOn Christmas morning, my mom went all fancy on us and served this delicious frittata. A frittata is an Italian egg-based dish alike an omelet or a quiche without a crust. It was a perfect, comforting dish on a snowy Quebec morning.
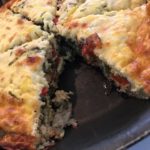
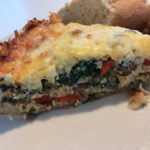
I like that it’s vegetable-packed and unlike a quiche, it doesn’t require a pesky crust that needs to be painstakingly rolled out. Mom used bacon (6 slices chopped) and breakfast sausage (6 links chopped) in her version, but meatless is great too!

Feel free to play around with the veggies you use. Asparagus, artichoke hearts and roasted butternut squash would be great and replacing the spinach with kale or arugula would also work. It’s a great way to empty out the fridge!

This frittata was served hot at mom’s house but could easily be served at room temperature if featured at a brunch or breakfast buffet.

Note that if grating your own potatoes, the starchier the potatoes, the crisper the “crust”. Baking potatoes would be the starchiest, followed by Yukon Golds and boiling potatoes as the least starchy. All three would work.

Ingredients:

  • 15-ounce package of hash browns or 4 cups freshly-grated potatoes, dried very well
  • 2 Tbsp. vegetable oil
  • 2 Tbsp. butter
  • 2 red bell peppers, diced
  • 1 large onion, diced
  • 8 ounces cremini mushrooms, sliced (could use white button mushrooms)
  • 2 cups baby spinach
  • 1 ½ cups grated sharp Cheddar cheese
  • ½ cup grated Mozzarella cheese
  • 1/3 cup heavy cream
  • ½ tsp. each salt and pepper
  • 1 Tbsp. fresh tarragon
  • 10 large eggs, beaten well

Directions:

  1. Preheat oven to 425 degrees.
  2. Butter or coat with cooking spray a 10-inch oven-proof skillet. Spread the hash browns on the bottom and walls of the skillet, creating a “crust”. Bake for 25 minutes or until the edges of the hash browns have…browned! Set aside to cool slightly.
  3. In a large skillet over medium-high heat, add the oil, the butter, the peppers, onion and mushrooms. Cook for 5 minutes, stirring frequently, until the vegetables have softened. Add the spinach and cook for 2 more minutes. Drain excess oil/moisture.
  4. Place the cooked vegetables over the baked crust.
  5. In a large bowl, add the cream, the salt, the pepper and the tarragon to the beaten eggs – whisk for a minute then pour over the vegetables, in the skillet.
  6. Top the eggs with both cheeses.
  7. Place the skillet on a baking sheet (to help with any drips) and bake for 40 minutes, or until the frittata is set in the center.
  8. Cool for 5 minutes and serve, or, cool completely, wrap in aluminum foil and store in the refrigerator for a day. If serving the next day, allow the frittata to come to room temperature and reheat in a 250 degree oven until warmed through, about 10 minutes.

Serves 8 generously.

Healthy Chicken Fiesta Bowls

Healthy Chicken Fiesta Bowls

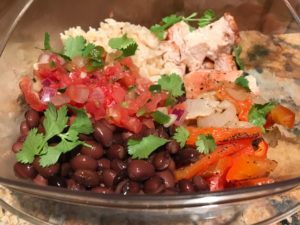
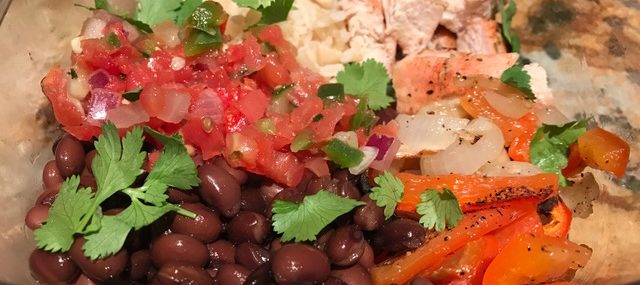
chicken-fiesta-bowlsIt’s a new year and I’m making all efforts to use meal prepping more so I can cook on Sundays and have delicious, healthy lunches during the week. I did pretty well with this in 2016, but since I travel over 50% of the time, meals at home weren’t very frequent. This recipe makes four lunch since bowls that are easy to take to work and reheat in the microwave. Corn would be a nice addition to this recipe, so feel free to add if you’re not trying to cut down on carbs a bit. Ingredients:
  • 2 skinless, boneless chicken breasts cut into three pieces each (6 pieces total)
  • 2 red bell peppers, julienned
  • 1 large onion, chopped in medium pieces
  • 1 Tbsp. creole/blackening seasoning (could use taco seasoning)
  • ½ tsp. each salt and pepper
  • 2 Tbsp. vegetable oil
  • 2 cups cooked brown rice
  • 1 cup canned black beans, drained and rinses
  • 1 cup fresh salsa (don’t want to make your own, check out the produce section of your grocery store for fresh salsa)
  • 4 Tbsp. cilantro leaves (optional)
  • 1 lime cut into 4, optional

Directions: Preheat oven to 375 degrees.

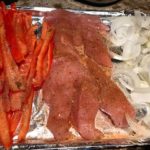
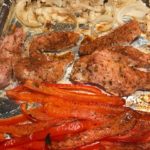
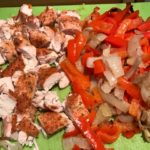
  1. Line a baking sheet with aluminum foil (to make cleanup easy). Place the chicken, peppers and onions on the baking sheet then sprinkle with blackening seasoning, salt and pepper. Drizzle the oil on the veggies and chicken and toss to coat with oil and spices evenly. Bake for 25 minute then turn oven to broil and broil for 3-4 minutes, until lightly charred. Allow to cool, then chop the veggies and chicken in bite size pieces.
  2. To assemble, divide the rice, black beans, salsa, chicken and cooked vegetables among 4 microwave-safe storage containers. Refrigerate until ready to eat, up to 5 days.
  3. When ready to eat, microwave partially-covered for 3 minutes. Garnish with cilantro leaves and, if using. Can also serve with additional salsa and lime juice.

Makes 4 lunch entrees.  

Going Formal for the Holidays

Going Formal for the Holidays

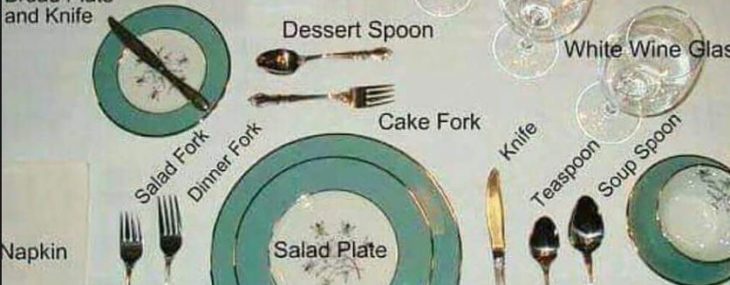
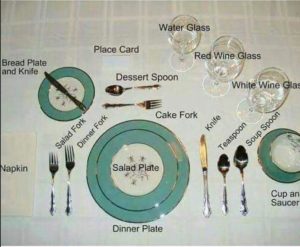
I love really dressing up my table around the holidays. If you’re thinking of pulling out grandma’s silver or unpacking those formal dishes you received at your wedding, here’s how the table should be set for a formal meal:

place-setting

Want a very VIP dinner menu for that special meal? Here’s one I love for the holidays:

Sweet Potato Gnocchi in Sage Brown Butter.

Simple & Festive Prime Rib.

Make-Ahead Twice Baked Potatoes.

Fail-Proof Yorkshire Puddings.

Elegant Key Lime Tart.

Enjoy!

Veronique

Baked Penne Parmesan

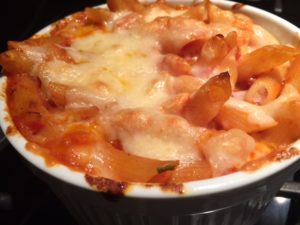
baked-pastaI love recipes that take me all of 10 minutes to prepare and that will serve a few meals during the week. This beyond-easy pasta dish is one of those recipes that I make on Sundays and portion for lunches during the week.
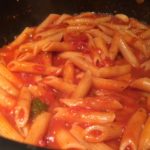
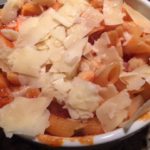
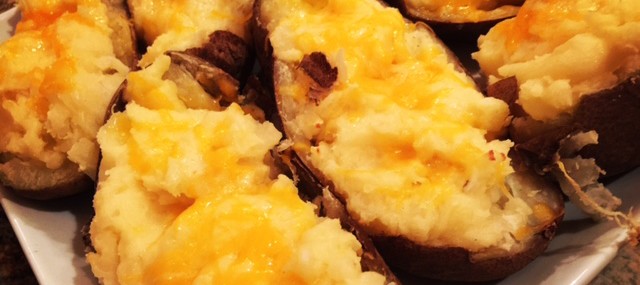
Ingredients:

Directions:

  1. Preheat oven to 400 degrees.
  2. Cook pasta 1 minute short of indicated on the packaging.
  3. Toss the drained pasta into the marinara sauce.
  4. Add the Mozzarella to the pasta and stir to distribute evenly.
  5. Pour the pasta into a medium baking dish.
  6. Top with the shaved cheese.
  7. Place the dish on a baking sheet to prevent oven drips and bake for 25 minutes.

Makes 2 generous entrée-size servings.

Note: I received a sample container of Sartori Cheese that I will now add to my grocery list.

Make Ahead Twice Baked Potatoes

Make Ahead Twice Baked Potatoes

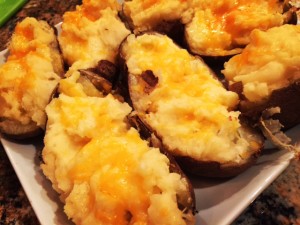
Twice Baked PotatoesSummer’s all about BBQs and outdoor parties and the last thing I want to do once my guests have arrived is to slave over a hot stove in the kitchen. We also attend a lot of outdoor events where I’m always puzzled with what to bring besides desserts.
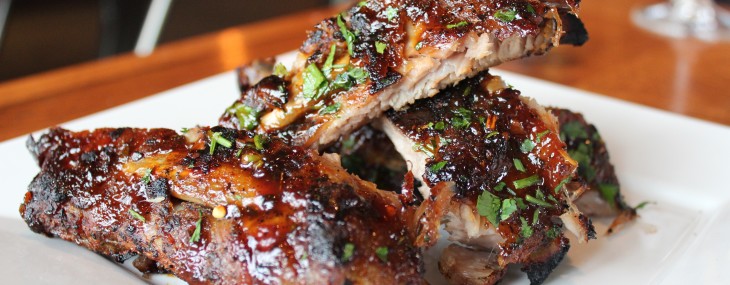
These old-school twice-baked potatoes are simple-to-make and can be prepared ahead and reheated on the grill or a camp fire before dinner.

Don’t feel like making your own mashed potatoes? Just buy some at the grocery store and doctor them up with the cheese, bacon (if using) and scallions.

Ingredients:

  • 3 large baking potatoes
  • 2 Tbsp. softened butter
  • 1/3 cup half & half (could use whole milk), warmed in the microwave for a minute
  • 4 bacon slices, cooked and crumbled (optional)
  • 1 cup sharp Cheddar cheese
  • ½ cup sour cream (optional)
  • ½ cup chopped scallions (optional)

Directions:

  1. Cook potatoes until fork-tender and allow to cool until just cool enough to handle. Cut each potato lengthwise and, using a spoon, scoop out most of the flesh without cutting through the skins. Place the scooped out flesh in a bowl and add the butter, half & half, bacon (if using) and cheese and mash until mostly smooth.
  2. Fill the potato skin shells with the mashed potatoes. At this point, you may wrap the potatoes in foil and keep in the fridge for a couple days until ready to use (go to step 3 when ready to cook) or, place on a cookie sheet for immediate use.
  3. Preheat oven to 400 degrees and cook room-temperature potatoes for 25 minutes, until slightly golden.
  4. Top the hot potatoes with sour cream and chopped scallions, if using.

Makes 6 servings.

Baby Back Ribs with Balsamic BBQ Sauce

Baby Back Ribs with Balsamic BBQ Sauce

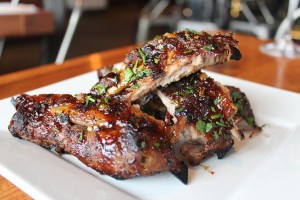
Pork RibsWhile I have my go-to ribs recipe, I’m always looking for new ideas and variations from the old standard. This recipe, provided by Executive Chef Josh Bernstein of Spuntino Wine Bar & Italian Tapas, puts a bit of an Italian spin on the backyard BBQ favorite.

Ingredients:

Rib Spice Rub:

  • 1/4 cup dried basil
  • 1/4 cup dried oregano
  • 1/2 cup paprika
  • 1/2 cup garlic powder
  • 1/2 cup onion powder
  • 1/2 cup ground fennel seed
  • 3/4 cup dark brown sugar           
  • 1 cup kosher salt
  • 2 Tbsp. red pepper flakes
  • 2 Tbsp. ground black pepper

Balsamic BBQ Sauce:

  • 2 cups balsamic vinegar
  • 1-1/2 cups ketchup
  • 3/4 cup dark brown sugar
  • 1 Tbsp. fresh chopped garlic
  • 2 Tbsp. Worcestershire sauce
  • 2 Tbsp. Dijon mustard
  • 1 tsp. Kosher salt             
  • 1/2 tsp. ground black pepper

Ribs:

  • 4 racks of baby back ribs
  • 1 cup rib spice rub
  • 2 Tbsp. chopped Italian parsley
  • 1 cup balsamic BBQ sauce

Method:

For the Rib Spice Rub:
Place all of the ingredients into a bowl.  Mix well.  Keep in an air tight container for up to 3 weeks.  This recipe will make more than needed for the ribs.  It is a good marinade for other meats as well.

For the Balsamic BBQ Sauce:
Combine all of the ingredients in a sauce pot.  Bring to a boil.  Reduce the flame and simmer for 45 minutes.  Stir every 10 minutes.  Strain and cool.

For the Ribs:
Spread the spice rub evenly over the ribs.  Wrap each in aluminum foil.  Allow to marinate overnight in the refrigerator for at least 12 hours.  Place the ribs, still wrapped in aluminum foil, into a 350 degree oven for 2 hours.  At this point you can cool them down and refrigerate up to 7 days or freeze for up to 2 months.  If not, brush the ribs with the BBQ sauce and place onto a hot grill.  Cook until the sauce is hot on the ribs.  Cut into 1-2 rib portions and garnish with parsley.

Serves 4.

Spaghetti alla Carbonara

Spaghetti alla Carbonara

This Roman dish was created in the middle of the 20th century using simple ingredients: pasta, eggs, pork jowls (think bacon) and cheese, typically Pecorino.

I’m all about simple pasta dishes, especially during the week, so this is one of my go-to recipes. I’ve made this decadent dish using a few variations, adding peas, morel mushrooms and shrimps…it’s delicious any ways. Note that garlic isn’t authentic to pasta carbonara, but it’s so darn tasty that I include it. Don’t like garlic – omit it! I used red pepper flakes too, which aren’t authentic either…sue me purists!

While the eggs do get warmed when tossed with the hot pasta, they aren’t fully cooked. If slightly cooked eggs aren’t your thing, this is likely not the dish for you. If you can get past that, you’ll get addicted, like I am, to the creamy “sauce” created by the eggs, pasta water and cheese.

Ingredients:

  • 1 pound good quality spaghetti, I use Delverde
  • 1 Tbsp. olive oil
  • 8 ounces diced pancetta or slab bacon
  • 1 large garlic clove, finely minced
  • 3 large eggs
  • 1 cup grated Pecorino-Romano or Parmesan cheese, divided
  • ½ tsp. red pepper flakes (or black pepper if you prefer)

Directions:

  1. Bring a large pot of salted water to a boil over high heat. Add the spaghetti and cook 1 minute less than the cooking directions on the packaging recommend.
  2. While the pasta’s cooking, warm the oil in a medium skillet over medium-high heat. Add the pancetta and cook until browned, about three minutes, stirring occasionally. Add the garlic and cook for another minute. Place the pancetta/garlic and the oil they cooked in, in a large, heat-proof bowl and set aside to cool.
  3. In a medium bowl, whisk the eggs, 1/2 cup of the cheese and pepper flakes. Whisk until well blended.
  4. When the pasta’s just al dente, scoop it out of the water using a pasta fork or tongs, and into the bowl with the pancetta – don’t drain the pasta water out of the pot! Toss the pasta until coated in the oil from the pancetta.
  5. Add the egg mixture to the pasta and toss quickly to ensure the eggs don’t scramble – you might need to give this method a couple tries to get it right – it’s worth it!
  6. Add ¼ cup of pasta cooking water to the pasta then the remaining cheese. Keep tossing to create a silky, creamy sauce that coats the pasta. Serve immediately.

Serves two for dinner or four as a starter.