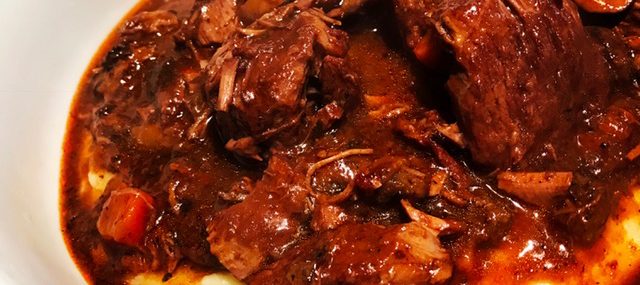

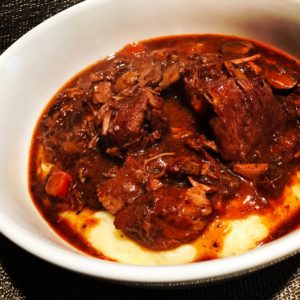
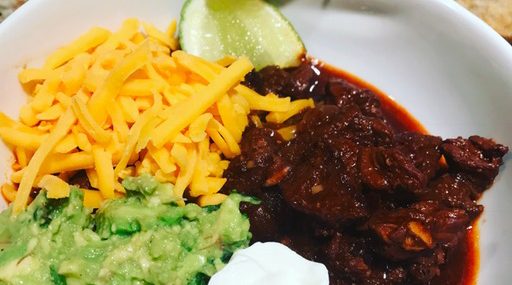
Beef Burgundy on Polenta
Warm weather’s on its way and with that, the end of slowly simmered or roasted dishes at our home. In anticipation of warmer days, I decided to make one of my favorite cold weather dishes: Boeuf Bourguignon or just beef cooked in Burgundy wine (I actually like a heavier wine for this dish, don’t judge).
If you haven’t invested in a heavy duty cast iron Dutch oven, just do it. You’ll use it all the time. If you want to, you could make the recipe through step 4 and throw everything in a slow cooker to cook for 8 hours. Up to you….I just love the long, slow simmered cook and the periodic stirring of the pot.
For you purists, this isn’t a very traditional recipe, just go along, it’s tasty. I served this dish over my Easy Creamy Polenta.
Ingredients:
- 9 Tbsp. vegetable oil
- 6 Tbsp. all-purpose flour, for dredging
- 1 tsp. each salt and pepper
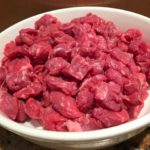
- 3 pounds beef chuck, cubed into large bite size pieces (you can find this already done in your grocery store)
- 4 slices slab bacon, diced
- 1 large Spanish onion, medium diced
- 2 carrots, medium diced
- 3 celery ribs, medium diced
- 1 pound Cremini mushrooms, chopped
- 2 Tbsp. tomato paste
- 3 cups Cabernet Sauvignon or other dry full-bodied red wine
- 32 ounces beef broth
- 2 bay leaves
- 1 Tbsp. fresh thyme
-
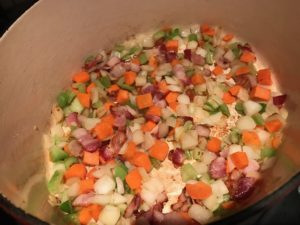
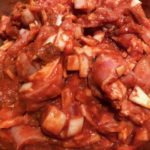
- Veggies & Bacon
-
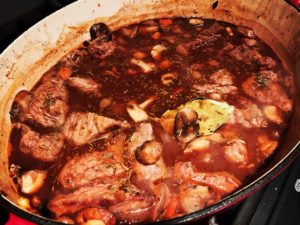
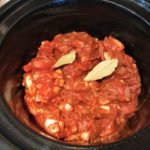
- Beef Simmering
Directions:
- Warm 3 tablespoons of the oil in a large Dutch oven over high heat.
- Add the salt and pepper to the flour then sprinkle over the beef. Toss to coat then shake beef pieces to remove excess flour.
- Sear half the beef in the hot oil until browned, about 4 minutes total and then remove to a platter. Repeat with the second half of the beef and 3 more tablespoons of oil and transfer to the first batch of beef on the platter and set aside.
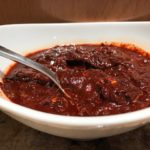
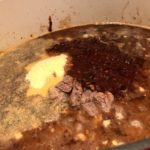
- Lower the heat to medium-high, add the bacon and cook stirring occasionally until a little browned, 4 minutes. Add the onions, the carrots and the celery to the bacon and cook for 5 minutes, stirring occasionally. Add the mushrooms and continue cooking for another 3 minutes. Add the tomato paste and cook for a minute. Add the wine and broth and scrape all the brown bits that have formed on the bottom of the Dutch oven. Add the beef back to the pot with the bay leaves and the thyme.
- Lower the heat to medium-low, cover tightly and cook for 2 hours, stirring occasionally. Lower the heat to low and cook for another 2 hours, covered.
- At this point, you can serve the beef or cool the pot completely and refrigerate overnight. To reheat the next day, an hour prior to serving, take the pot out of the fridge and preheat oven to 275 degrees. Warm the beef in the oven for about an hour, basting the meat with the sauce every 15 minutes.
Makes 6 hearty servings.
- • 9 Tbsp. vegetable oil
- • 6 Tbsp. all-purpose flour, for dredging
- • 1 tsp. each salt and pepper
- • 3 pounds beef chuck, cubed into large bite size pieces (you can find this already done in your grocery store)
- • 4 slices slab bacon, diced
- • 1 large Spanish onion, medium diced
- • 2 carrots, medium diced
- • 3 celery ribs, medium diced
- • 1 pound Cremini mushrooms, chopped
- • 2 Tbsp. tomato paste
- • 3 cups Cabernet Sauvignon or other dry full-bodied red wine
- • 32 ounces beef broth
- • 2 bay leaves
- • 1 Tbsp. fresh thyme
- 1. Warm 3 tablespoons of the oil in a large Dutch oven over high heat.
- 2. Add the salt and pepper to the flour then sprinkle over the beef. Toss to coat then shake beef pieces to remove excess flour.
- 3. Sear half the beef in the hot oil until browned, about 4 minutes total and then remove to a platter. Repeat with the second half of the beef and 3 more tablespoons of oil and transfer to the first batch of beef on the platter and set aside.
- 4. Lower the heat to medium-high, add the bacon and cook stirring occasionally until a little browned, 4 minutes. Add the onions, the carrots and the celery to the bacon and cook for 5 minutes, stirring occasionally. Add the mushrooms and continue cooking for another 3 minutes. Add the tomato paste and cook for a minute. Add the wine and broth and scrape all the brown bits that have formed on the bottom of the Dutch oven. Add the beef back to the pot with the bay leaves and the thyme.
- 5. Lower the heat to medium-low, cover tightly and cook for 2 hours, stirring occasionally. Lower the heat to low and cook for another 2 hours, covered.
- 6. At this point, you can serve the beef or cool the pot completely and refrigerate overnight. To reheat the next day, an hour prior to serving, take the pot out of the fridge and preheat oven to 275 degrees. Warm the beef in the oven for about an hour, basting the meat with the sauce every 15 minutes.

 Polenta is comfort in a bowl and ultra-easy to make. It’s a perfect complement for hearty toppings like short ribs, boeuf Bourguignon or sautéed mixed mushrooms. It’s also delicious served on its own with an extra grating of Parmesan.
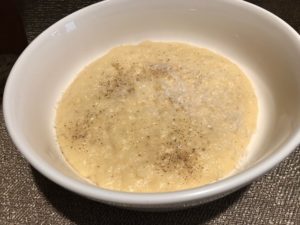
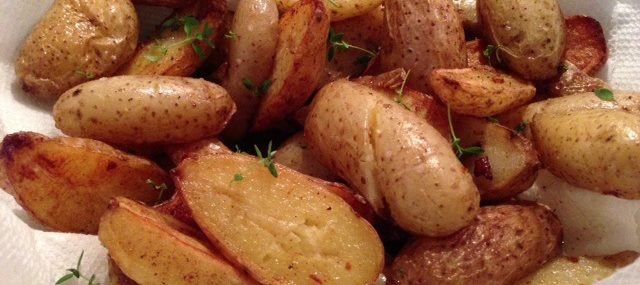
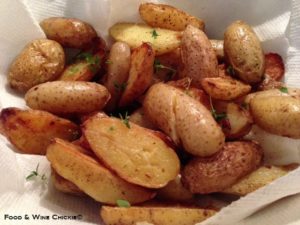 It’s been said that bacon makes everything better. I must agree with that statement…porky, fatty, salty…what could be better (vegan/vegetarian friend refrain from comments!).
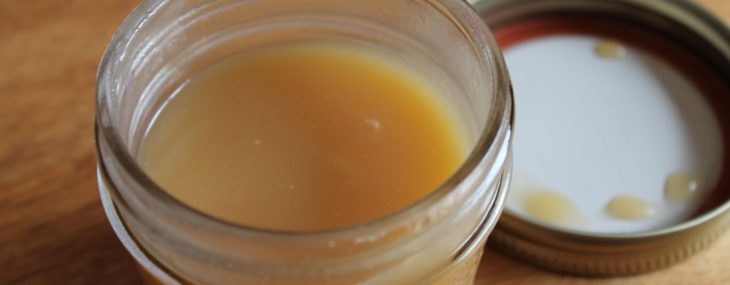
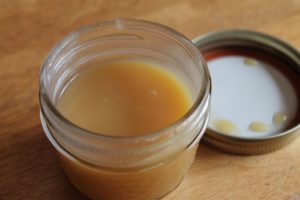 It’s that time of year when I get homesick for Quebec and my family….and, going to the maple sugar shack. I grew up going to the sugar shack at our ranch and get a serious case of the blues when I can’t make it up to Quebec for this sweetest season. When that happens, as is the case this year, I’m sure to come up with a few maple-centric recipes to satisfy my sweet tooth.

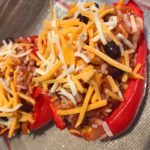
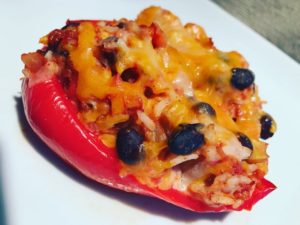 I’m still on my mission to try to stick to vegetarian dishes on #MeatlessMonday and since I’d make a double batch of my

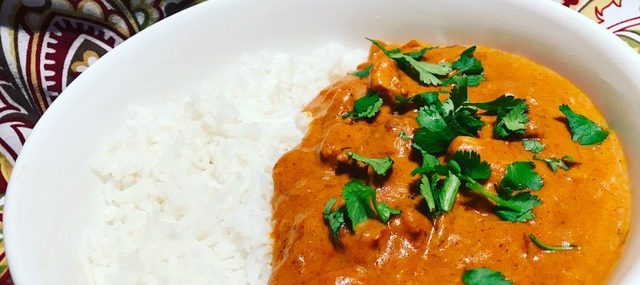
 I love Indian food and the deep flavors of the various dishes I’ve tried thus far. Over the years, I’ve fine-tuned my recipe for Chicken Tikka Masala that’s slow cooked and delicious, but this past weekend, I decided to pull the old Crockpot out of the attic and make this comforting recipe in it. So perfect for a cold winter day!
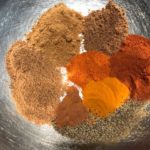
 I’ve been using my “
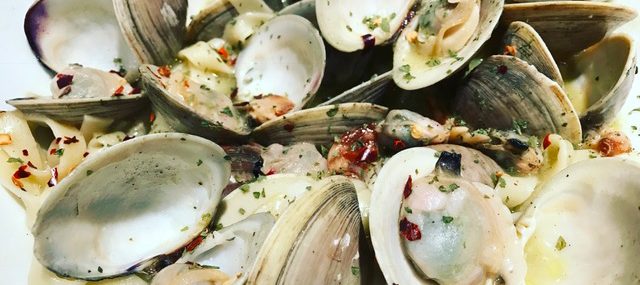
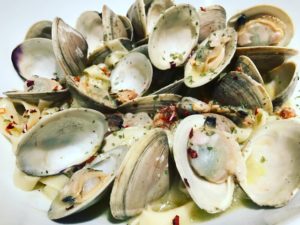 I was watching an old episode of The Best Thing I Ever Ate – SAUCED last weekend where Chef Michael Psilakis talked about the linguine and clam sauce at Don Peppe in Queens, NY (watch the mouth-watering


Recent Comments