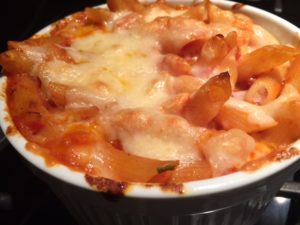
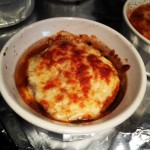
Baked Penne Parmesan

baked-pastaI love recipes that take me all of 10 minutes to prepare and that will serve a few meals during the week. This beyond-easy pasta dish is one of those recipes that I make on Sundays and portion for lunches during the week.

Ingredients:

Directions:

  1. Preheat oven to 400 degrees.
  2. Cook pasta 1 minute short of indicated on the packaging.
  3. Toss the drained pasta into the marinara sauce.
  4. Add the Mozzarella to the pasta and stir to distribute evenly.
  5. Pour the pasta into a medium baking dish.
  6. Top with the shaved cheese.
  7. Place the dish on a baking sheet to prevent oven drips and bake for 25 minutes.

Makes 2 generous entrée-size servings.

Note: I received a sample container of Sartori Cheese that I will now add to my grocery list.

Get to Know Slawsa Plus Easy Latkes Recipe

Get to Know Slawsa Plus Easy Latkes Recipe

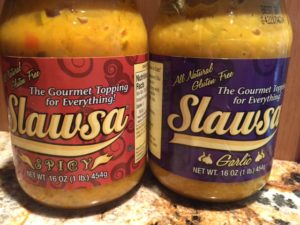
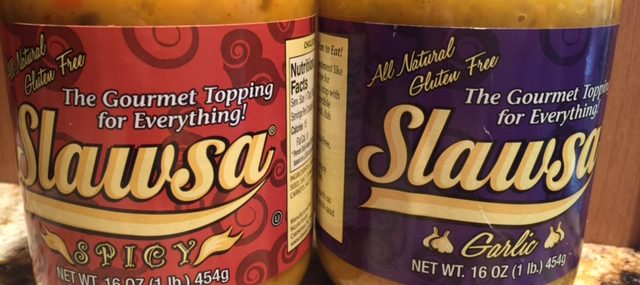
Slawsa JarsLast week, I was sent samples of a new product called Slawsa that I think are pretty fabulous so I’m sharing a bit about them and also sharing a recipe I made using the product.

About Slawsa

Slawsa breaks the mold of modern condiments and is meant to replace traditional ketchup, mustard, mayo or relish as a compliment to everyday foods.

Slawsa is a cabbage-based relish with a salsa twist. While it contains other vegetables, mustard and vinegar, the mustard and vinegar are not overwhelming, allowing it to be used in various ways.  It begins on the palate as sweet and transfers heat undertones that make it addictive atop grilling fare such as hot dogs, burgers or brats. Slawsa comes in Original, Spicy, Garlic and the new Fire.

The Flavors

Original – The classic, Slawsa Original starts a little sweet and finishes with a little heat that will quickly dissipate. The mustard and vinegar base is not overpowering and Slawsa retains a nice amount of crunch in every bite.

Spicy – The Spicy version isn’t “overly spicy” and more of a medium heat but does have a bit more kick to finish off the bite than the Original.

Fire – Slawsa Fire has a big kick of habanero and is truly for those who love the heat. But no, it’s not ghost pepper hot.

Garlic – The Garlic is truly for garlic lovers as it does have a bold garlic base.

Nutritional Facts

  • all-natural
  • fat-free
  • cholesterol-free
  • gluten-free
  • very low in sodium 
  • kosher
  • vegan

I tried the spicy and the garlic versions and both were unusual and delicious. I used both to create a mock latkes (typically a pan-fried potato pancake).

Easy Sauerkraut Latkes

Ingredients:

  • 1 cup Garlic Slawsa (could replace with sauerkraut)
  • 1 large egg
  • 1 tsp. all-purpose flour
  • ¼ tsp. each salt and pepper
  • ¼ cup vegetable oil, for frying
  • 4 tsp. Spicy Slawsa

Directions:

  1. Using a fine sieve, drain as much liquid from the Slawsa as possible. Place the drained Slawsa in a clean kitchen towel and wring as much of the remaining liquid as possible. Place the Slawsa in a small bowl and add the egg, flour and salt and pepper. Combine without over-mixing.
  2. In a heavy frying pan over high-heat, warm the oil for two minutes – pan should be sizzling hot.
  3. Drop the Slawsa mixture by the teaspoonful onto the oiled frying pan (should make 4 latkes) and cook for 2 minutes or until golden brown (see short video of this live action). Flip the latkes and cook an additional minute.
  4. Place on a double layer of paper towel to rid of excess oil and serve hot or at room temperature with the Spicy Slawsa.

Make 4 Latkes.

Slawsa is available for purchase online or at stores near you.

Cheers,

Veronique

Make Ahead Twice Baked Potatoes

Make Ahead Twice Baked Potatoes

Twice Baked PotatoesSummer’s all about BBQs and outdoor parties and the last thing I want to do once my guests have arrived is to slave over a hot stove in the kitchen. We also attend a lot of outdoor events where I’m always puzzled with what to bring besides desserts.
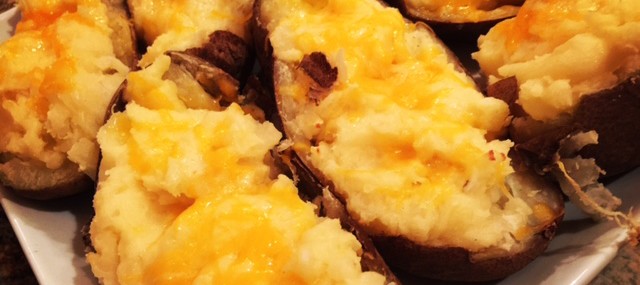
These old-school twice-baked potatoes are simple-to-make and can be prepared ahead and reheated on the grill or a camp fire before dinner.

Don’t feel like making your own mashed potatoes? Just buy some at the grocery store and doctor them up with the cheese, bacon (if using) and scallions.

Ingredients:

  • 3 large baking potatoes
  • 2 Tbsp. softened butter
  • 1/3 cup half & half (could use whole milk), warmed in the microwave for a minute
  • 4 bacon slices, cooked and crumbled (optional)
  • 1 cup sharp Cheddar cheese
  • ½ cup sour cream (optional)
  • ½ cup chopped scallions (optional)

Directions:

  1. Cook potatoes until fork-tender and allow to cool until just cool enough to handle. Cut each potato lengthwise and, using a spoon, scoop out most of the flesh without cutting through the skins. Place the scooped out flesh in a bowl and add the butter, half & half, bacon (if using) and cheese and mash until mostly smooth.
  2. Fill the potato skin shells with the mashed potatoes. At this point, you may wrap the potatoes in foil and keep in the fridge for a couple days until ready to use (go to step 3 when ready to cook) or, place on a cookie sheet for immediate use.
  3. Preheat oven to 400 degrees and cook room-temperature potatoes for 25 minutes, until slightly golden.
  4. Top the hot potatoes with sour cream and chopped scallions, if using.

Makes 6 servings.

Baby Back Ribs with Balsamic BBQ Sauce

Baby Back Ribs with Balsamic BBQ Sauce

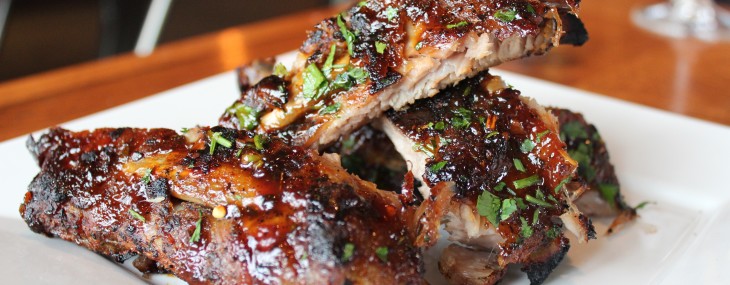
Pork RibsWhile I have my go-to ribs recipe, I’m always looking for new ideas and variations from the old standard. This recipe, provided by Executive Chef Josh Bernstein of Spuntino Wine Bar & Italian Tapas, puts a bit of an Italian spin on the backyard BBQ favorite.

Ingredients:

Rib Spice Rub:

  • 1/4 cup dried basil
  • 1/4 cup dried oregano
  • 1/2 cup paprika
  • 1/2 cup garlic powder
  • 1/2 cup onion powder
  • 1/2 cup ground fennel seed
  • 3/4 cup dark brown sugar           
  • 1 cup kosher salt
  • 2 Tbsp. red pepper flakes
  • 2 Tbsp. ground black pepper

Balsamic BBQ Sauce:

  • 2 cups balsamic vinegar
  • 1-1/2 cups ketchup
  • 3/4 cup dark brown sugar
  • 1 Tbsp. fresh chopped garlic
  • 2 Tbsp. Worcestershire sauce
  • 2 Tbsp. Dijon mustard
  • 1 tsp. Kosher salt             
  • 1/2 tsp. ground black pepper

Ribs:

  • 4 racks of baby back ribs
  • 1 cup rib spice rub
  • 2 Tbsp. chopped Italian parsley
  • 1 cup balsamic BBQ sauce

Method:

For the Rib Spice Rub:
Place all of the ingredients into a bowl.  Mix well.  Keep in an air tight container for up to 3 weeks.  This recipe will make more than needed for the ribs.  It is a good marinade for other meats as well.

For the Balsamic BBQ Sauce:
Combine all of the ingredients in a sauce pot.  Bring to a boil.  Reduce the flame and simmer for 45 minutes.  Stir every 10 minutes.  Strain and cool.

For the Ribs:
Spread the spice rub evenly over the ribs.  Wrap each in aluminum foil.  Allow to marinate overnight in the refrigerator for at least 12 hours.  Place the ribs, still wrapped in aluminum foil, into a 350 degree oven for 2 hours.  At this point you can cool them down and refrigerate up to 7 days or freeze for up to 2 months.  If not, brush the ribs with the BBQ sauce and place onto a hot grill.  Cook until the sauce is hot on the ribs.  Cut into 1-2 rib portions and garnish with parsley.

Serves 4.

Warm Brie with Honeyed Raspberries and Pistachios

Warm Brie with Honeyed Raspberries and Pistachios

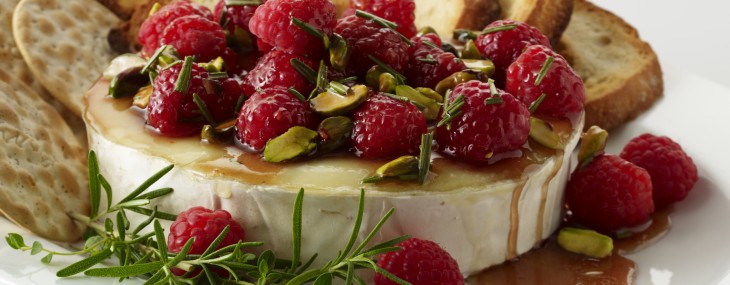
This is an easy yet festive recipe I received from the folks at Driscoll’s Berries.

Original File Name: 4186-Rasp_Brie-014.tif

Ingredients:

  • 1/2 cup (2 ounces) shelled pistachios
  • 1 wheel (13.3 ounces) ripe Brie, box reserved, top rind sliced off, cheese chilled
  • 1/4 cup honey
  • 1 tsp. balsamic vinegar
  • 1/2 tsp. finely chopped fresh rosemary
  • 1 package (6 ounces or 1 1/4 cups) Driscoll’s Raspberries
  • Water crackers or baguette slices for serving

Directions:

  1. Preheat the oven to 350˙F.
  2. Spread the pistachios on a rimmed baking sheet. Bake, stirring occasionally, until lightly toasted and fragrant, about 10 minutes. Transfer to a plate.
  3. Place Brie, in its box, on baking sheet. Bake until warm and the top is softened, but not until cheese is oozing, about 15 minutes. Transfer cheese in box to serving platter.
  4. Stir honey, vinegar, and rosemary in a medium skillet over medium heat just until warm. Add raspberries and pistachios and gently fold in with a rubber spatula. Pour raspberry mixture over warm cheese. Serve at once, with the crackers for spreading.

Servings: 4 to 6

Vegetarian Stuffed Eggplant

Vegetarian Stuffed Eggplant


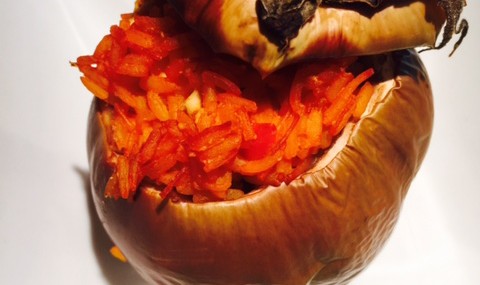
I try to abide by my #MeatlessMonday promise when I can and am always looking for ways to use more vegetables in my diet so this weekend, I found beautiful mauve round eggplants that I prepared two ways – meat-stuffed and vegetarian.

These single-serve eggplants are great to fix on the weekend to bring for work lunches during the week. They’re also beautiful served as a starter at a dinner party and a breeze as they can be made in advance and reheated in time for dinner.

Ingredients:

  • 2 cups cooked Spanish rice, homemade or commercial (I used Goya brand Arroz con Tomate)
  • 4 ounces crumbled Feta cheese
  • ½ tsp. dried mint
  • 2 Tbsp. golden raisins
  • 4 Tbsp. Easy Greek Vinaigrette
  • Two small mauve round eggplants (or any small round eggplants)
  • ½ tsp. sea salt
  • 1 Tbsp. olive oil

Directions:

  1. Preheat oven to 350 degrees.
  2. In a medium bowl, combine the rice, Feta, mint, raisins and 2 tablespoons of Greek Vinaigrette. Set aside.
  3. Using a paring knife and a teaspoon, remove the very top of the eggplants and then remove most of the pulp from the interior being careful not to pierce through the outer skin. See photo as reference.
  4. Rub the sea salt on the inside of each eggplant.
  5. Fill the cored eggplants with the rice stuffing then drizzle with the olive oil.
  6. Place the stuffed eggplants in a Pyrex baking dish with tall sides. If the eggplant won’t stand up straight, use a crumpled piece of foil to create a small “stand” for them.
  7. Bake for 30 minutes and either serve hot or at room temperature with a drizzle of the remaining vinaigrette.

Serves 2.

Arugula, Pear, Gorgonzola and Prosciutto Salad Bundles

Arugula, Pear, Gorgonzola and Prosciutto Salad Bundles

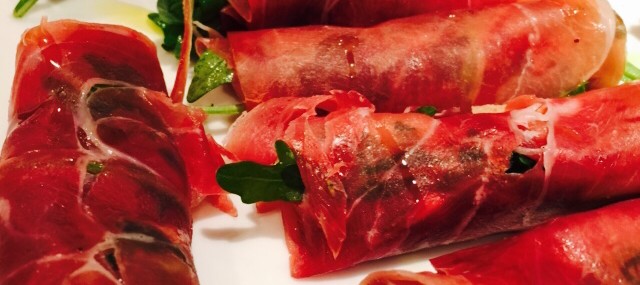
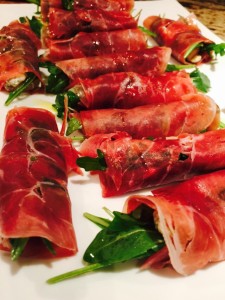
Proscuitto RollsLast weekend, I was hosting a casual outdoor party and was looking for hors d’oeuvres that were easy to pick up and eat without utensils.  A salad I enjoy serving is a baby arugula salad with the traditional pear and blue cheese combo. I perused Pinterest for interesting salad serving ideas and ran into an idea where the salad is rolled in a slice of Prosciutto – brilliant and very portable.

After seeing the concept, I ran with the idea with my own ingredients and the results were pretty darn tasty.

Ingredients:

  • 1 Tbsp. Dijon mustard
  • ½ cup olive oil
  • 4 Tbsp. red wine vinegar
  • ½ tsp. each salt, pepper and oregano
  • 4 cups baby arugula
  • 8 slices Prosciutto
  • 4 ounces crumbled Gorgonzola
  • 1 ripe pear, peeled, cored and cut in thin slices
  • 2 Tbsp. good quality olive oil

Directions:

  1. In an airtight jar, add the mustard, half cup of oil, vinegar and salt, pepper and oregano. Shake well to combine and create a creamy dressing. This dressing is great on most things and can be stored in the sealed jar for a week.
  2. Within an hour of serving, place the arugula in a medium bowl and add 4 tablespoons of dressing. Toss to coat the greens.
  3. On a clean work surface or a plate, place the slices of Prosciutto. Divide the dressed arugula into 8 portions and place a portion to one end of a Prosciutto slice. Repeat with the rest of the arugula. Top each portion of arugula with a bit of blue cheese and with two slices of pear. Roll the Prosciutto over the salad in a tight bundle.
  4. Place the salad bundles on a serving platter and drizzle with the 2 tablespoons of olive oil.

Makes 8 arugula salad bundles.

Easy 4th of July Starters

With so many “lists” out there of tasty-sounding 4th of July recipes, it’s difficult to pick which are best for your own get-together.

Below are 5 easy yet delicious, tested recipes that are sure to get the festivities started on the right foot!

Cheesy and Garlicky Pull Apart Bread
Easy Pimento Cheese Dip
Green Goddess Dip
Hasselback PotatoesMemorial Day Flag
Pork Belly Deviled Eggs

Enjoy the holiday weekend!

Veronique

Almost Guilt-Free Individual Eggplant Parmesan

Almost Guilt-Free Individual Eggplant Parmesan

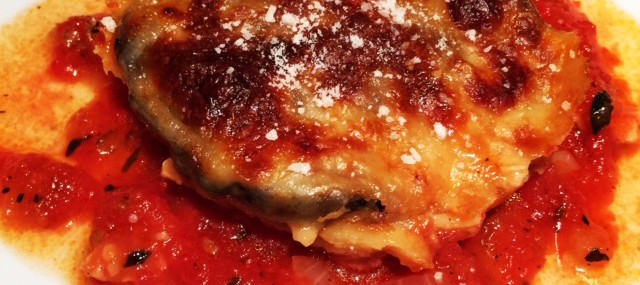
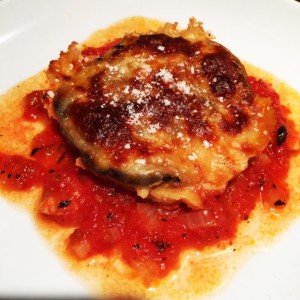
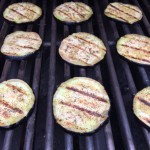
Eggplant ParmesanSometimes, when I’m in the grocery store, produce just speaks to me. On this last trip, eggplants screamed for me to take them home (well, seemed like they were screaming).

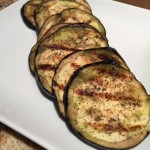
While I love breading and flying eggplant for eggplant Parmesan, I wanted this version to be less indulgent and lighter so I grilled sliced eggplant and made individual servings.

This technique of making single servings guarantees we won’t overeat, well, unless we decide to have a couple of servings.

The use of my Basil-Packed Marinara Sauce keeps this dish fresh and is a good use of basil and tomatoes as crops are plentiful.

Ingredients:

  • 1 large, medium girth eggplant, sliced in 8 thin disks
  • 2 Tbsp. olive oil
  • ½ tsp. each salt, pepper
  • 3 cups Basil-Packed Marinara Sauce (could use store-bought)
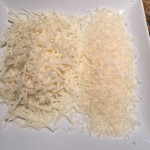
  • ½ cup grated Parmesan cheese
  • 1 cup grated Mozzarella cheese   

Directions:

  1. Preheat oven to 400 degrees.
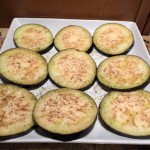
  2. Lightly oil each side of the eggplant disks then salt and pepper them. Heat a grill to medium-high heat and grill the eggplant disks for 3 minutes on each side. Alternatively, use a grill pan to cook the eggplant.
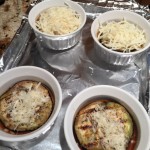
  3. Place 4 ramekins on a baking sheet. Add a tablespoon of marinara sauce to each ramekin and top with a grilled eggplant disk. Top each eggplant disk with ½ teaspoon Parmesan and 1 teaspoon Mozzarella. Add a tablespoon of marinara, another eggplant disk and top with the remaining cheeses.
  4. Cook the eggplant Parmesans for 10 minutes, turn the broiler to high and cook an additional 4 minutes or until the cheesy tops have browned.
  5. Serve as a starter or as a side dish alongside grilled Italian sausages with the remaining marinara sauce.

Makes 4 side dishes.

Lobster Thermidor Dip

Lobster Thermidor Dip

Lobster Thermidor DipWhen I was a small kid growing up in Quebec in the late 70s and early 80s, THE indulgent, luxurious dish one could treat herself to was Lobster Thermidor. I remember my mom raving about it and all I knew is that only the best restaurants served it.

According to Wikipedia, “Lobster Thermidor was created in 1894 by Marie’s, a Parisian restaurant near the theatre Comédie Française, to honor the opening of the play Thermidor by Victorien Sardou”.

In this dip, I used some of the flavors of the original dish to create a casual way to enjoy it. Don’t have any lobster on hand? Don’t fret – just use crab or shrimps.

Ingredients:

  • ¼ cup (1/2 stick) butter
  • 1 shallot, minced
  • 3 Tbs. flour
  • 2 Tbs. dry sherry or brandy
  • 2 Tbs. dry white wine
  • 1 cup chicken broth
  • 1/3 cup grated Parmesan cheese
  • 2 Tbs. minced flat leaf parsley
  • 1 cup heavy cream (could use light cream)
  • 1 tsp. Dijon mustard
  • ½ tsp. each salt and pepper
  • 2 cups cooked fresh lobster meat, cut into ½-inch pieces
  • ½ cup grated Gruyere cheese

Directions:

  1. In a large skillet, melt butter over medium heat.  Add the shallots and sauté 1 minute, stirring to ensure even cooking. Whisk in flour and cook 1 minute. Add the sherry (or brandy), the white wine and the chicken broth and simmer 4 minutes, whisking frequently.
  2. Add the Parmesan cheese, the parsley, the cream and the Dijon mustard and simmer over medium-low heat for 2 minutes, stirring frequently. Season with the salt and pepper.
  3. Add the lobster meat and gently stir to coat with the sauce.
  4. Pour the lobster mixture in a shallow, oven-safe baking dish. Sprinkle with the Gruyere cheese and place under broiler for 1 minute or until cheese is melted and beginning to brown. 
  5. Serve with crackers and crudités.

6 servings.